• Skip to main content
  • Skip to secondary menu
  • Skip to primary sidebar
Haven Only

Haven Only

Ad example
  • Home
  • St. Patrick’s Day
  • Valentine’s Day
  • Blog

Claire Anderson

23 Elegant White Marble Bathroom Ideas for a Bright and Timeless Look


White marble bathrooms are the epitome of timeless elegance. They bring a sense of brightness and calm while making even small spaces feel open and airy. Whether your style is modern, classic, or minimalist, white marble offers a clean canvas to create a luxurious feel without splurging. These 23 ideas will inspire you to refresh your bathroom with simple touches, clever layouts, and budget-friendly upgrades, all while keeping a bright, welcoming atmosphere.


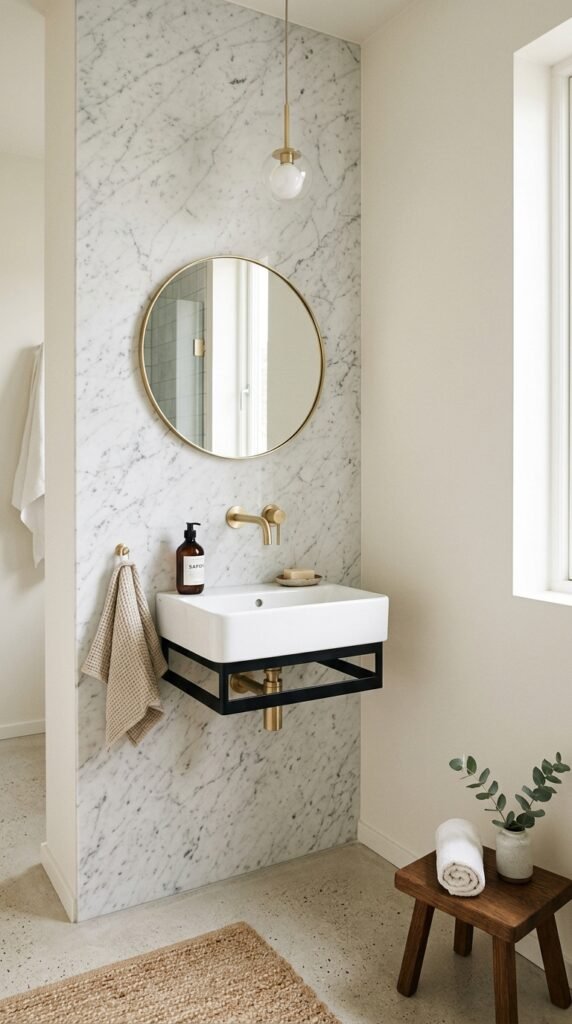
1. Classic Marble Walls with Subtle Veins

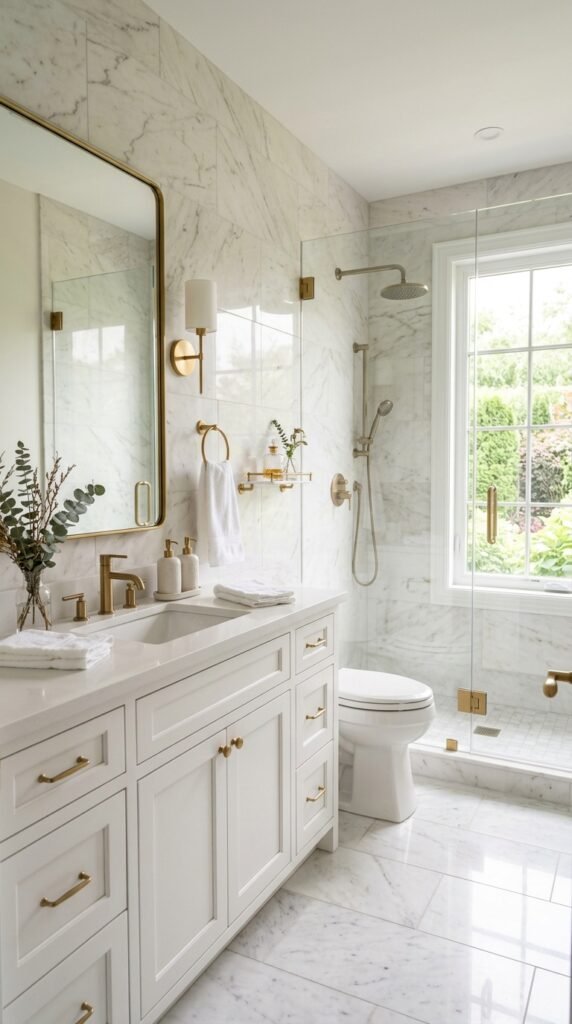
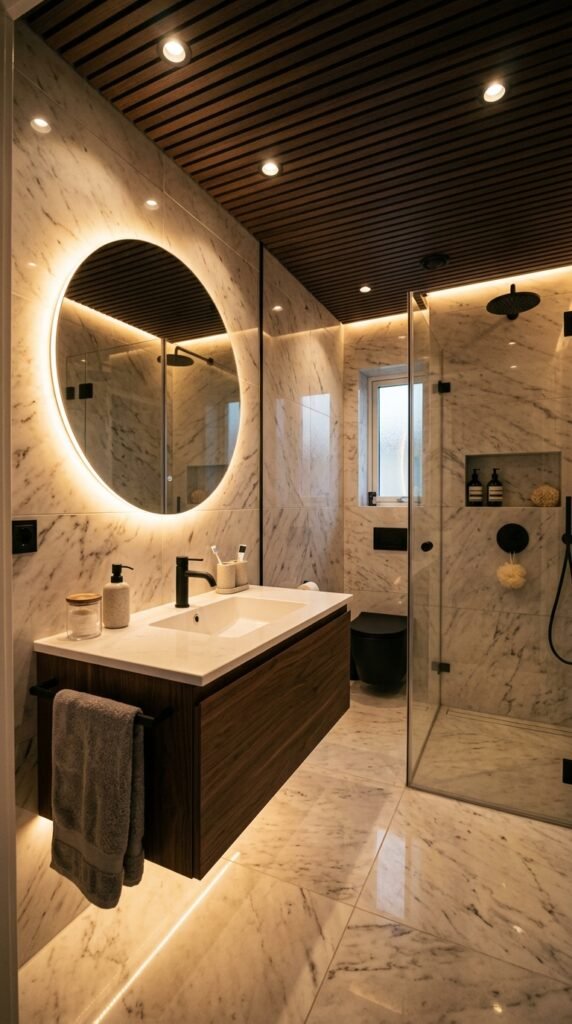
Installing marble tiles on your walls instantly adds elegance. Even if full coverage feels expensive, try using marble accent strips or a backsplash behind the sink. For a budget-friendly DIY, consider peel-and-stick marble tiles for a similar effect. Light veining keeps the space bright and creates a sophisticated backdrop for faucets, mirrors, or framed artwork. Pair with white or neutral accessories to maintain the airy feel.


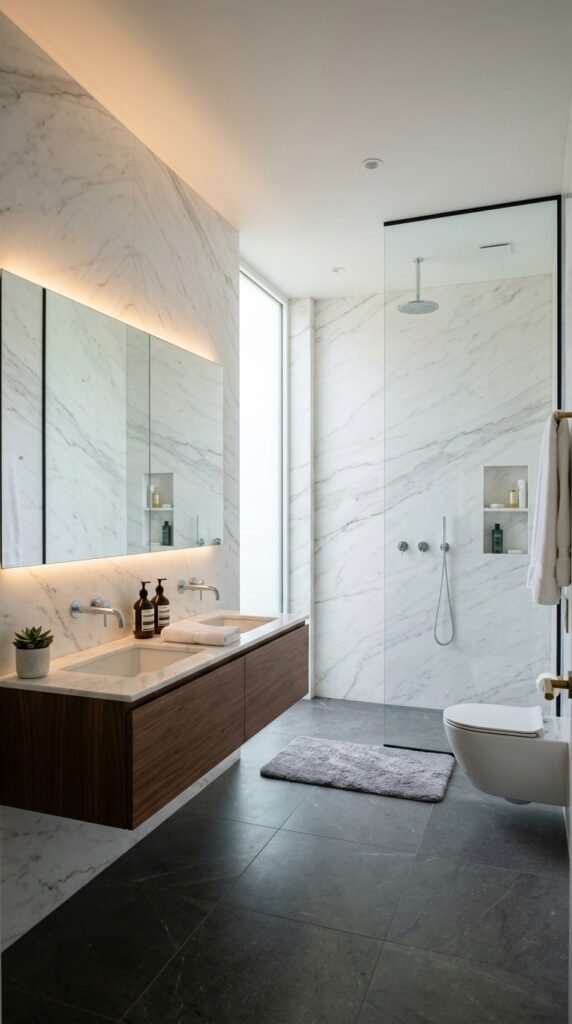
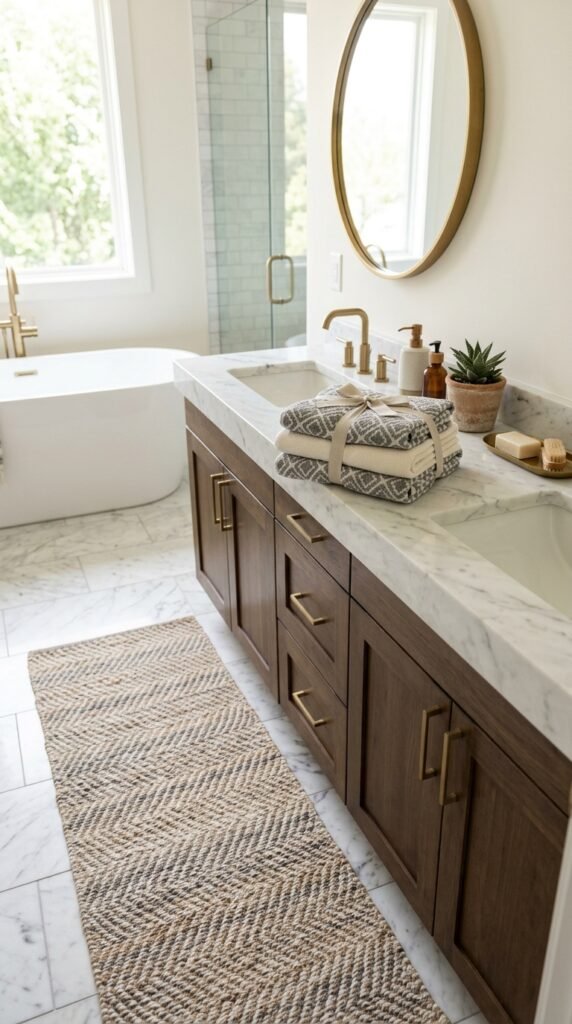
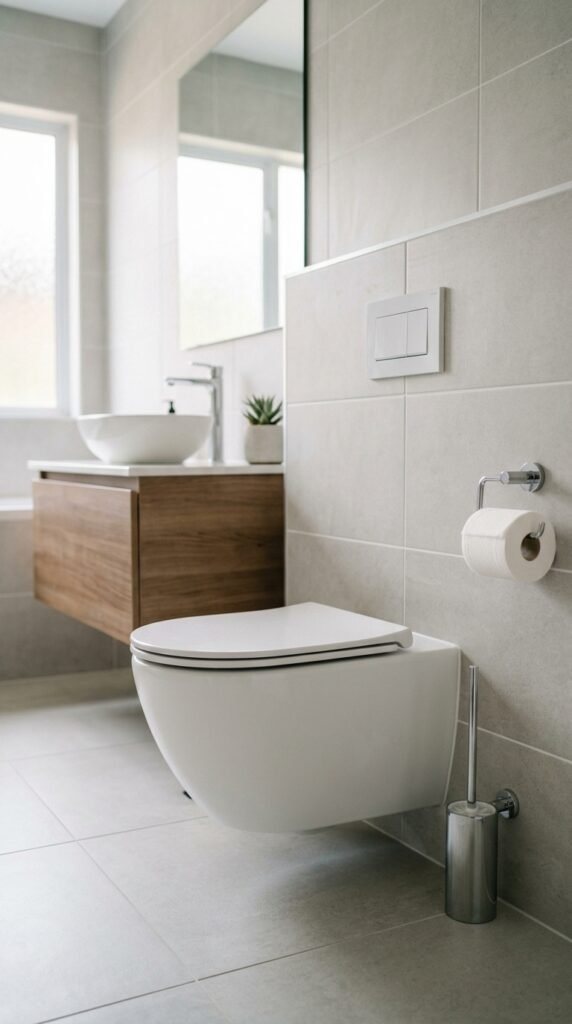
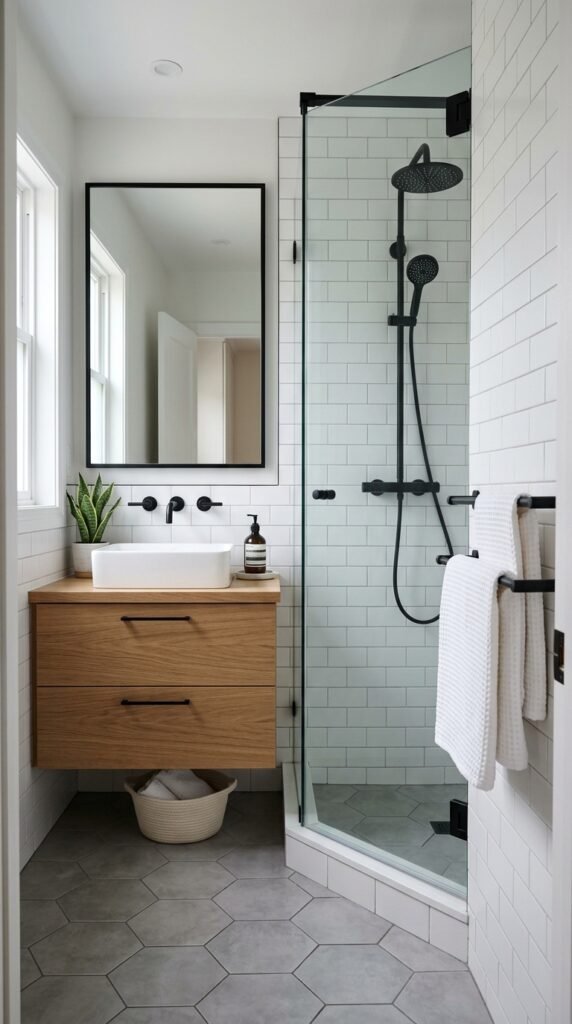
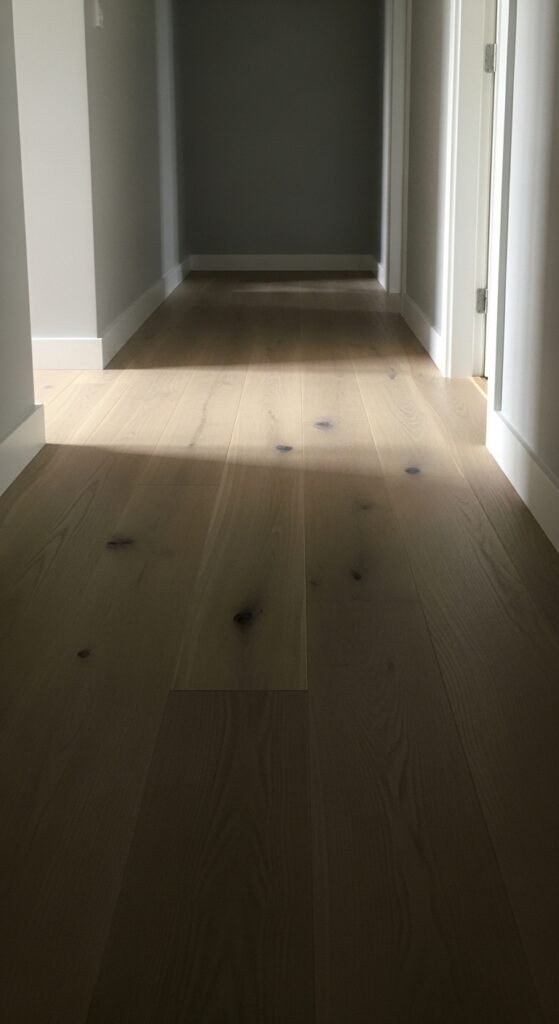
2. Marble Flooring with Warm Wood Accents

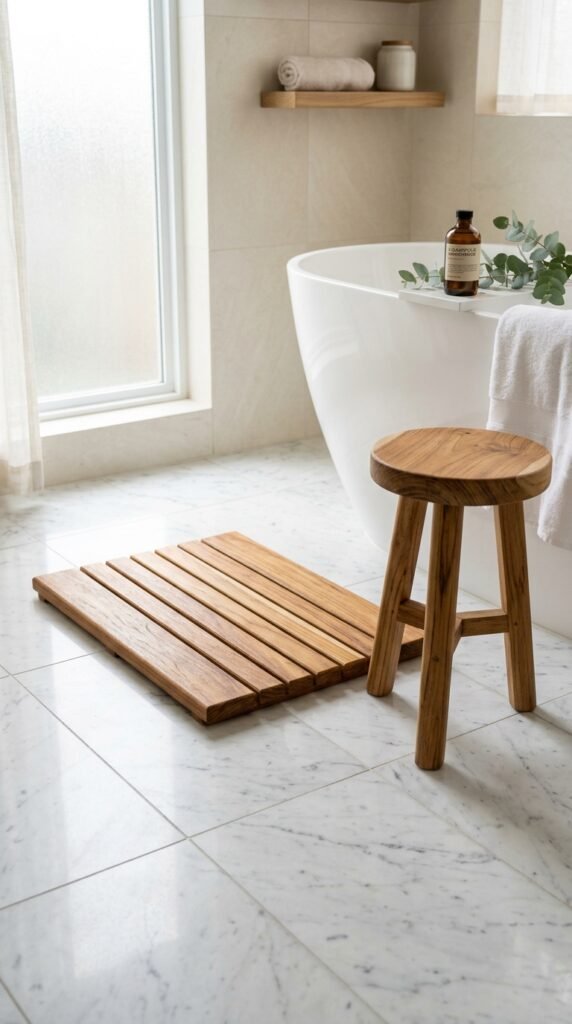
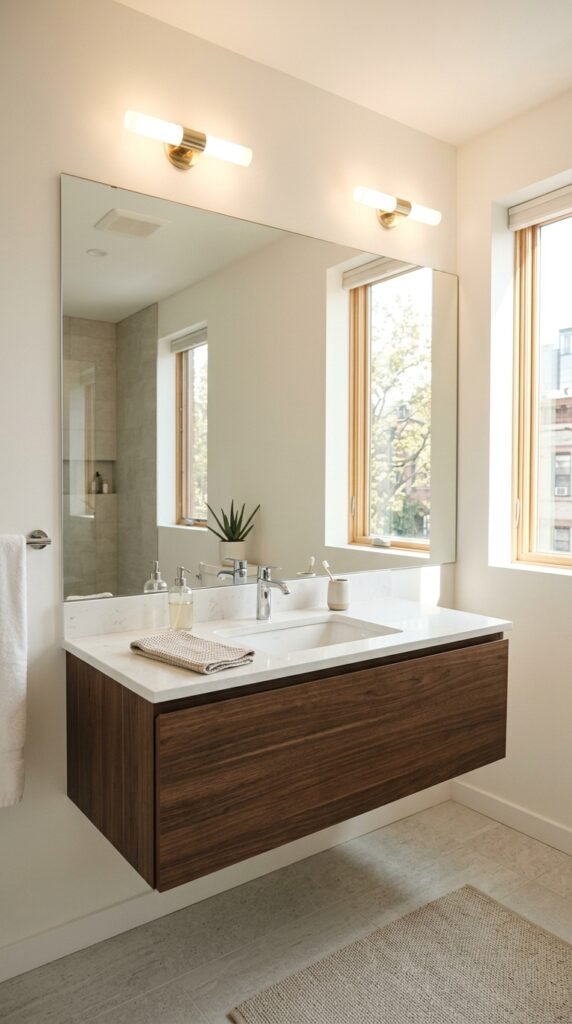
White marble floors make the bathroom feel larger and cleaner. Combine them with warm wood accents like stools, shelves, or small mats to add texture. Even inexpensive bamboo mats can provide that cozy touch. Marble tiles with light gray veins hide minor water spots, while wooden accessories prevent the space from feeling cold or sterile. This mix creates a balanced, inviting look.


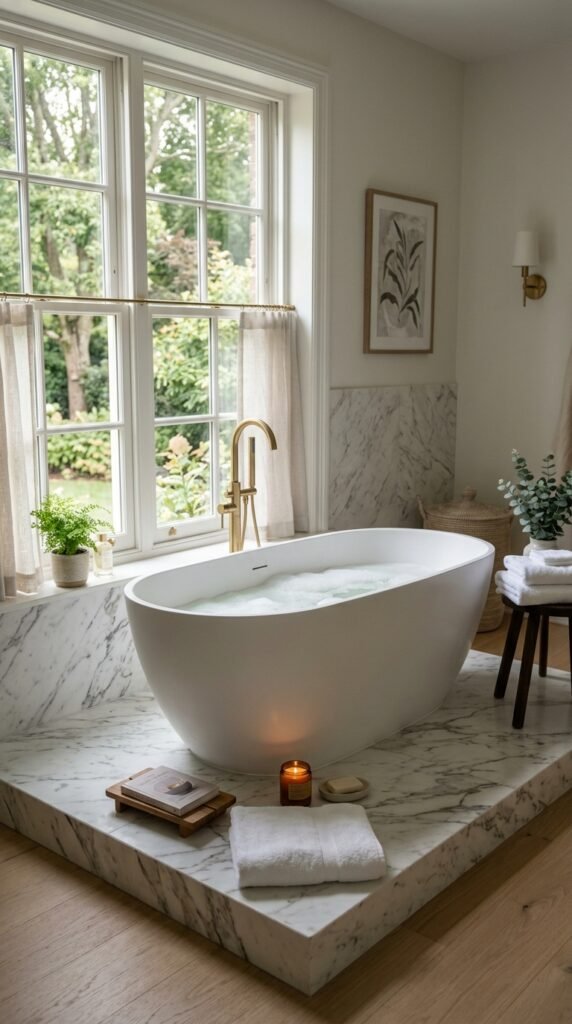
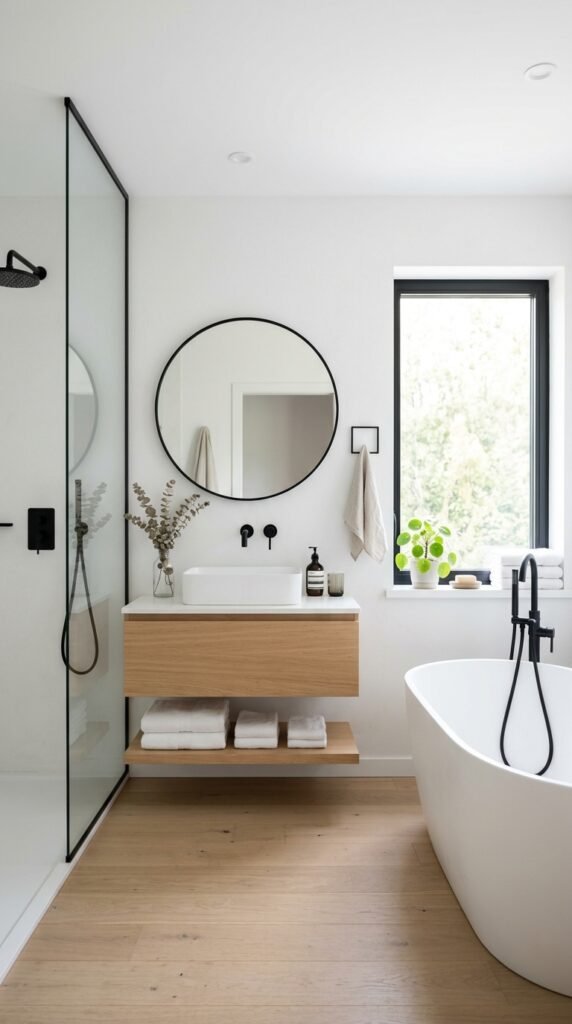
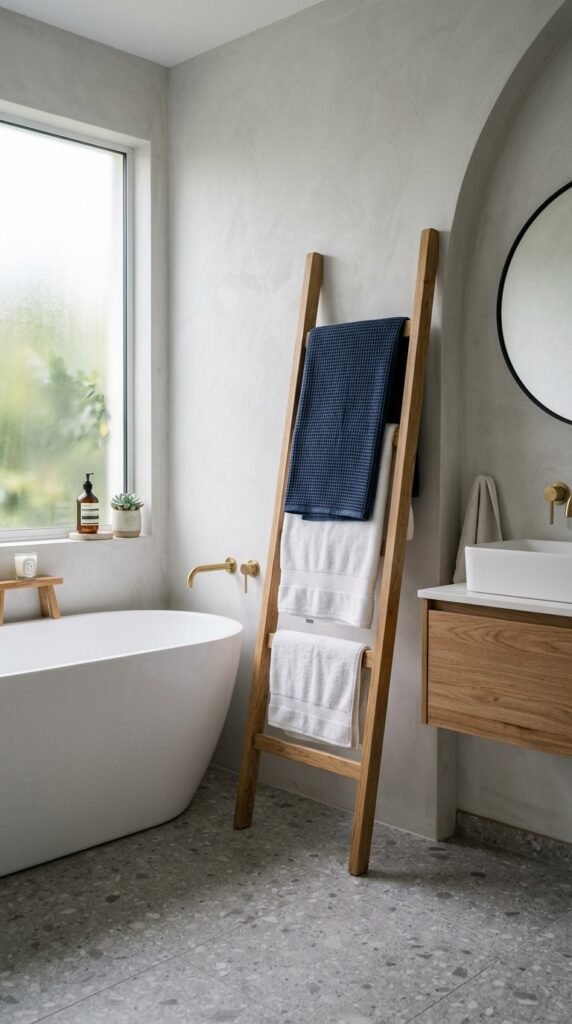
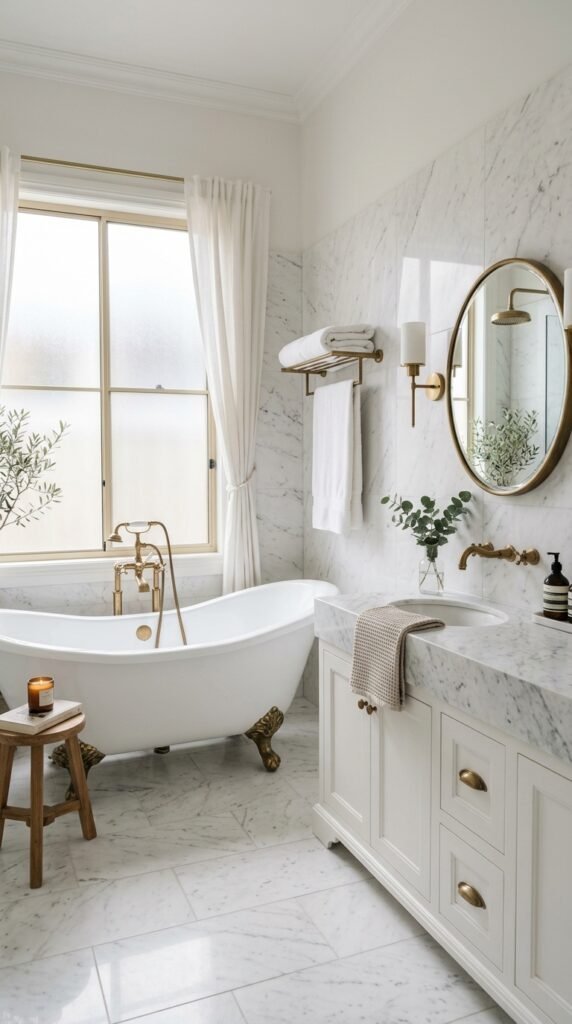
3. Freestanding Tub on Marble Pedestal

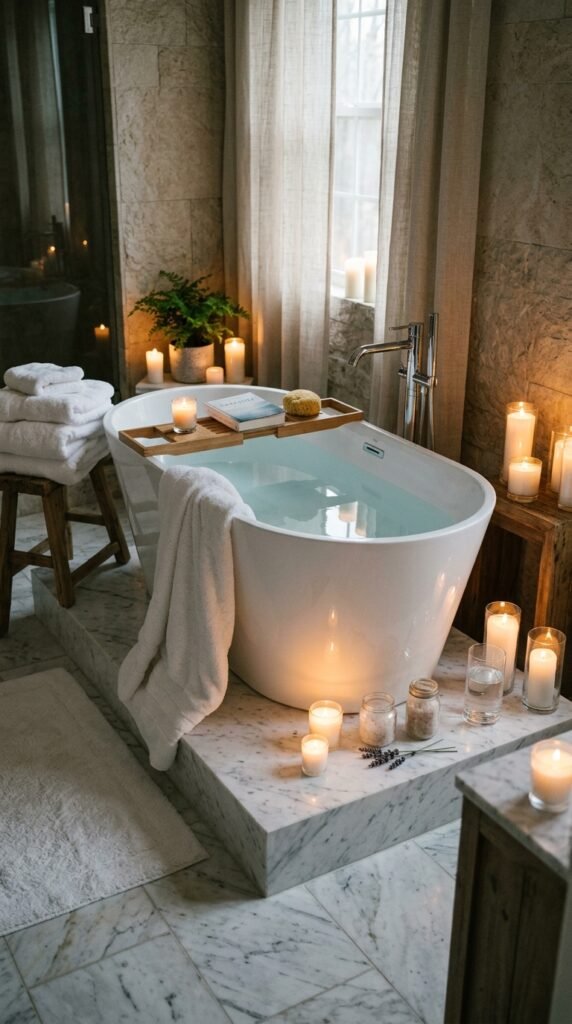
A freestanding tub on a marble platform creates a spa-like vibe. You don’t need a full renovation; a marble-effect pedestal or tiles under your existing tub works wonders. Add a bath caddy or simple candles to enhance relaxation. This setup highlights the elegance of marble while keeping the room uncluttered and stylish.


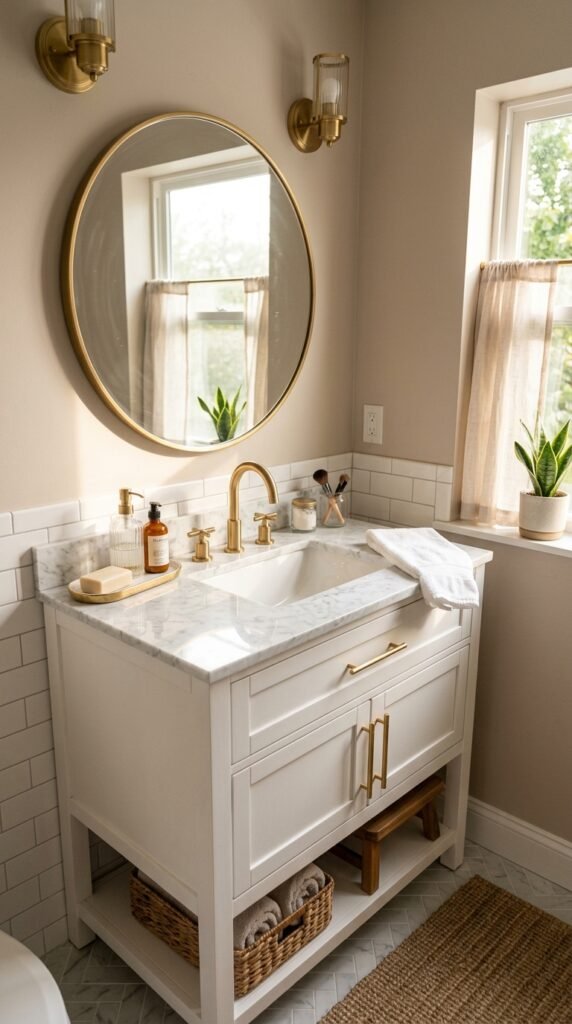
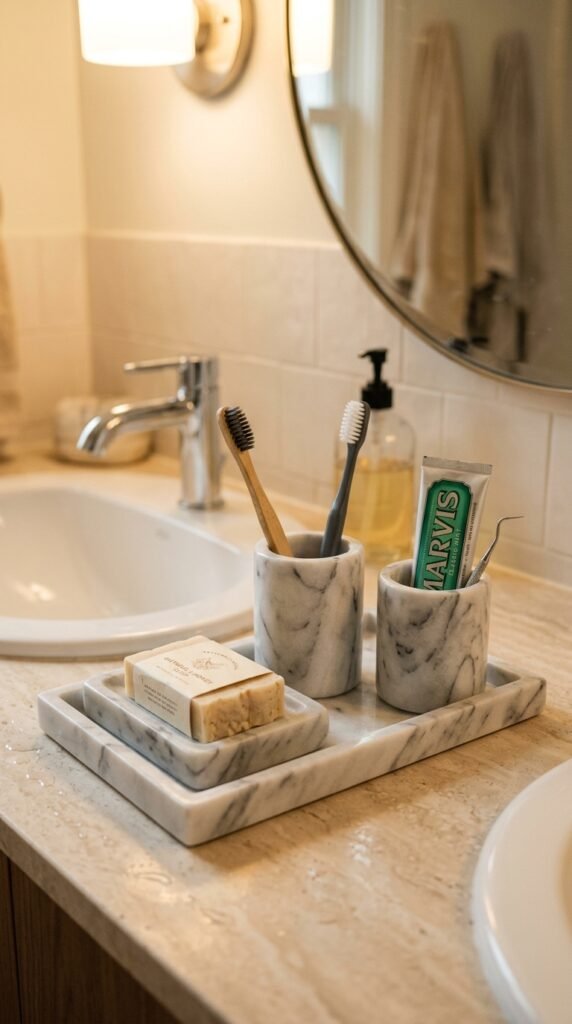
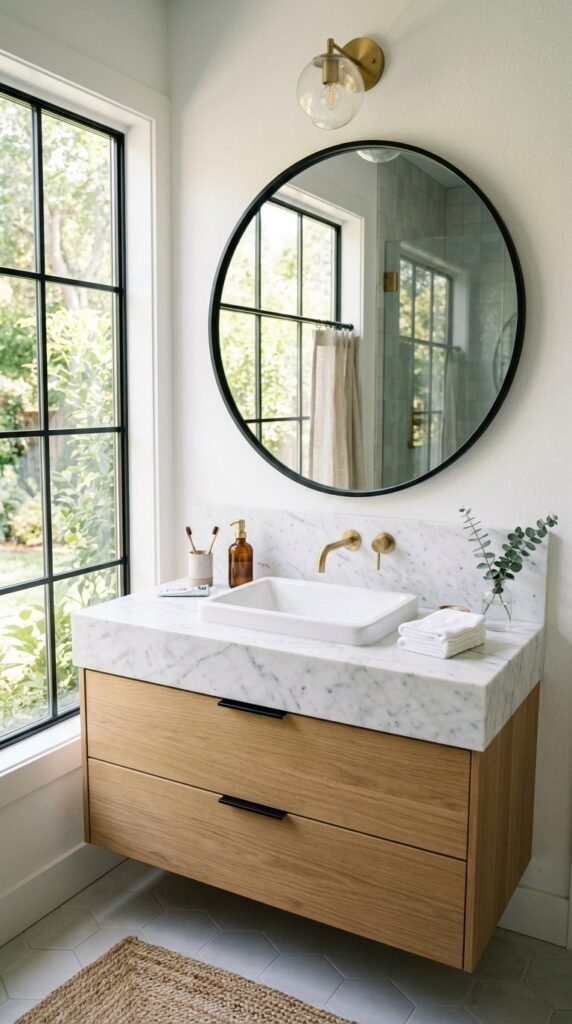
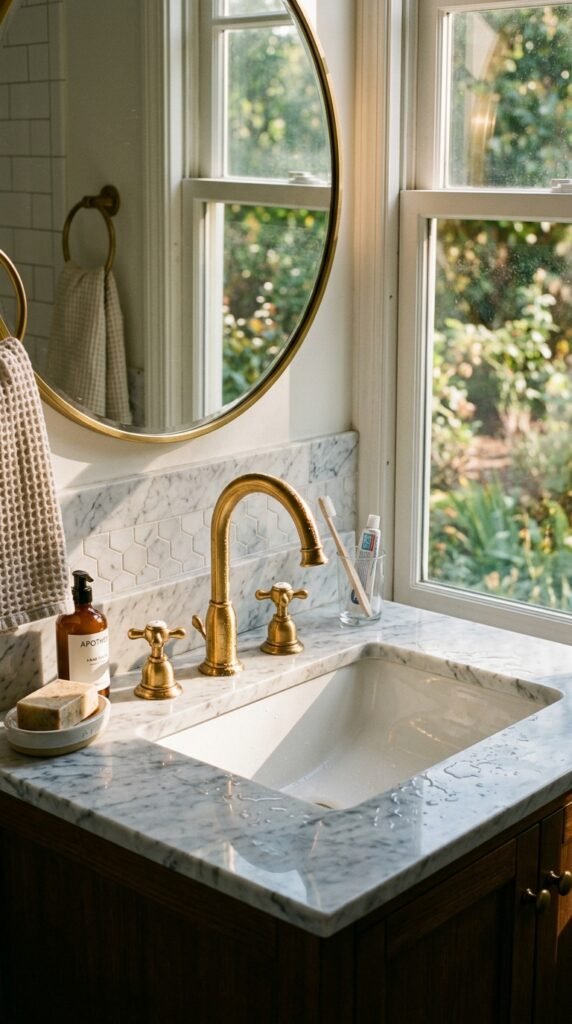
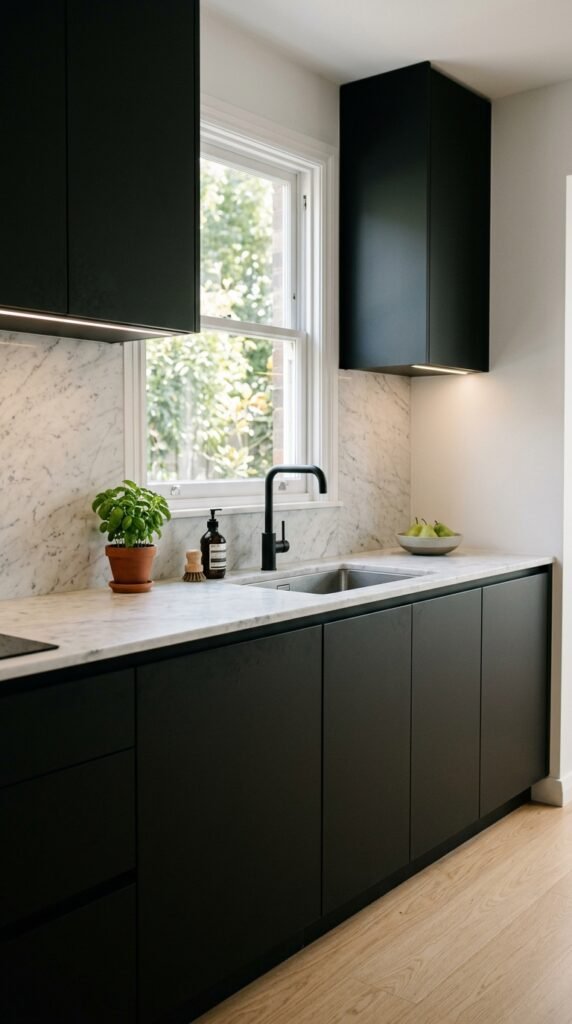
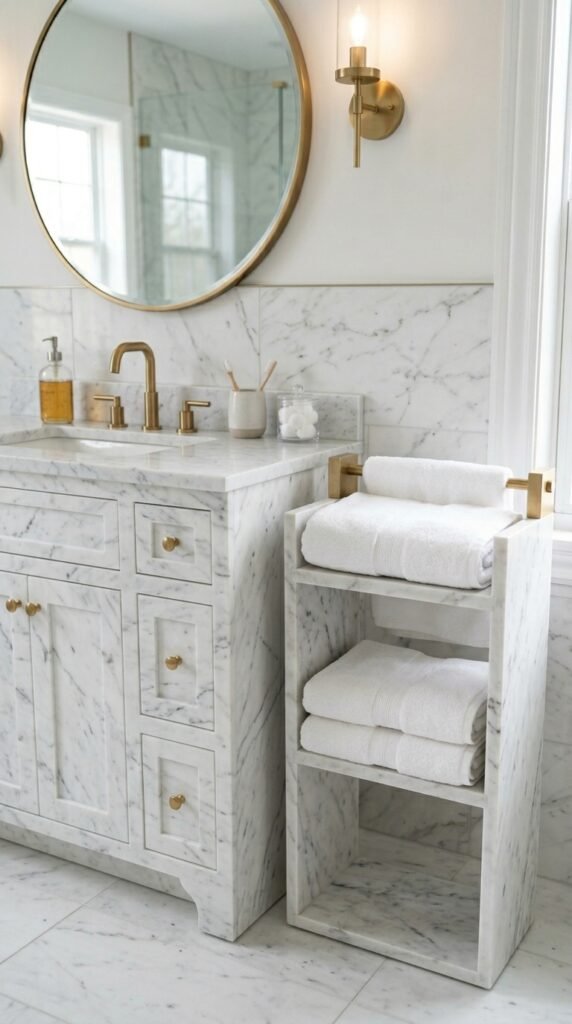
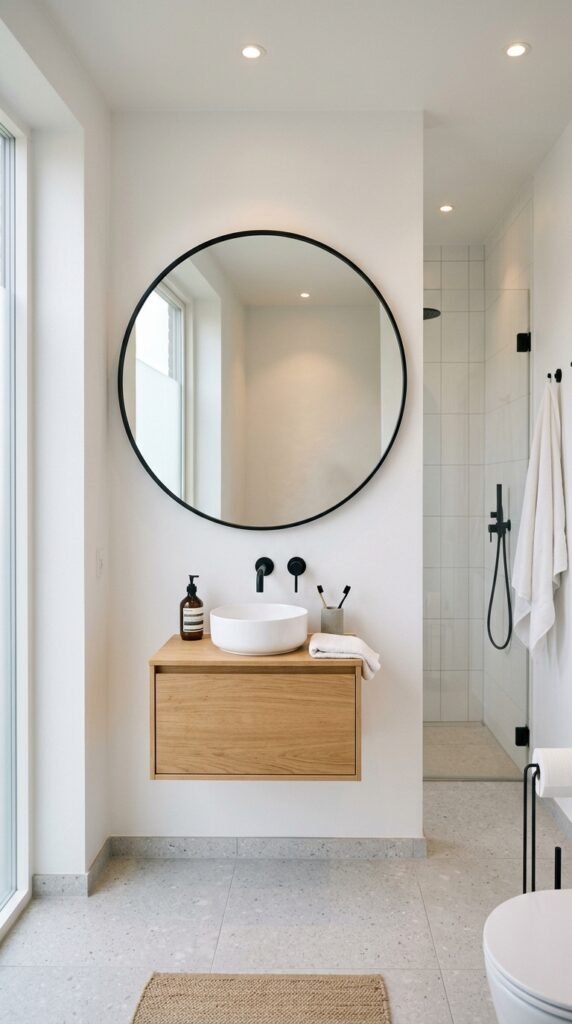
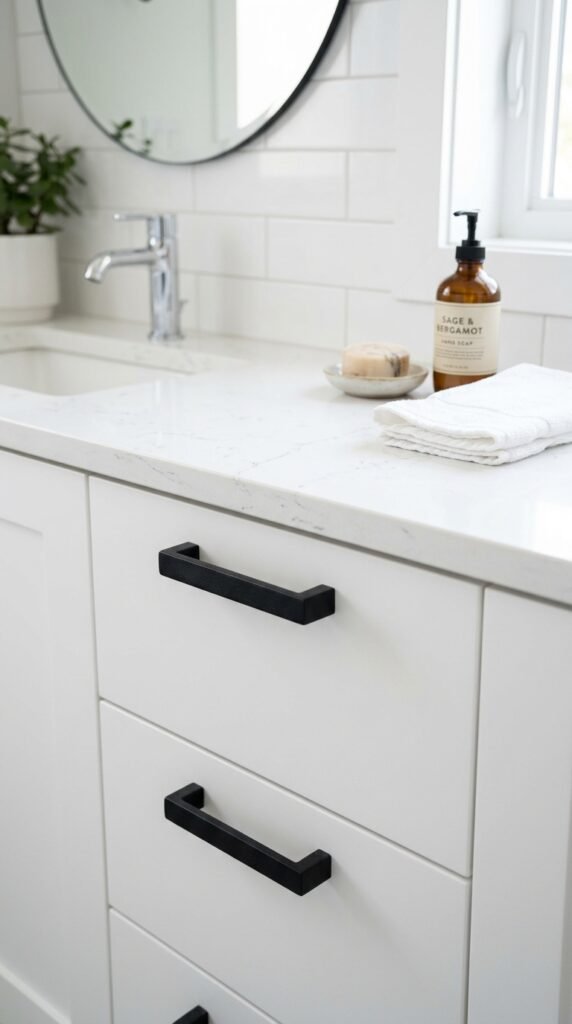
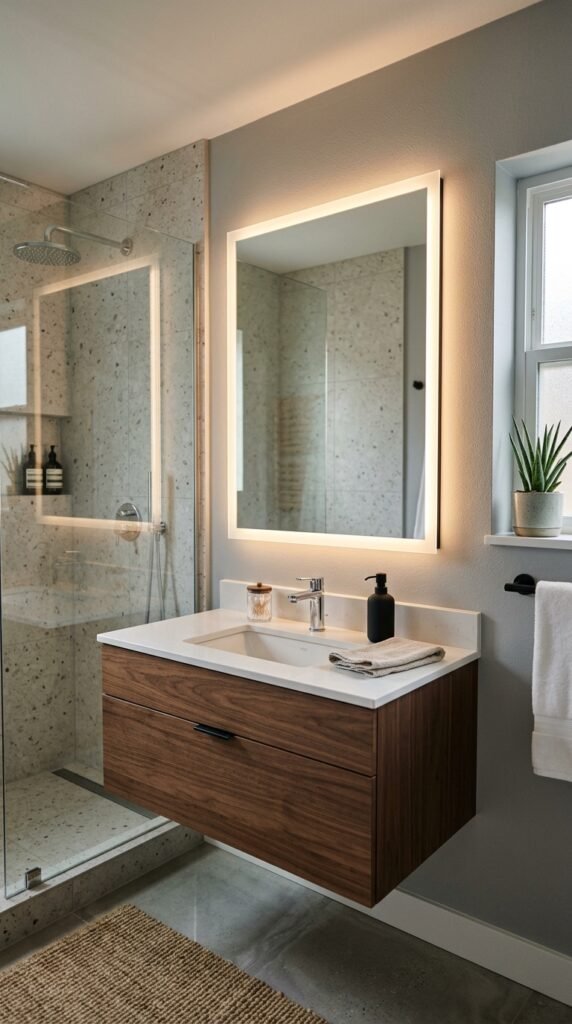
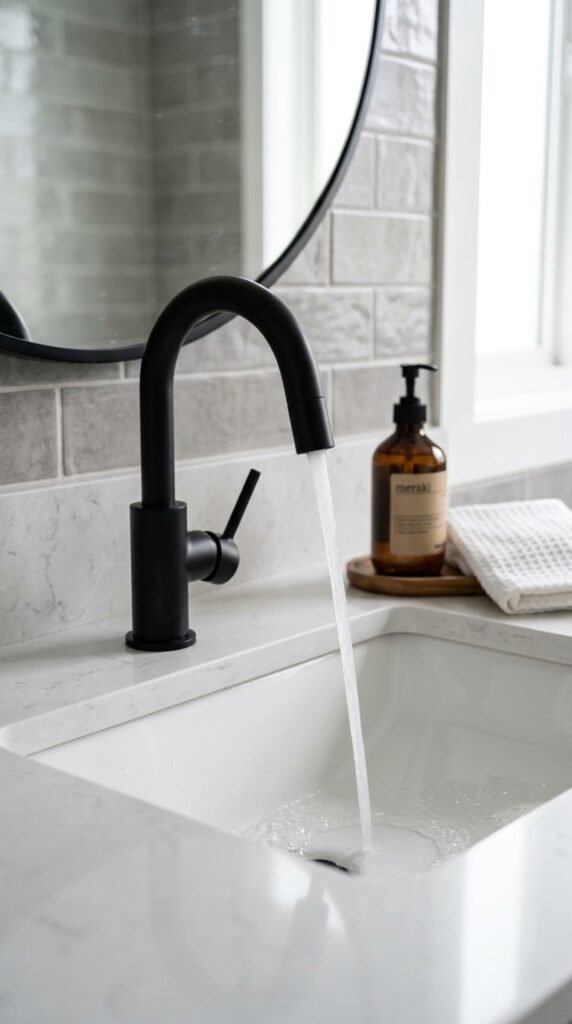
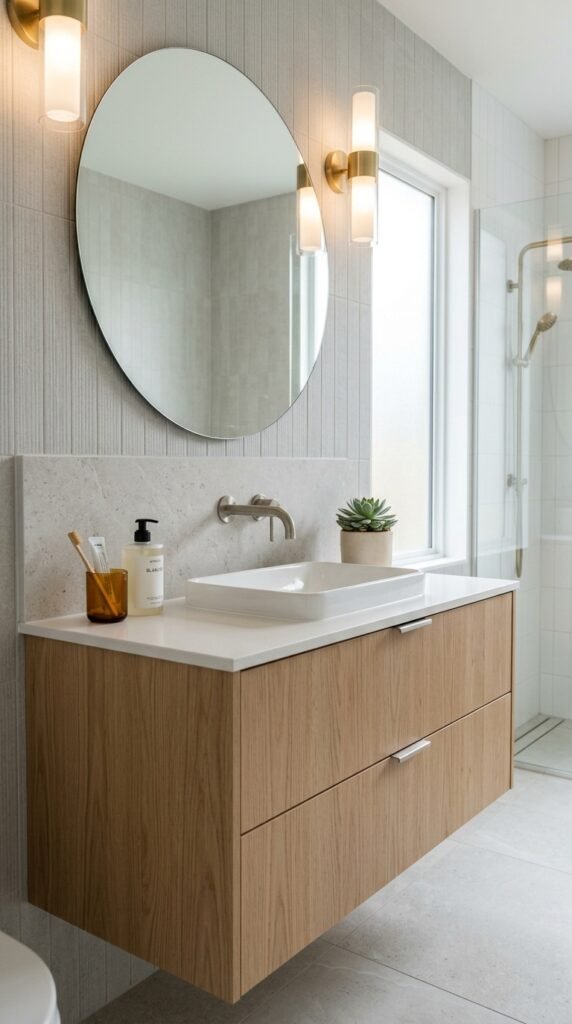
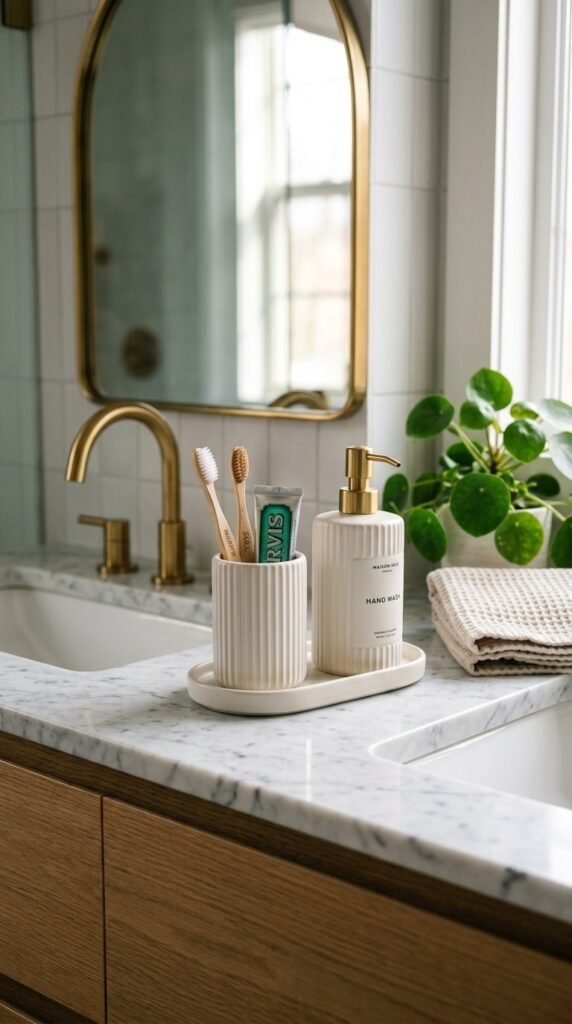
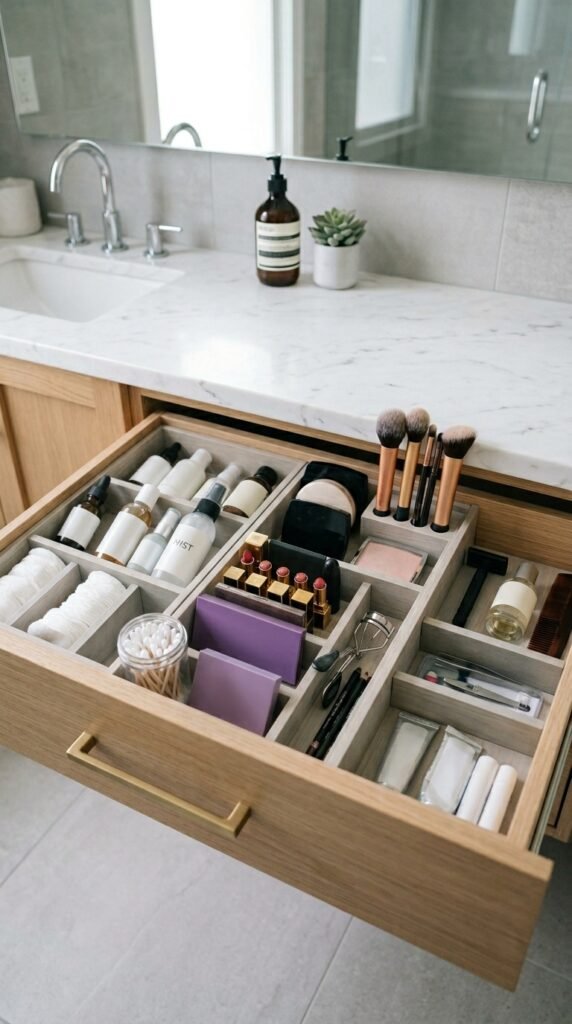
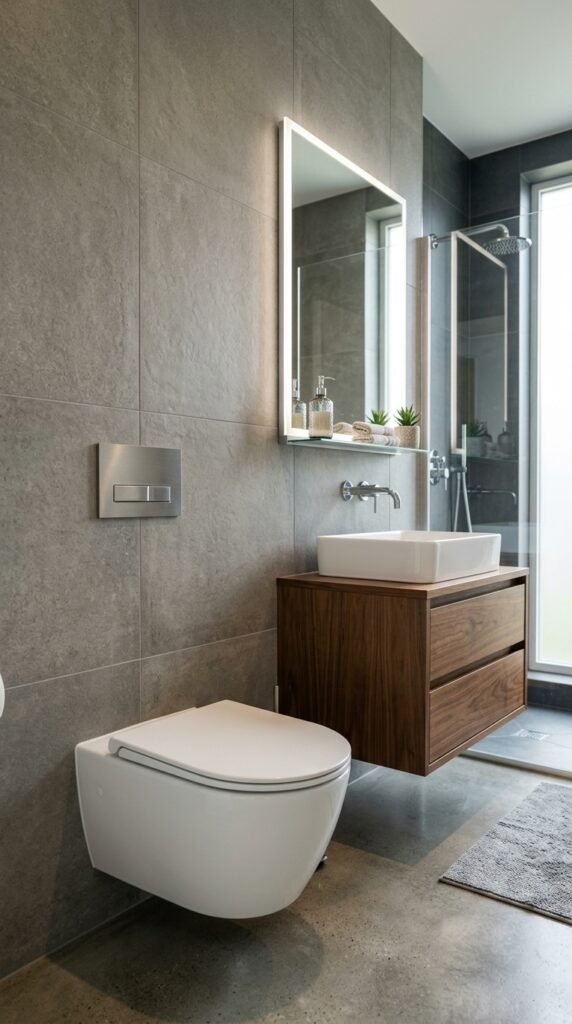
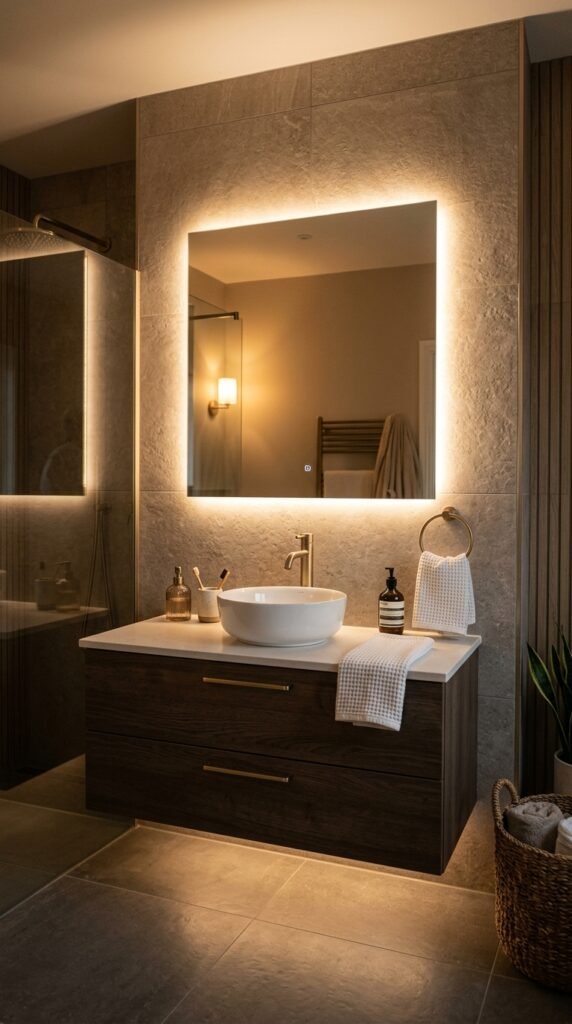
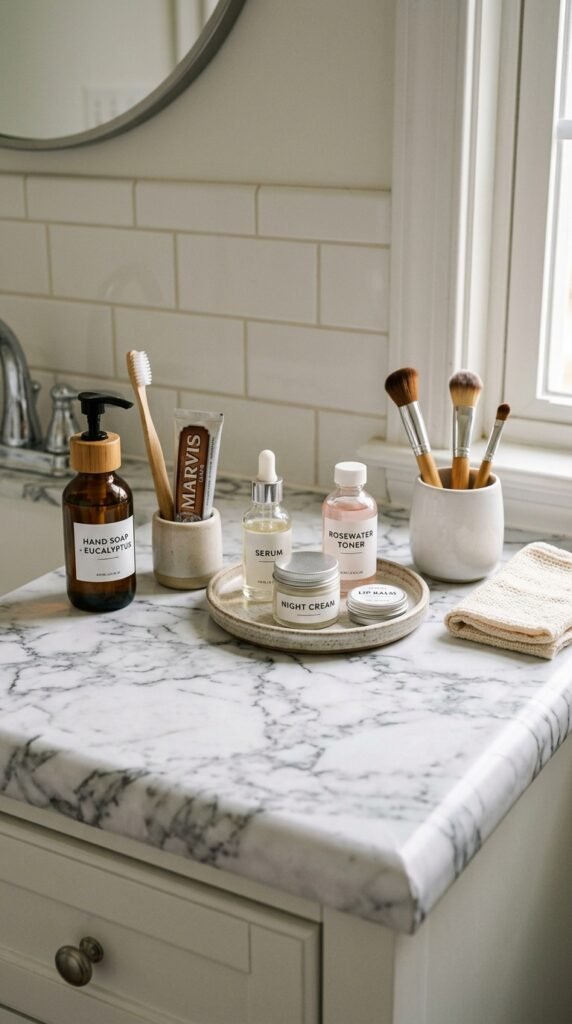
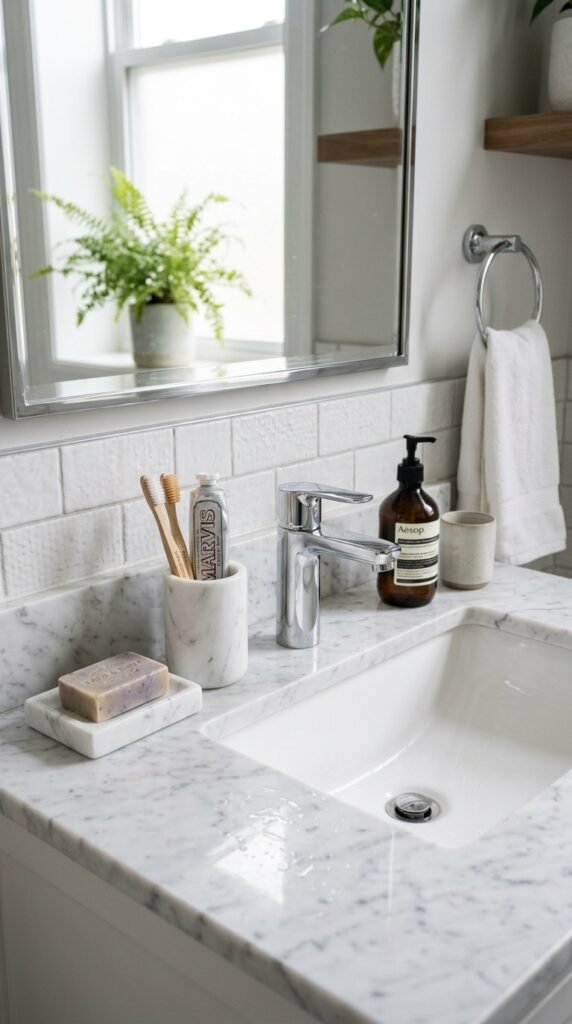
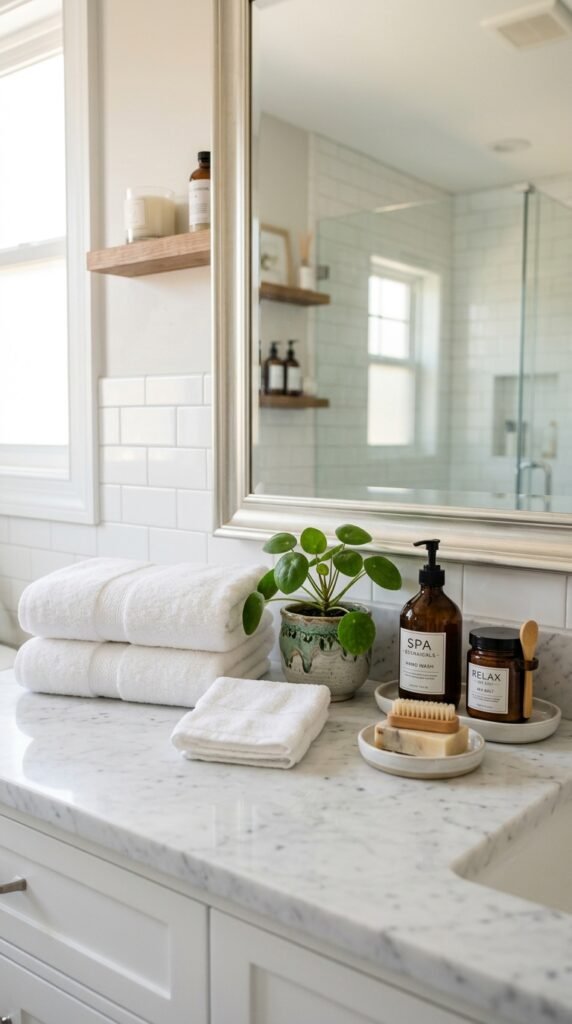
4. Marble Vanity Countertop with Simple Fixtures

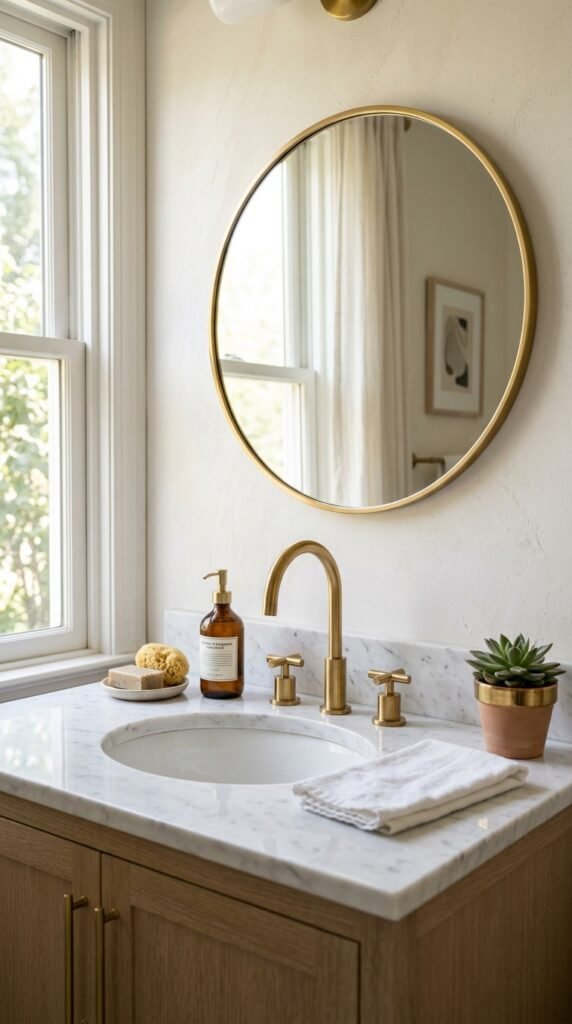
Swap out an old countertop for a marble surface to instantly refresh the sink area. For those on a budget, consider marble laminates or slabs cut to fit your vanity. Minimal fixtures keep attention on the marble’s beauty. Adding small items like a soap dish or tray complements the countertop without crowding it.


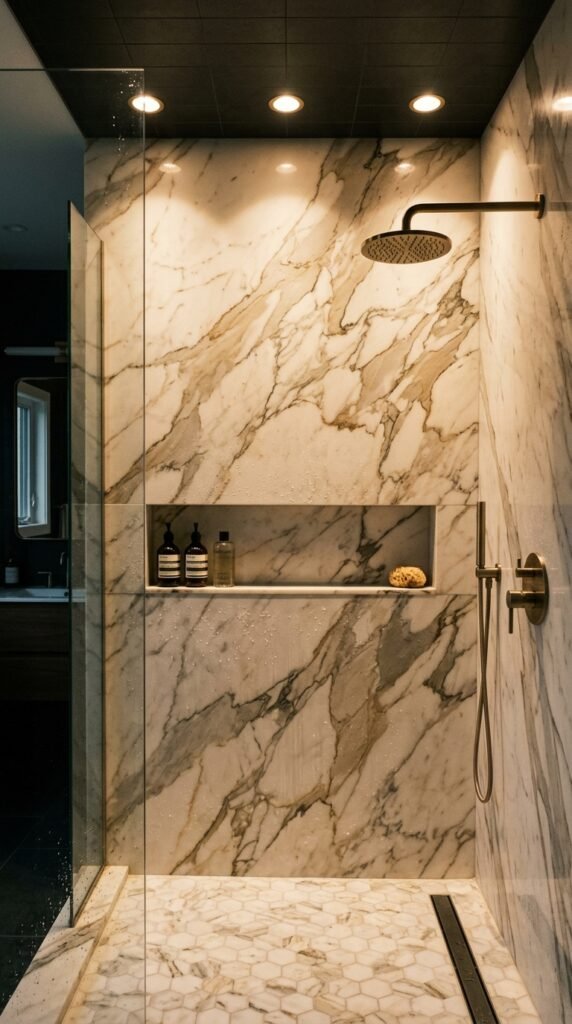
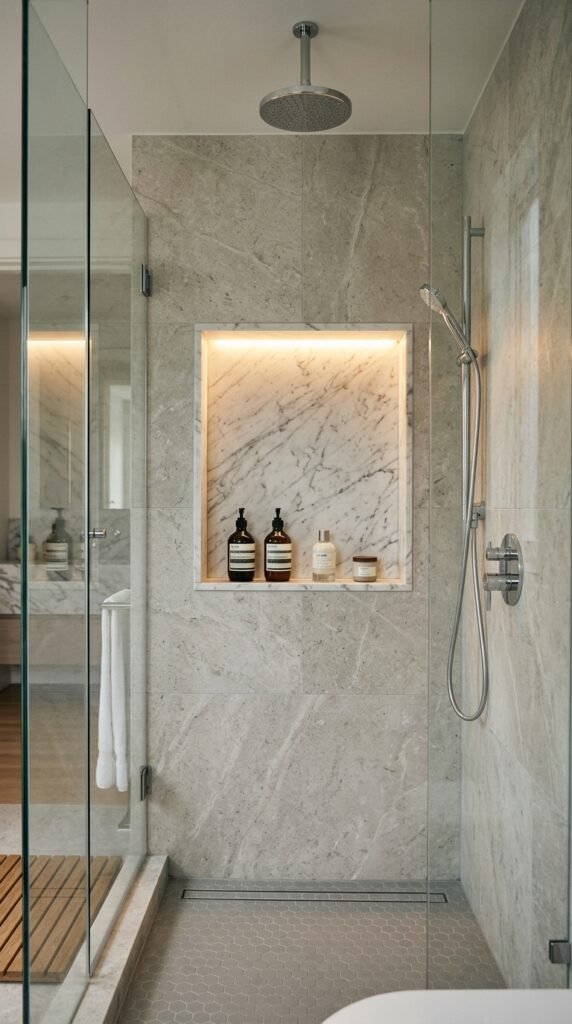
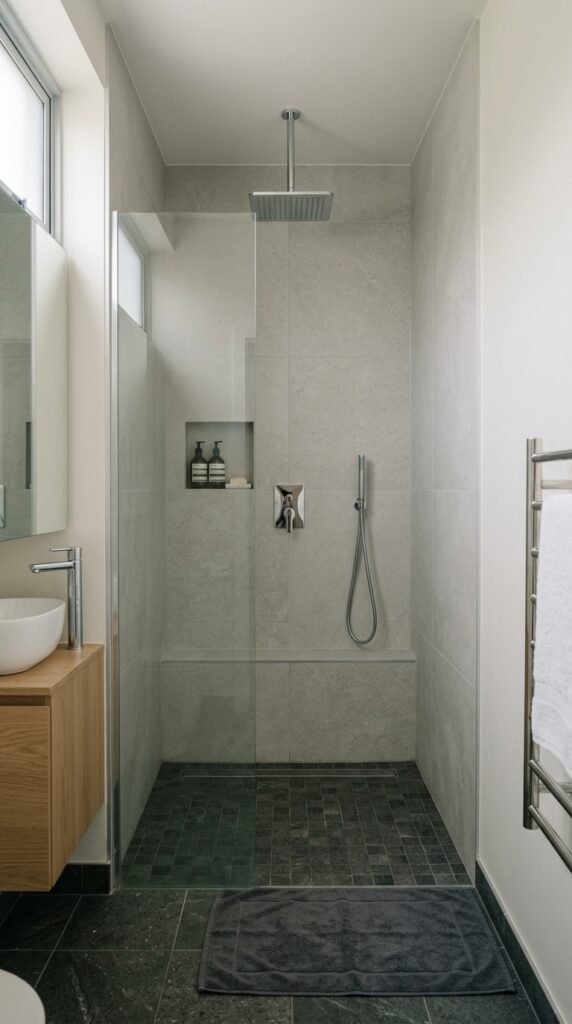
5. Marble Shower Niche for Functional Style

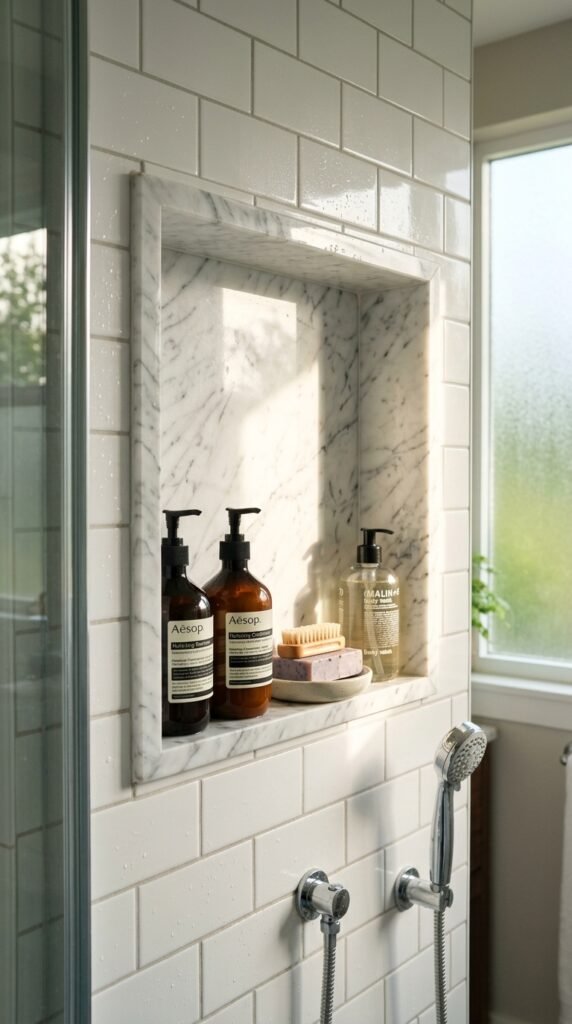
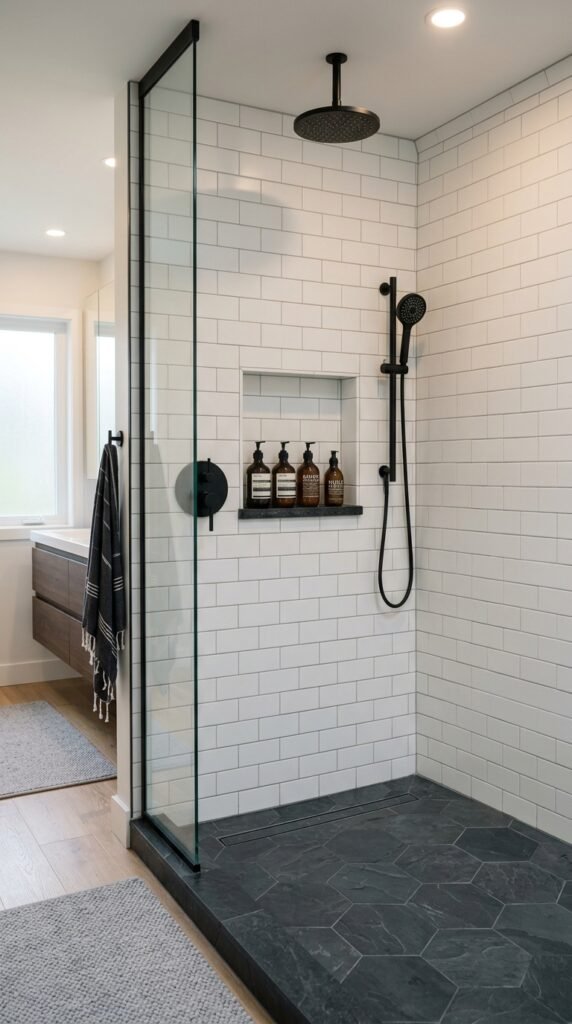
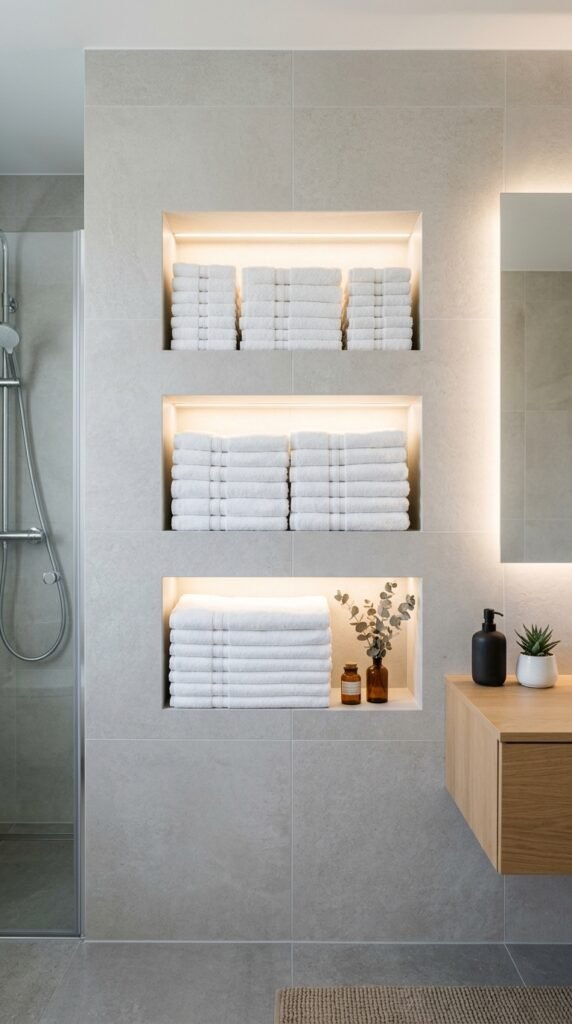
Incorporating a marble shower niche gives both style and storage. If full marble walls aren’t feasible, this small accent can make a big impact. Use it for soaps, candles, or plants. For DIY-friendly options, marble tile sheets can line the niche, giving a high-end look without a large expense.


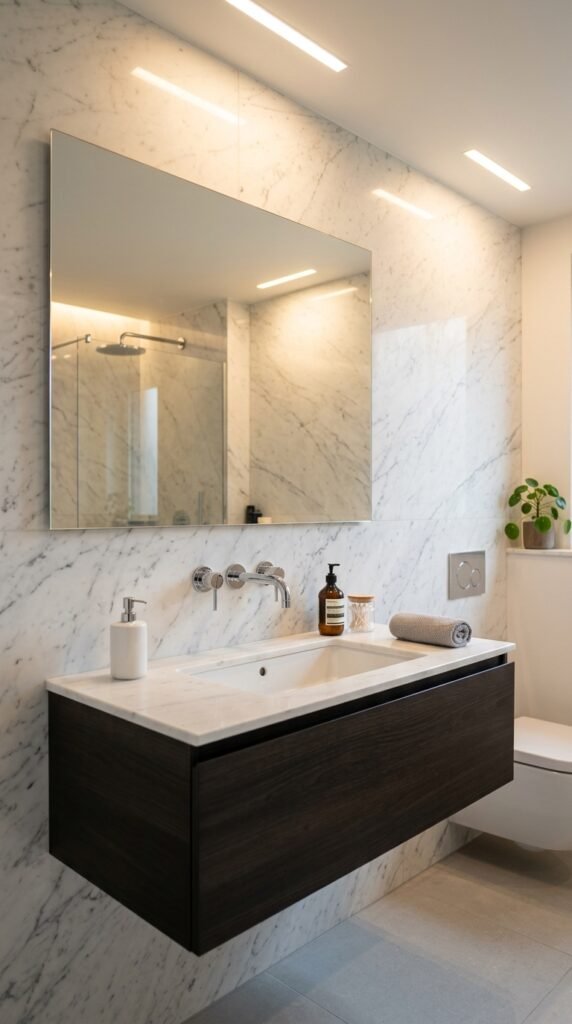
6. Marble Backsplash Behind the Sink

A marble backsplash adds subtle luxury. Even covering just 2–3 feet behind your sink elevates the space. Peel-and-stick tiles or small slabs can be installed quickly. This approach highlights your sink area while keeping the rest of the bathroom simple and budget-conscious.


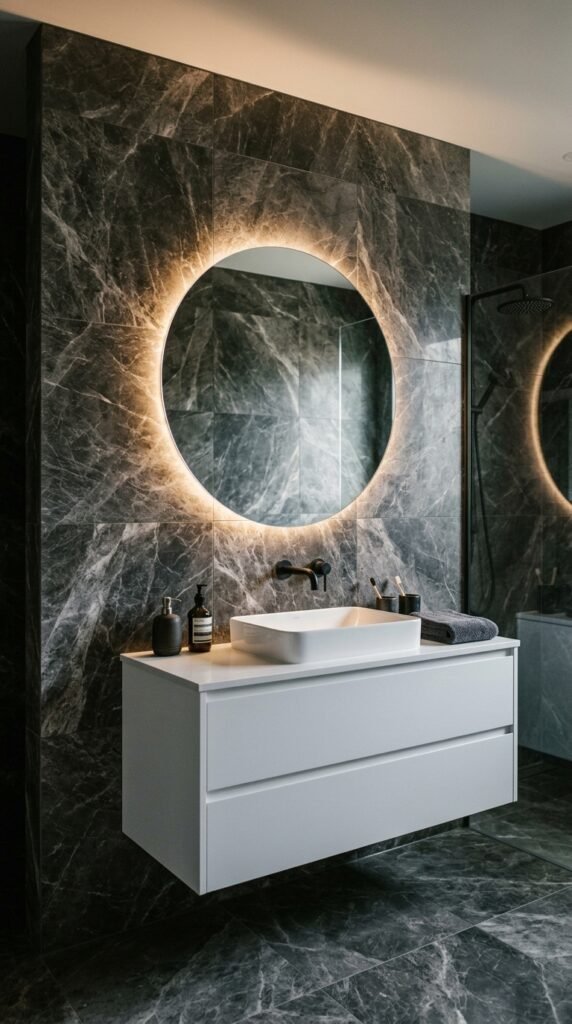
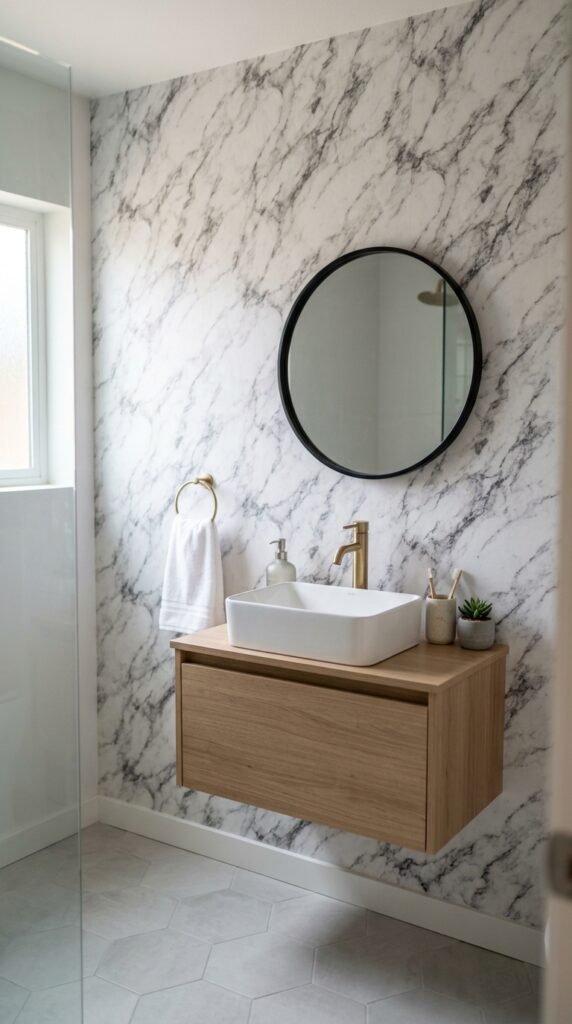
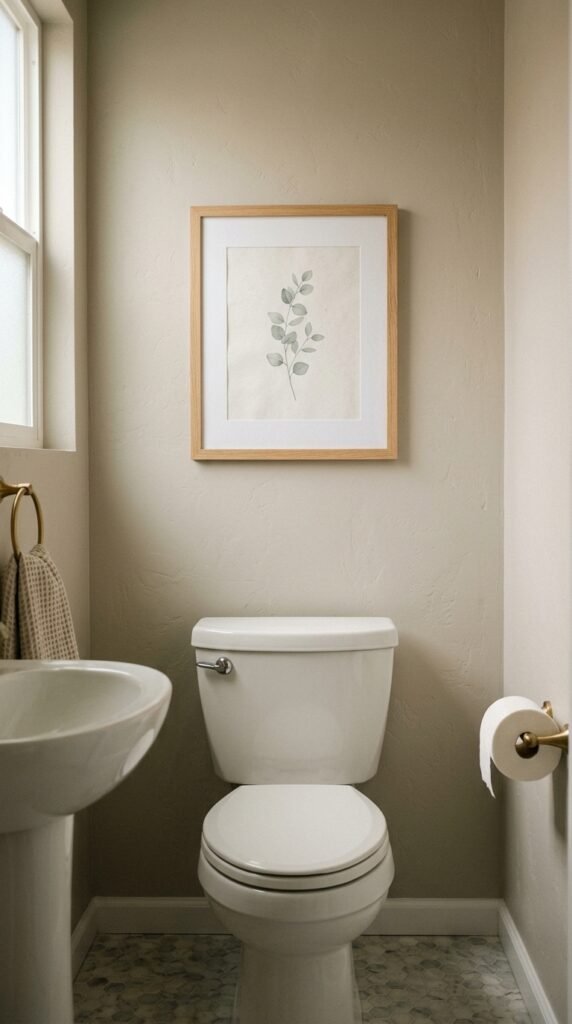
7. Minimalist Marble Accent Wall

Focusing on a single accent wall lets you enjoy marble’s beauty without overwhelming your budget. Place it behind the tub or vanity for maximum impact. Keep other walls plain or painted white to maintain brightness. Small décor items like plants or candles complement this setup.


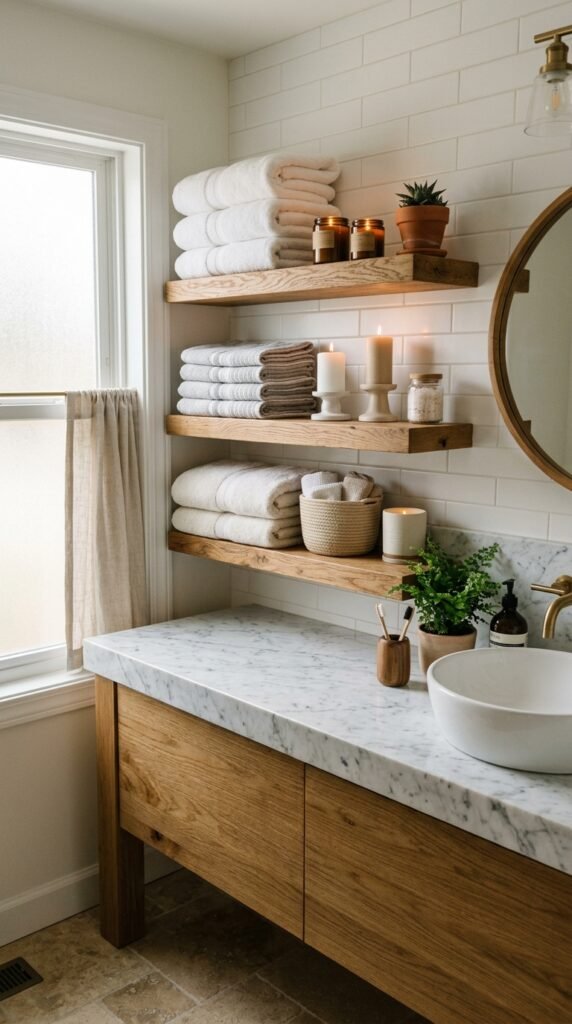
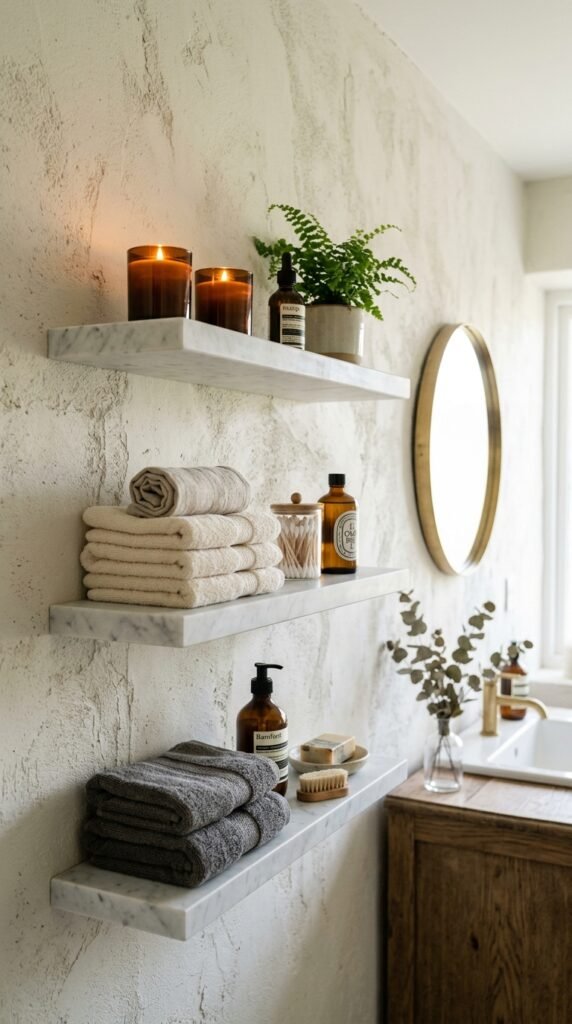
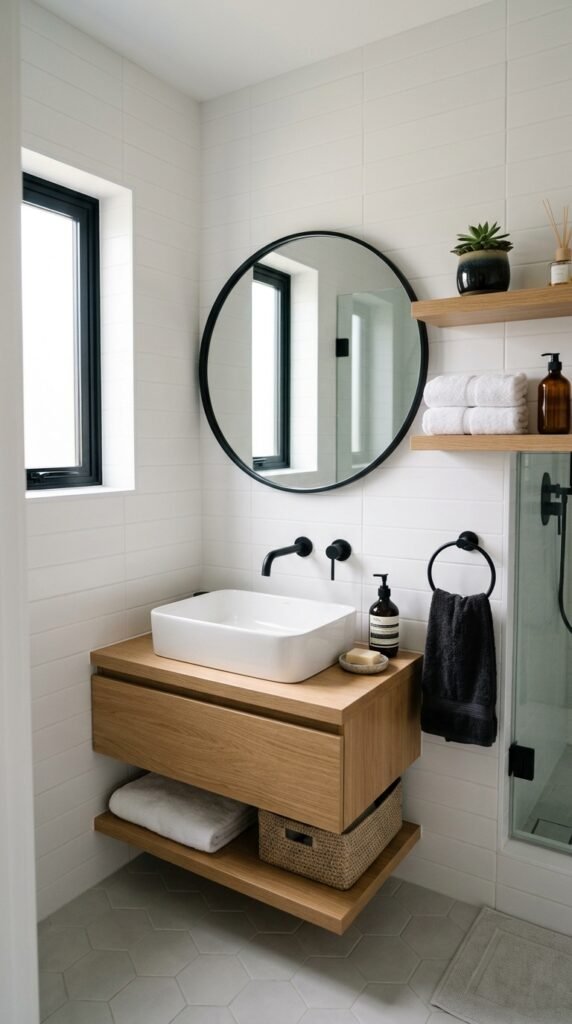
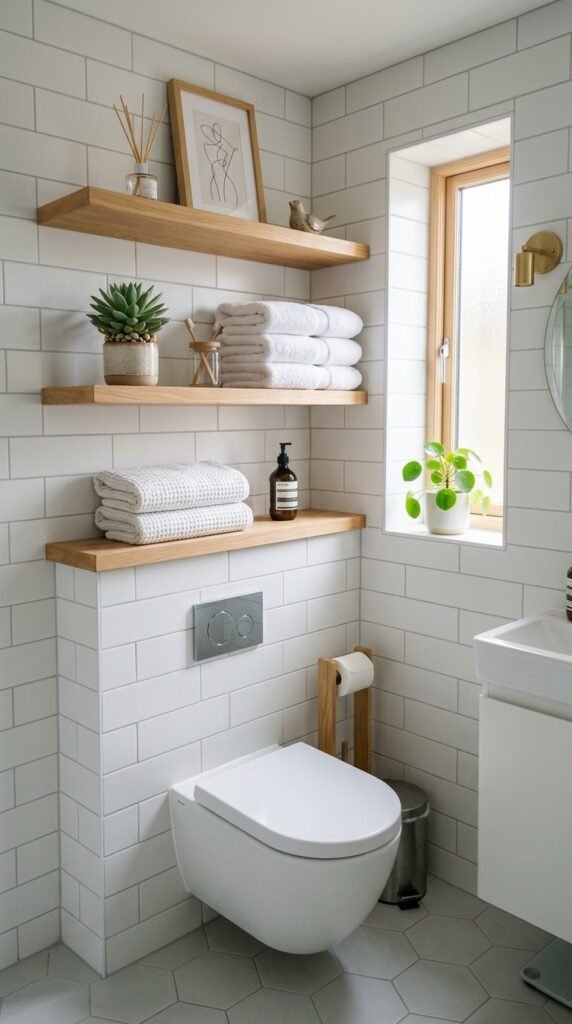
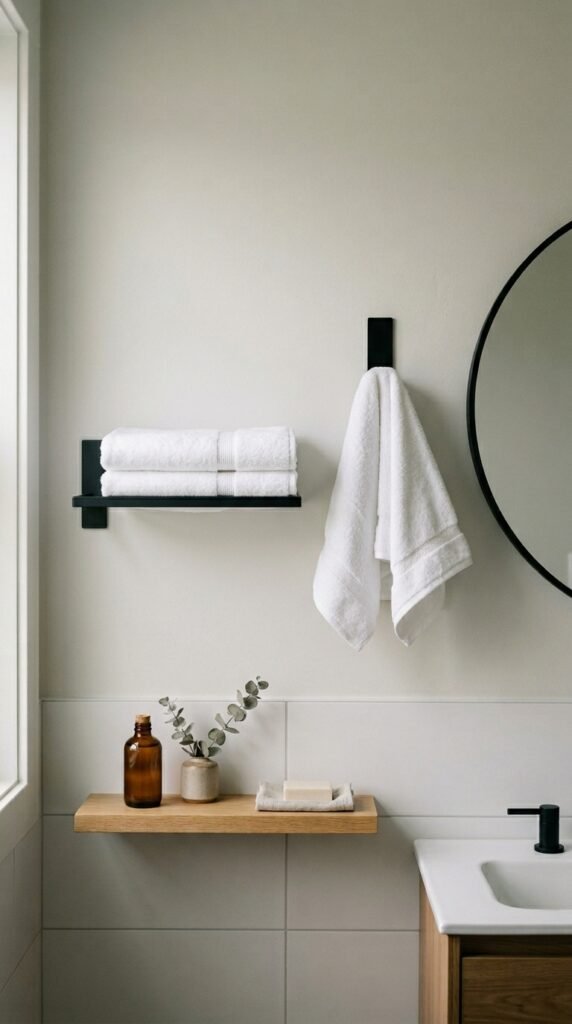
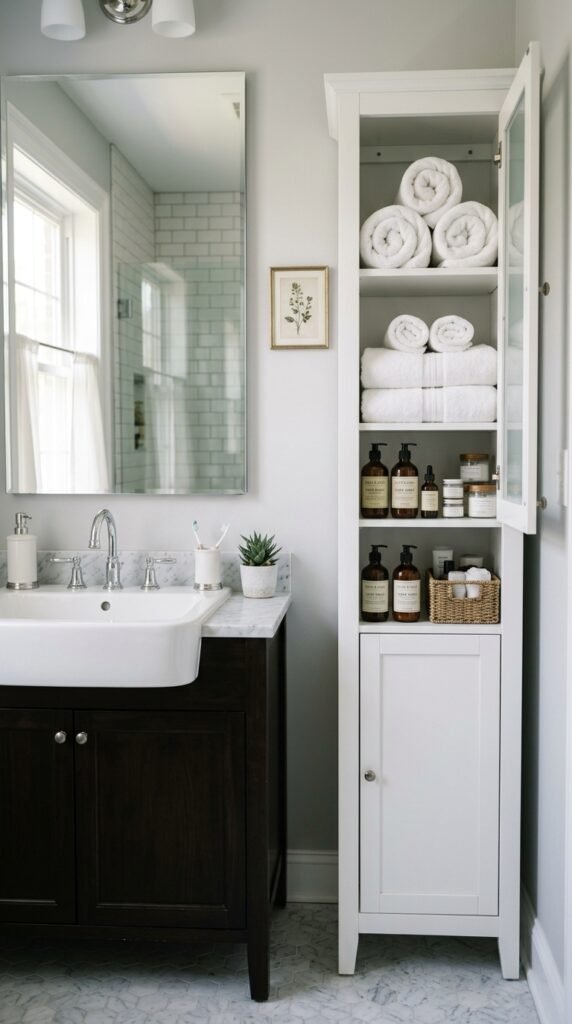
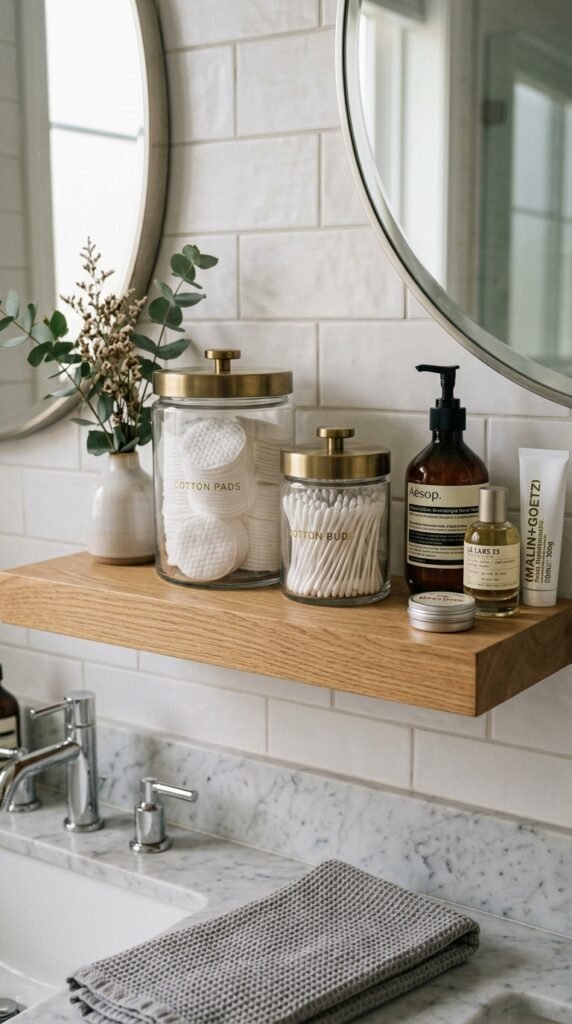
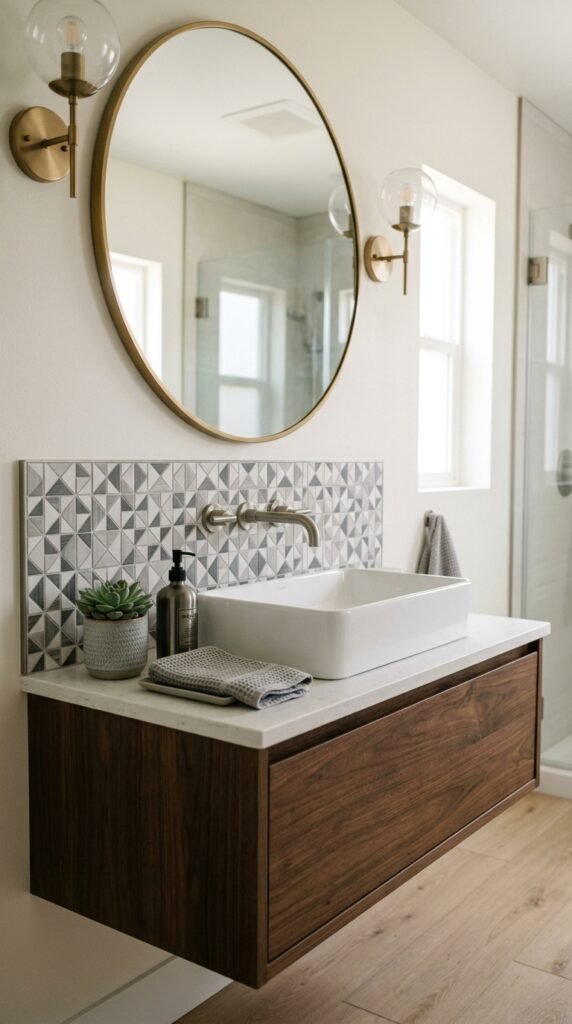
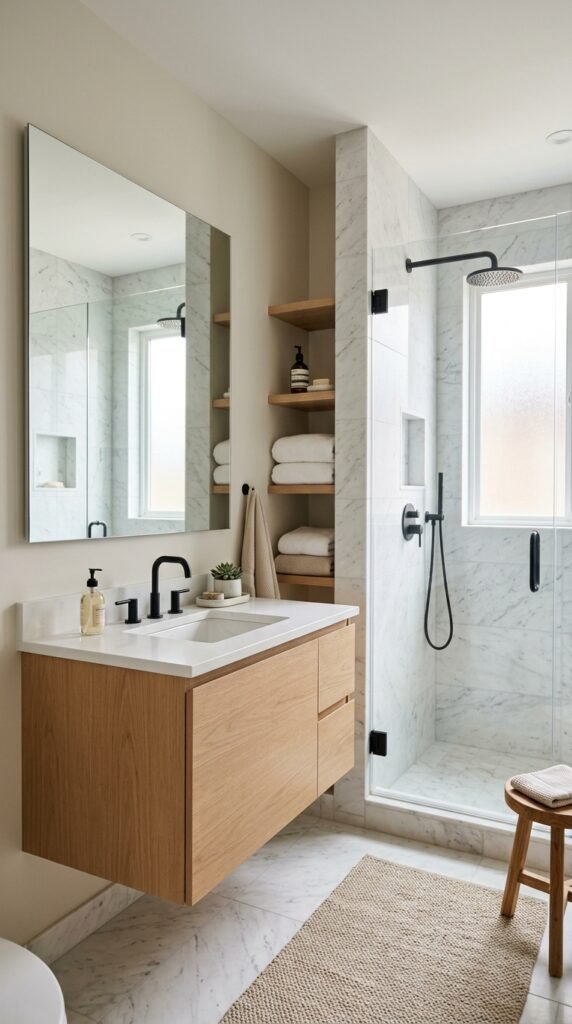
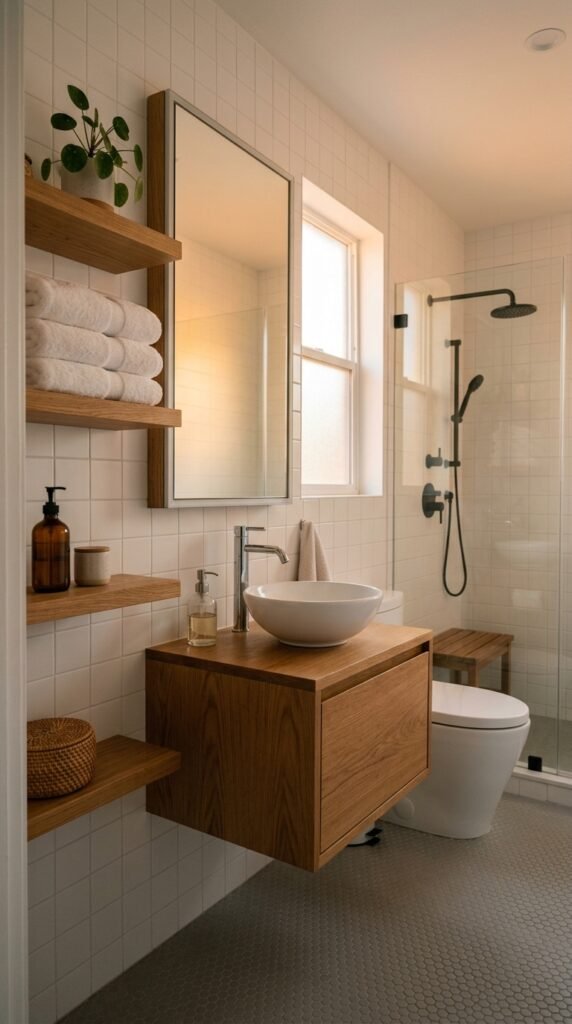
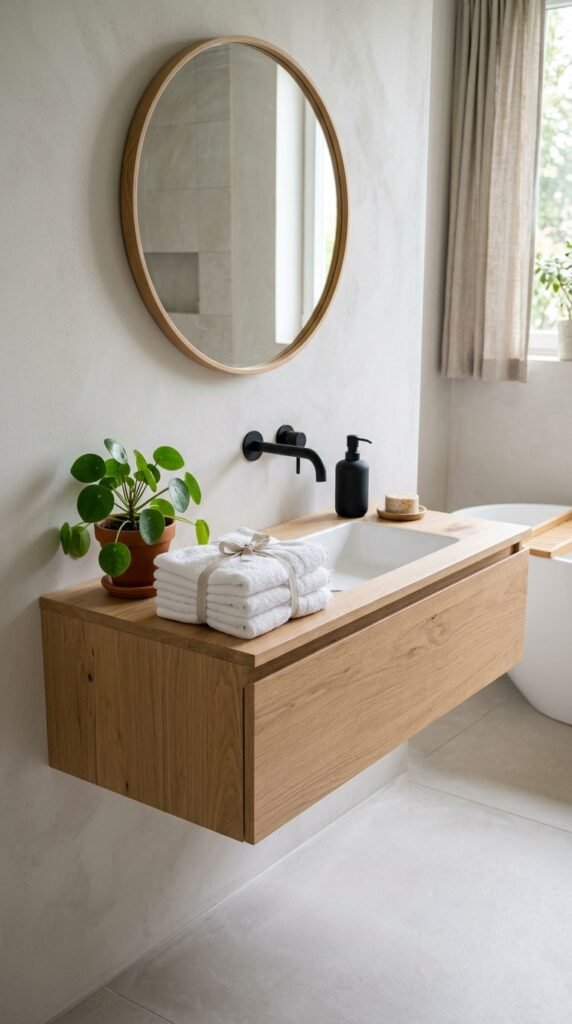
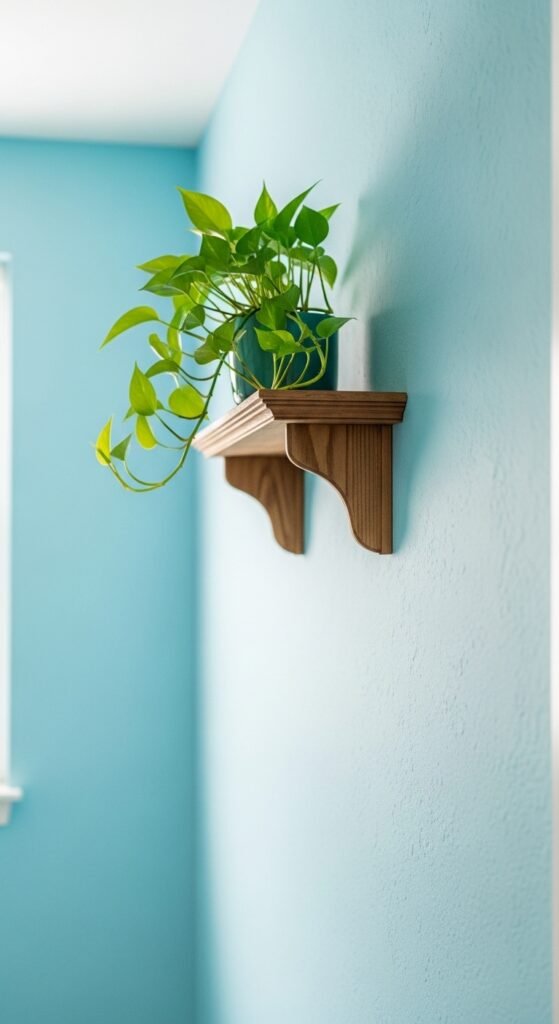
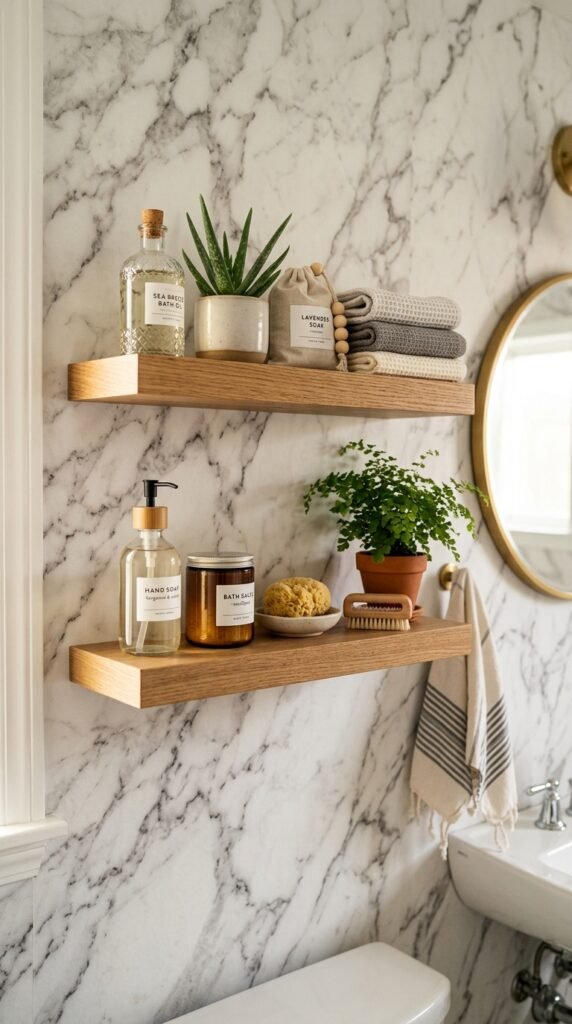
8. Marble Countertop with Floating Shelves

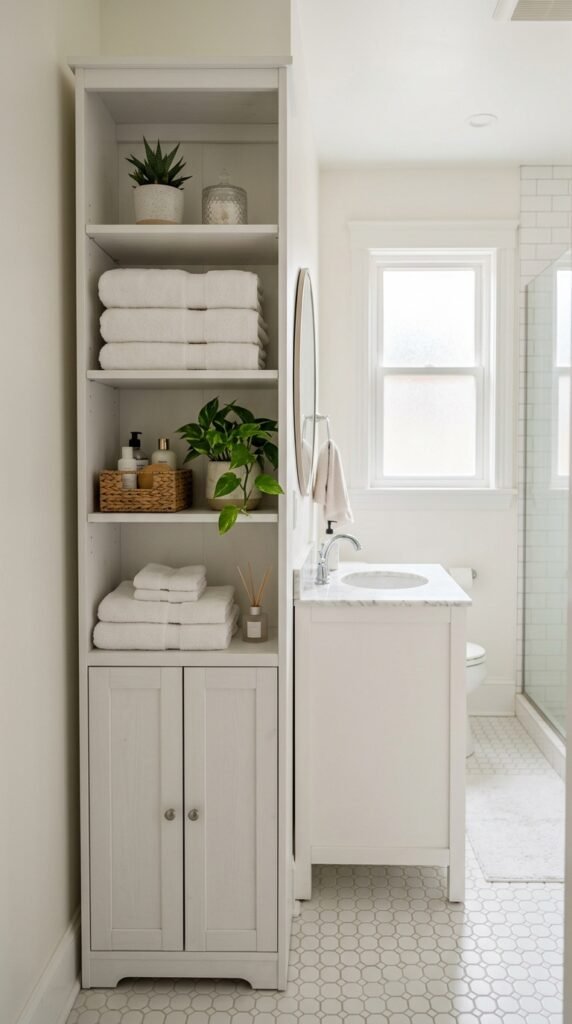
Pairing a marble countertop with floating wooden shelves combines elegance and practicality. Shelves offer storage without bulky cabinetry. This is easy to install and gives the bathroom an open feel. For DIY, ready-made floating shelf kits are affordable and simple to assemble.


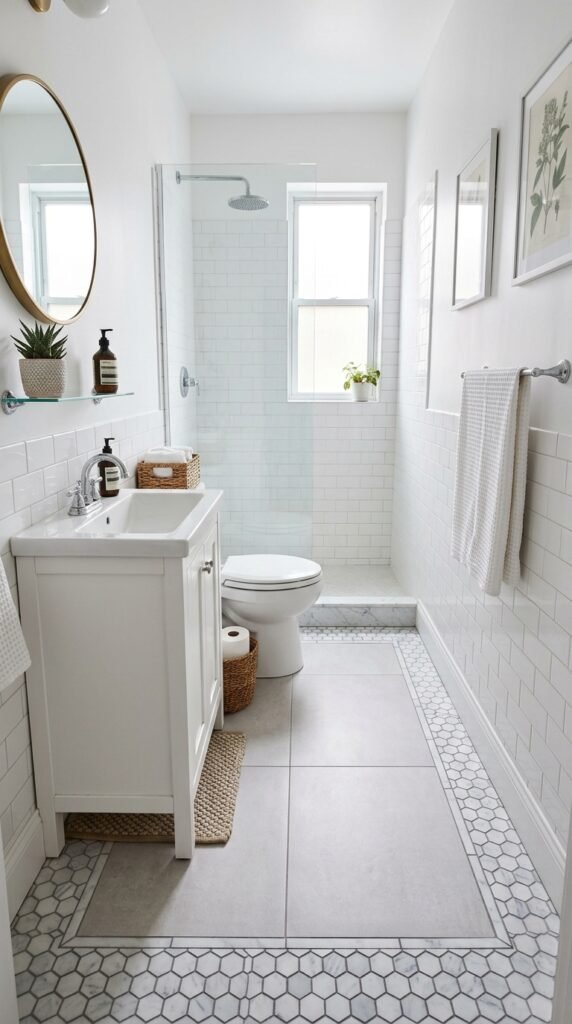
9. White Marble with Subway Tile Combo

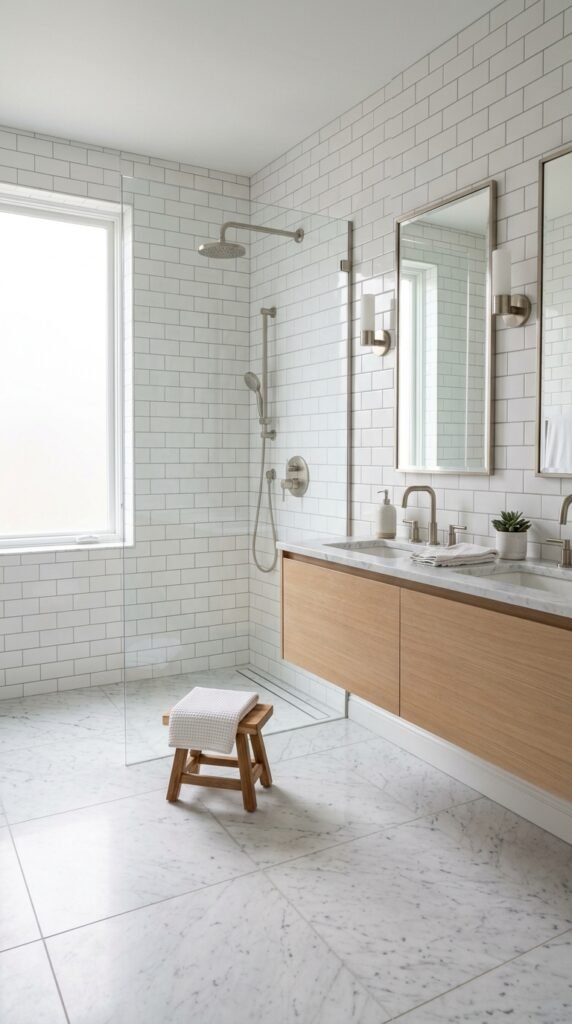
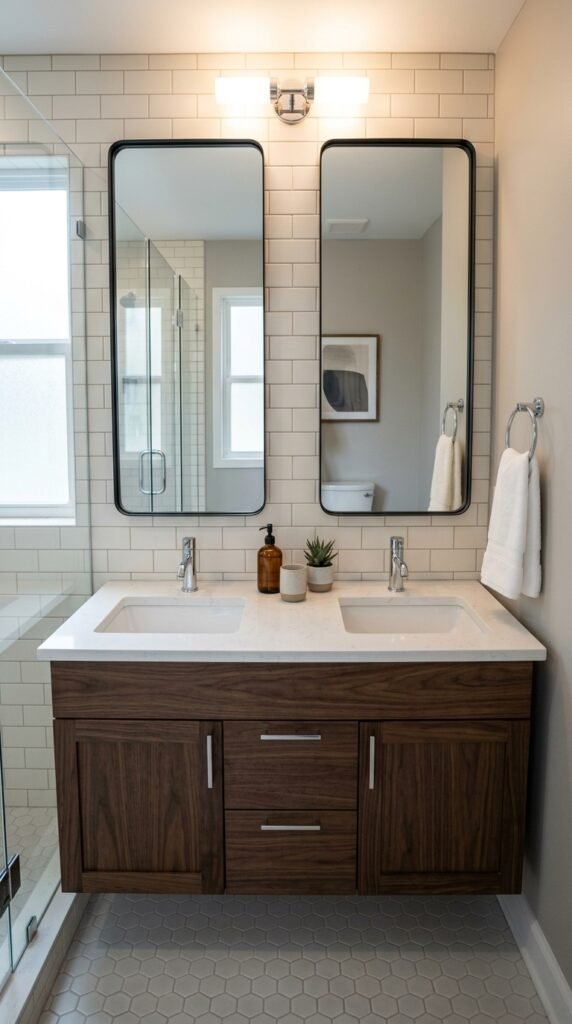
Mixing marble with subway tiles creates a modern yet timeless look. Use subway tiles on walls while keeping marble floors for elegance. This combination is budget-friendly and gives texture contrast. Grout color can subtly change the vibe—light gray for warmth or crisp white for brightness.


10. Marble-Look Stickers for Small Updates

For a quick and affordable upgrade, marble-look adhesive sheets can transform countertops, shelves, or small walls. Easy to apply, they mimic real marble and allow experimentation. Perfect for renters or temporary projects, they offer a bright and polished effect without professional installation.


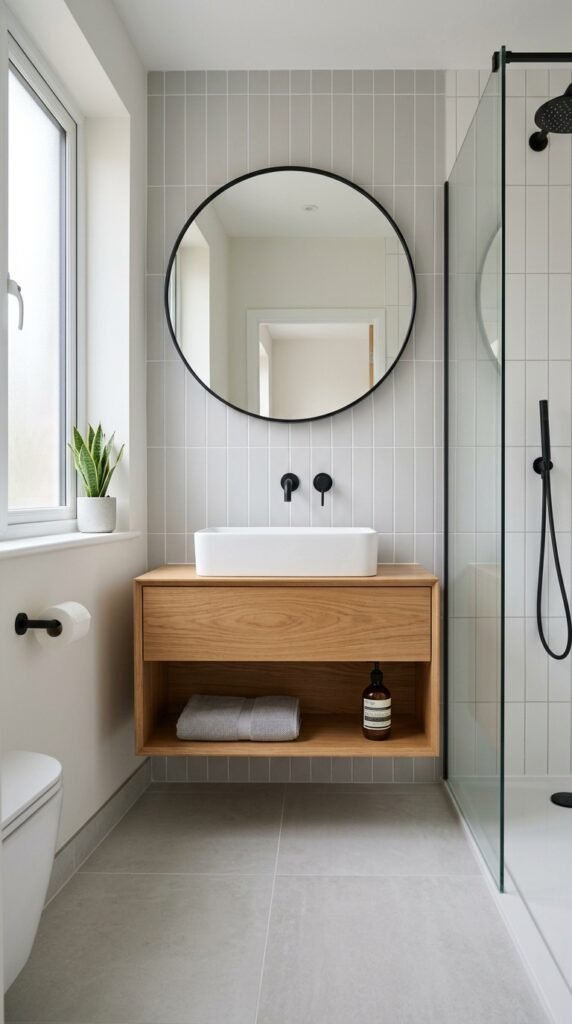
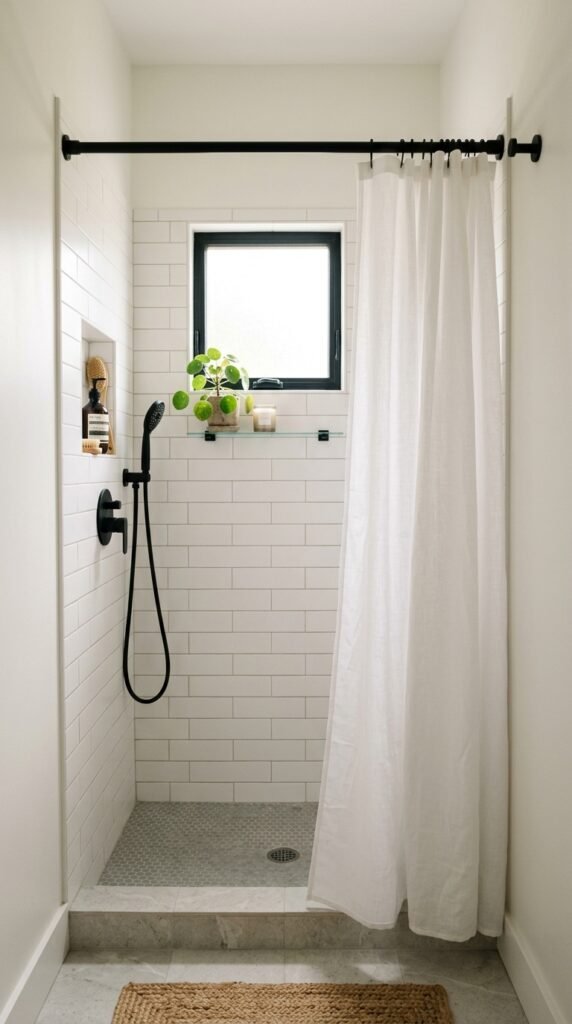
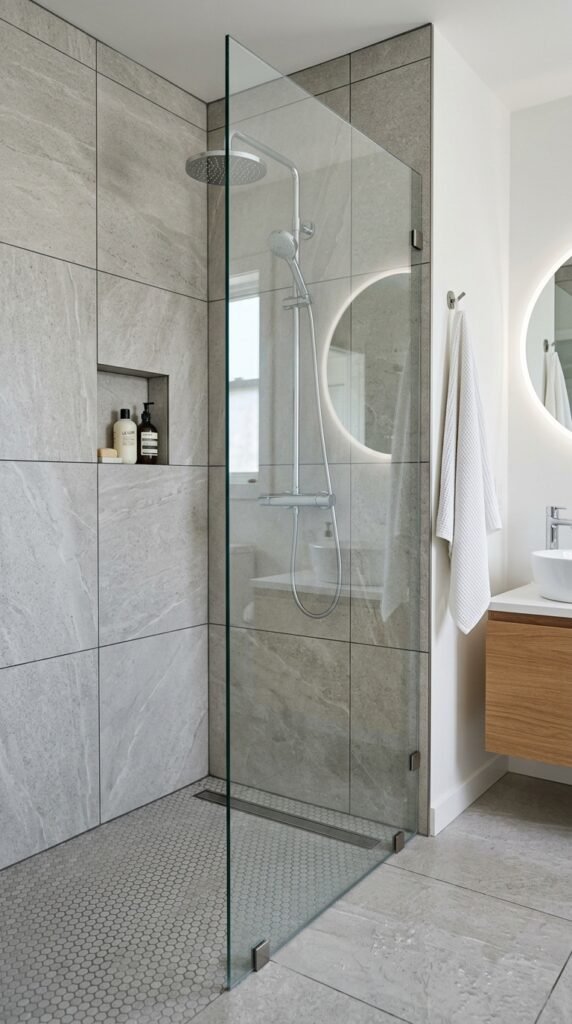
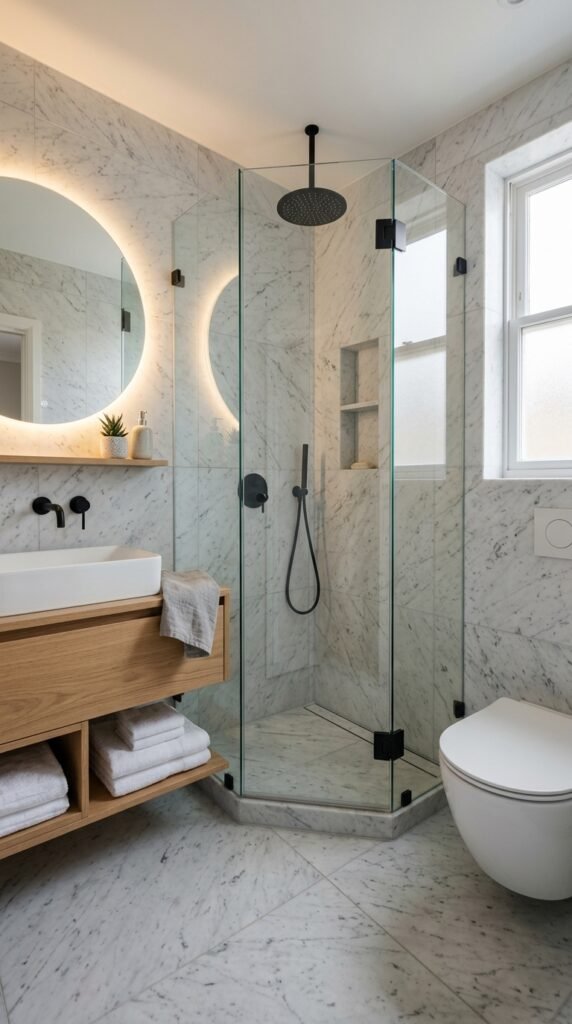
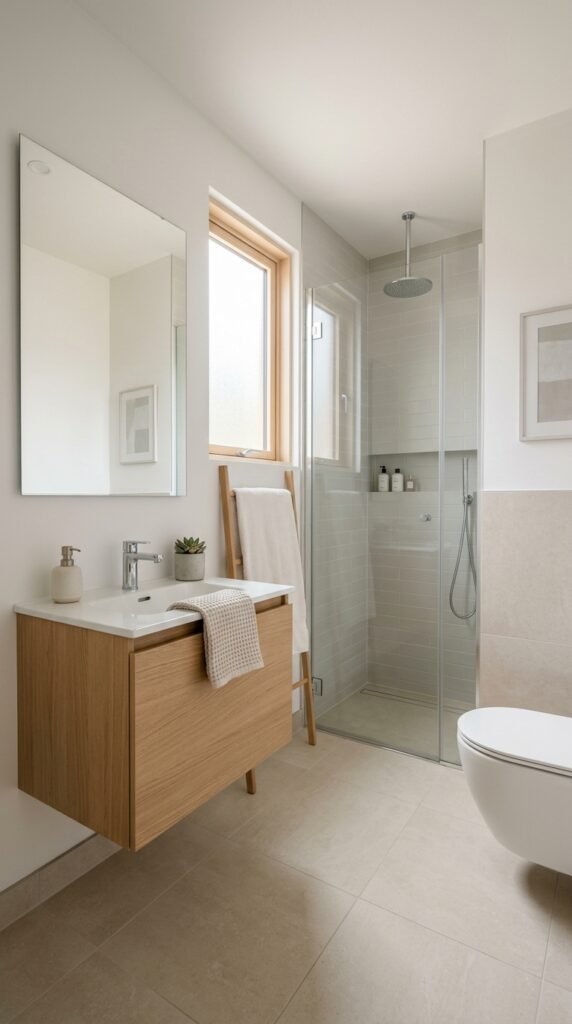
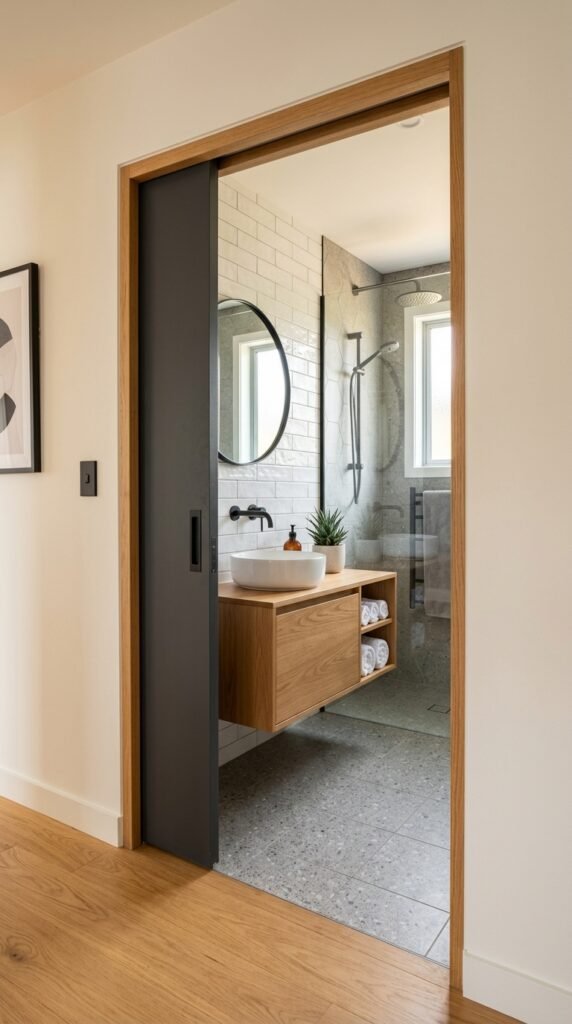
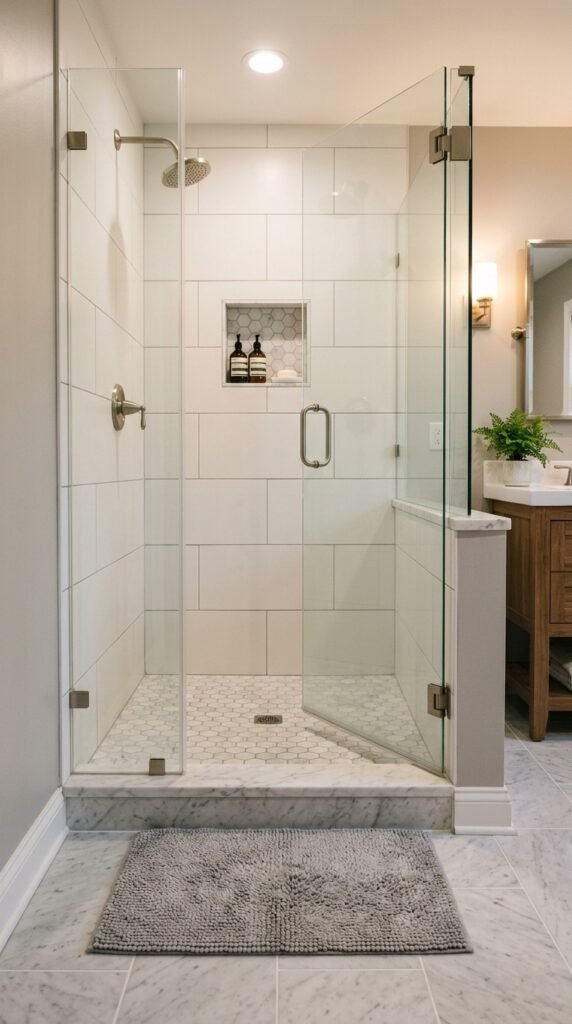
11. Marble Shower Walls with Frameless Glass

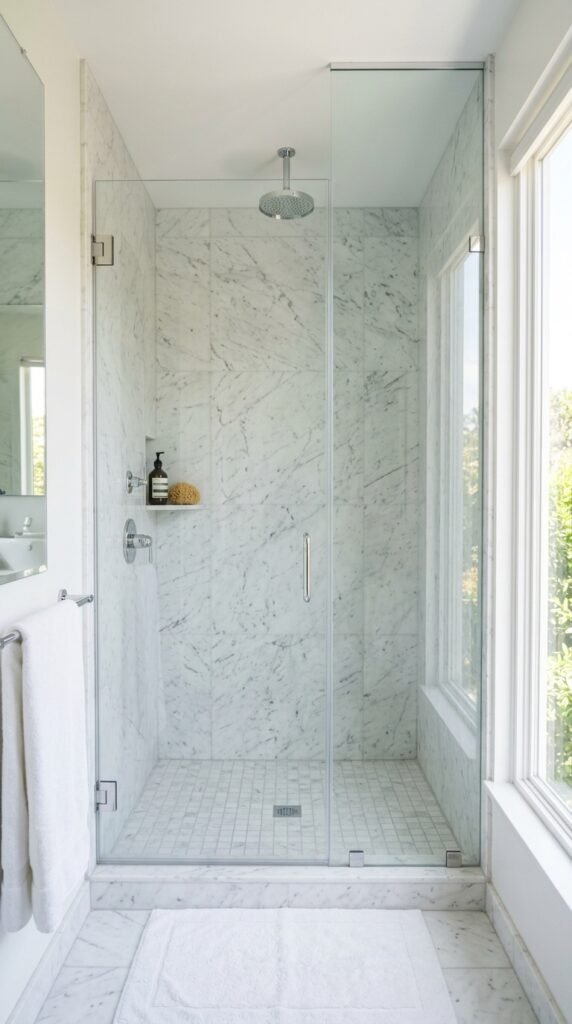
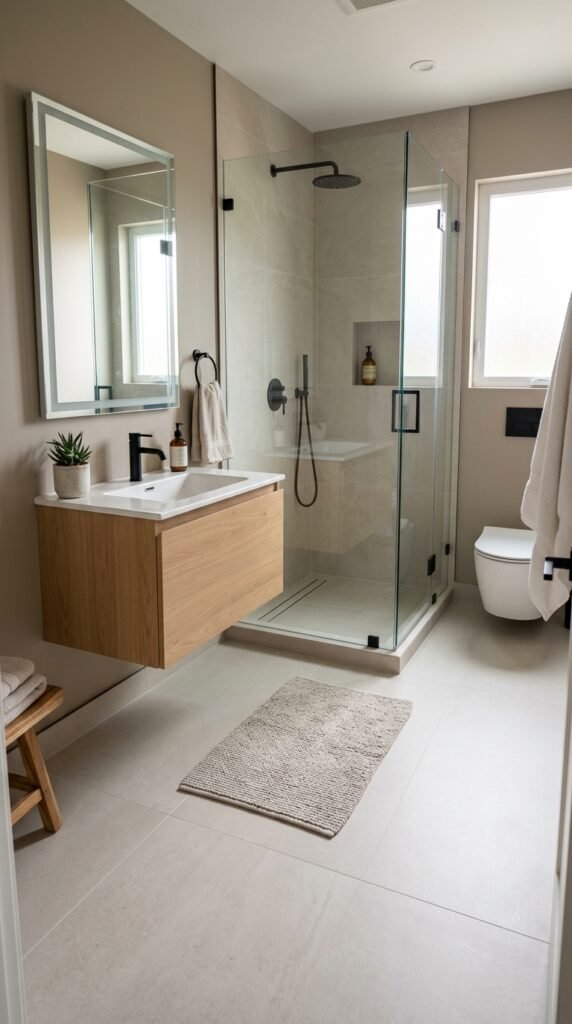
Frameless glass keeps the bathroom feeling spacious. Combining it with marble shower walls amplifies light reflection. Even partial marble coverage works. Affordable options include marble-effect panels or tiles. Clear glass ensures the marble remains the room’s focal point, making the shower look luxurious and open.


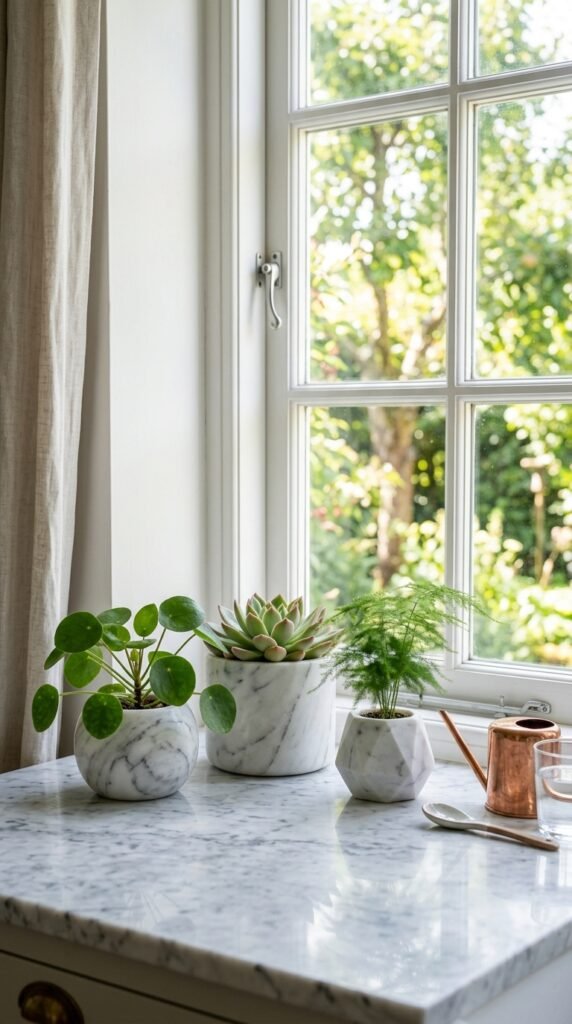
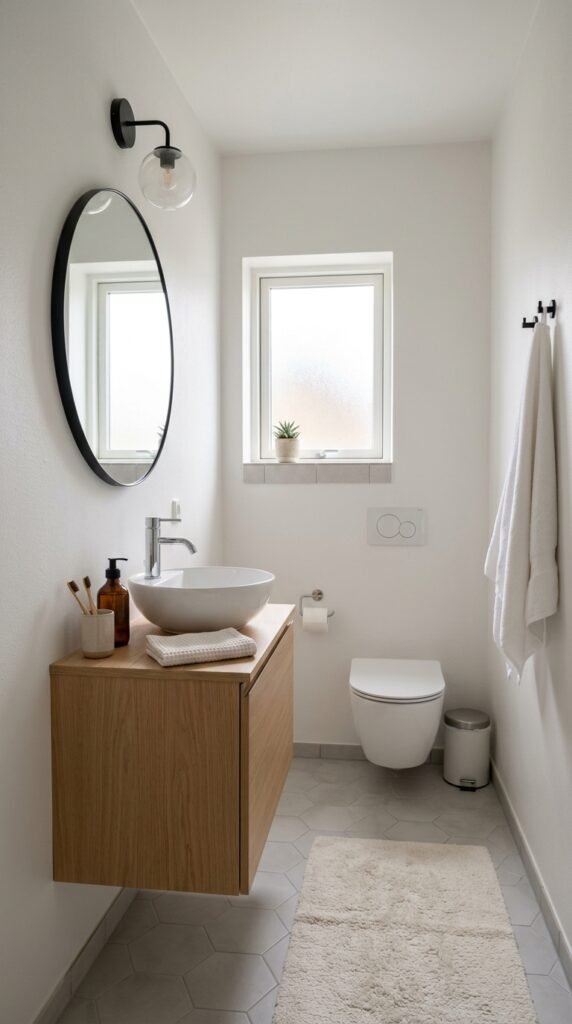
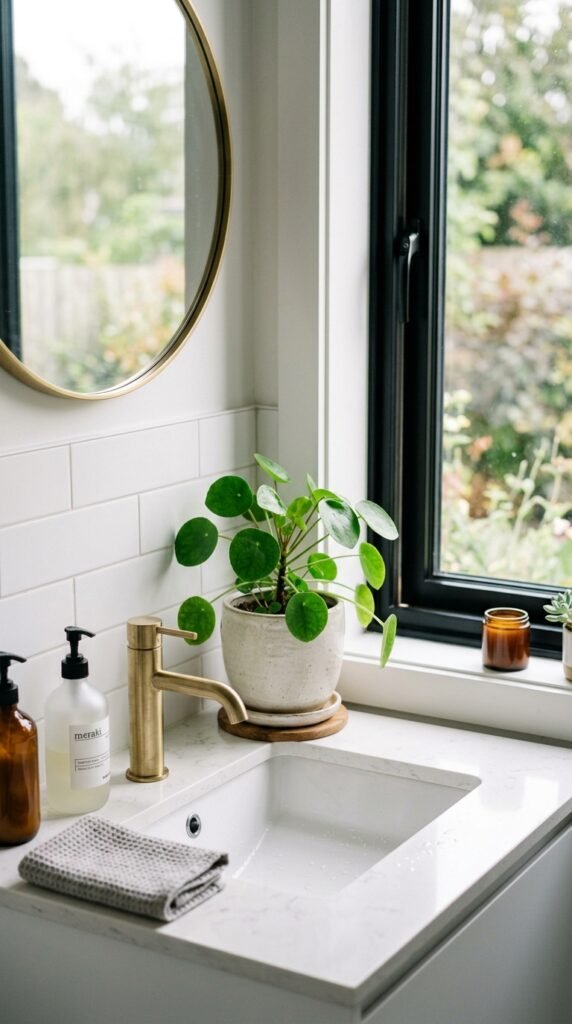
12. Marble Window Sill Accents

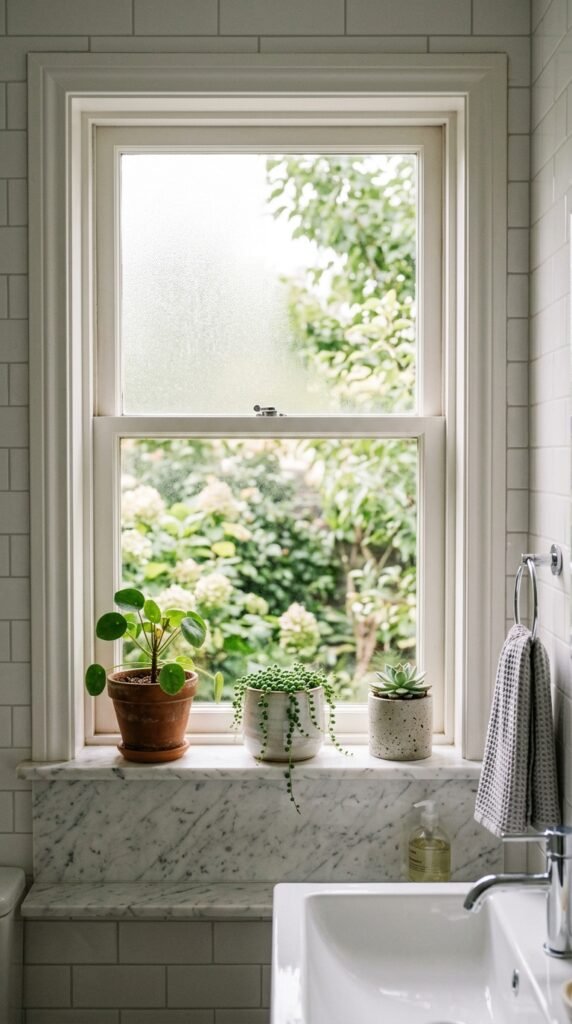
A marble window sill is a subtle upgrade with a big visual effect. Perfect for small bathrooms, it brightens the room and adds charm. Small DIY cuts or marble-look laminates fit most window frames. Place plants or toiletries on the sill for practicality without clutter.


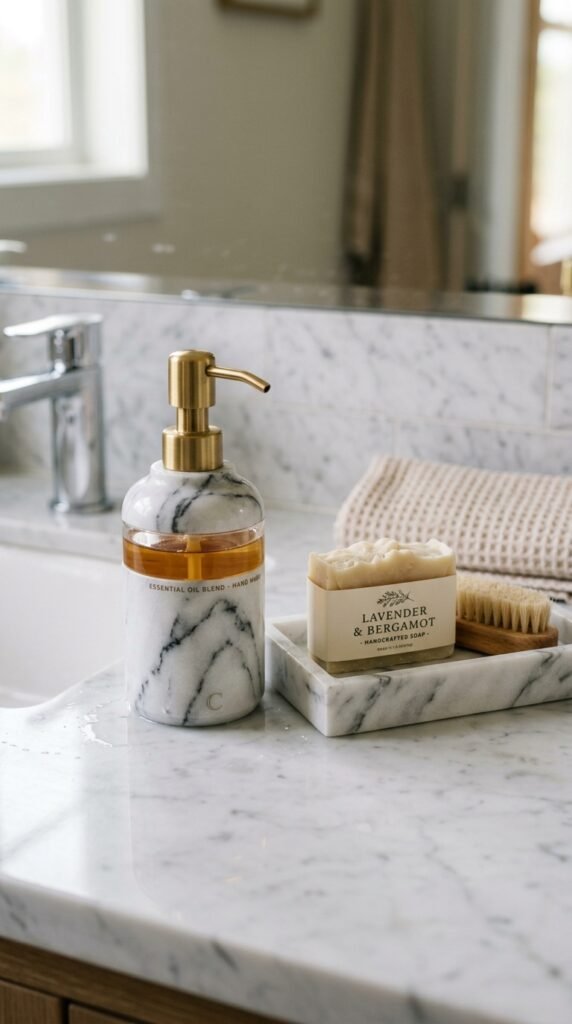
13. Marble Soap Dishes and Accessories

Small marble accessories instantly lift your space. Soap dishes, trays, or containers provide cohesion without major renovations. These items are affordable and easy to replace if you want a seasonal refresh. Their subtle elegance complements larger marble features in the room.


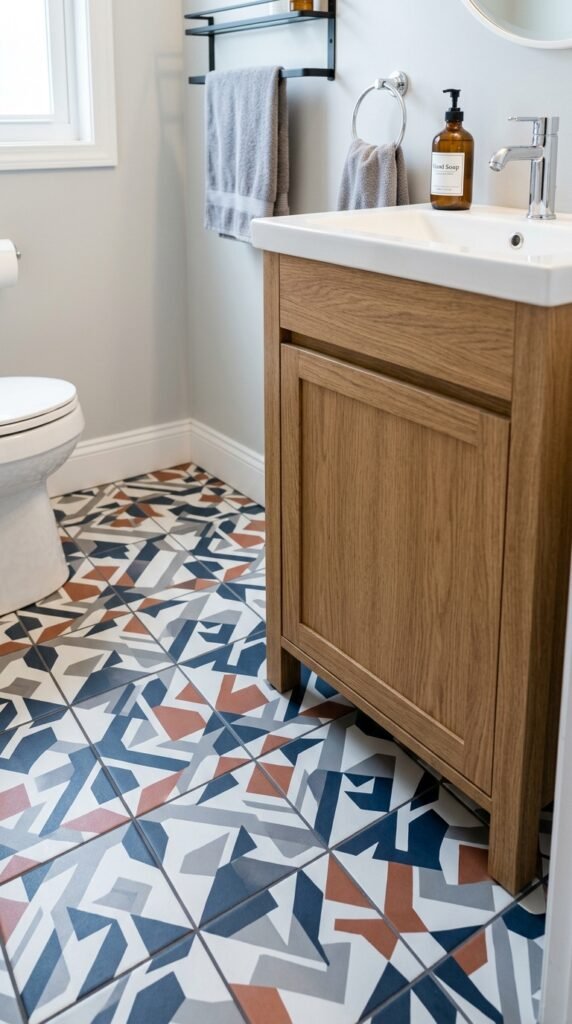
14. Marble Tile Patterns for Visual Interest

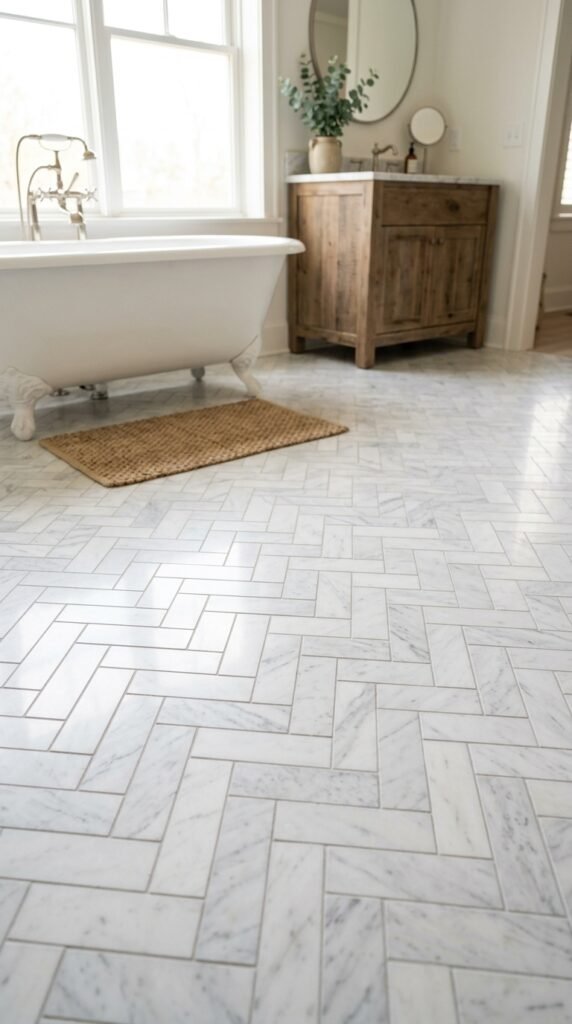
Using patterns like herringbone or chevron adds interest to marble surfaces. Even with a small area, patterned tiles break monotony. For DIY, pre-cut herringbone marble tiles make installation easier. Patterns also guide the eye, making the space feel larger and more dynamic.


15. Marble-Look Countertop Paint

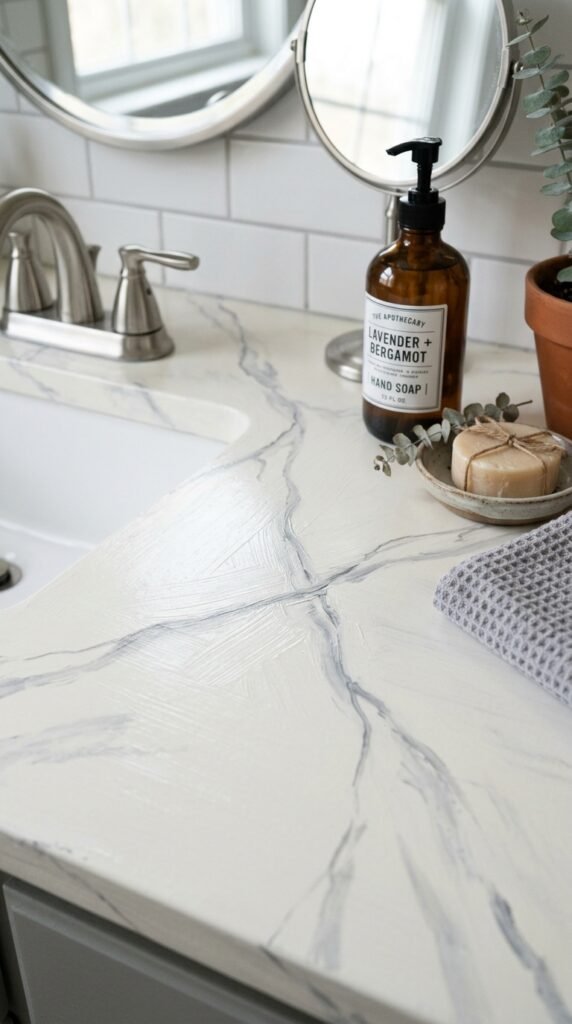
Marble-effect paint offers a budget-friendly option to refresh old counters. With a few layers and light veining, you can imitate marble at a fraction of the cost. This is perfect for renters or short-term upgrades. Seal the surface for durability and easy cleaning.


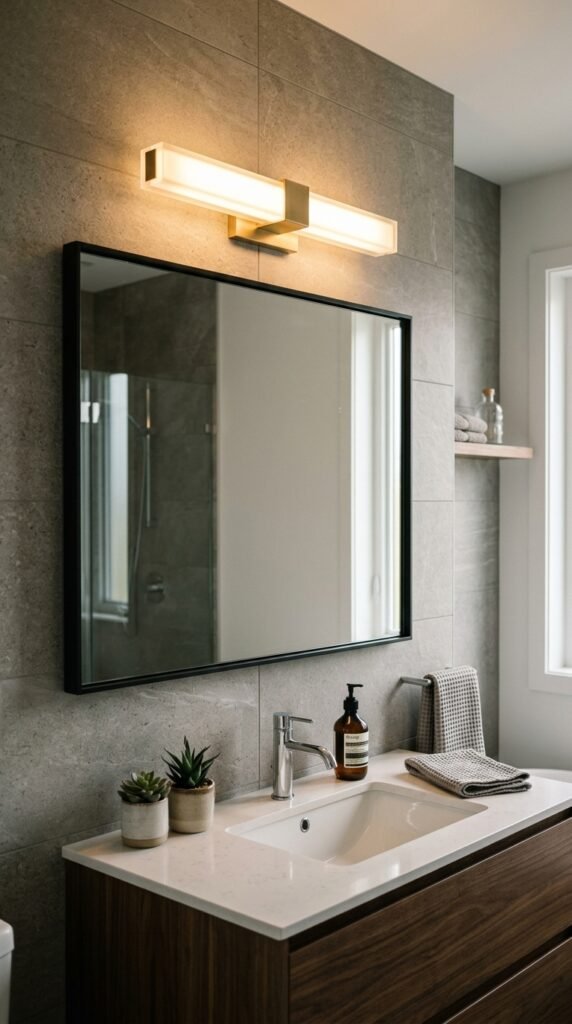
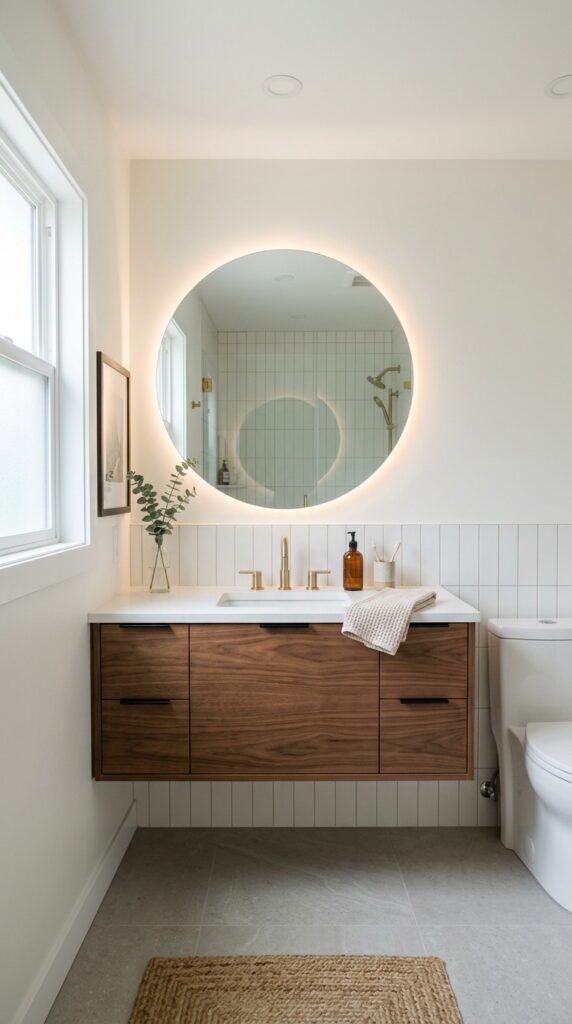
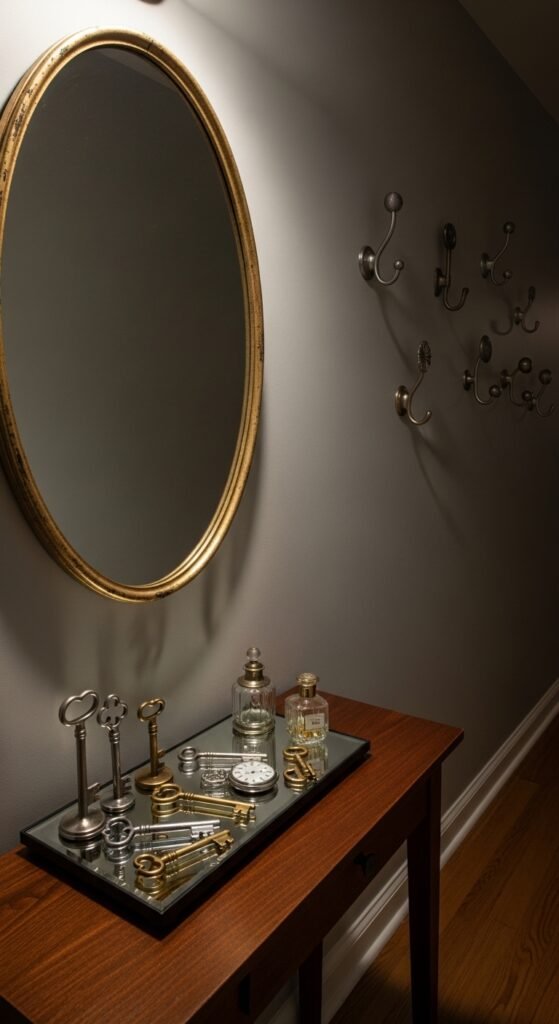
16. Marble Mirror Frame

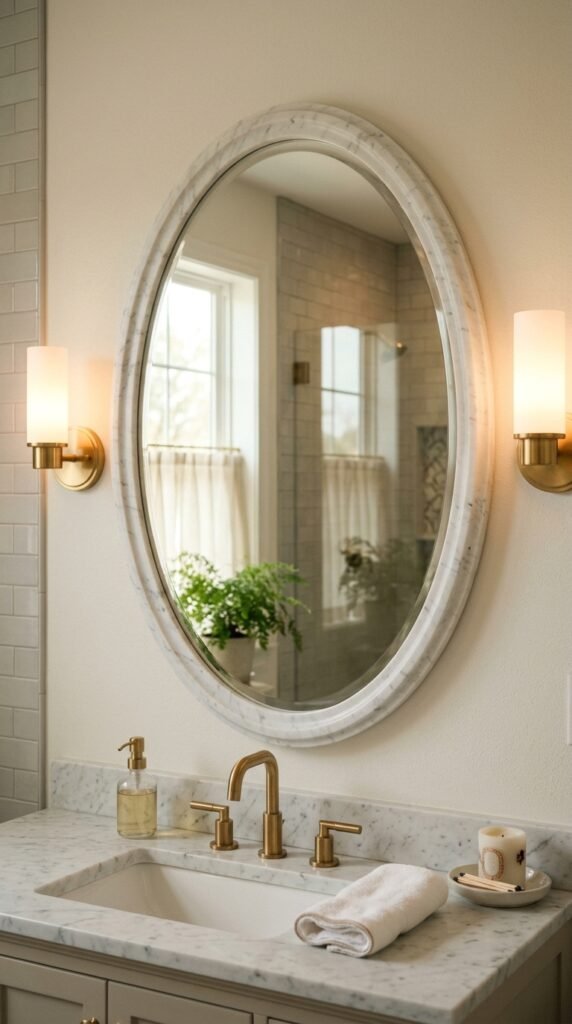
A marble-framed mirror adds elegance without replacing your vanity. Use adhesive marble sheets for a DIY frame upgrade. Mirrors reflect light, enhancing marble’s brightness. Choose a simple frame to maintain a clean, timeless look that complements your bathroom’s overall aesthetic.


17. Marble Shower Threshold

A marble shower threshold is a subtle but effective upgrade. It separates wet areas while adding a polished touch. Small slabs or cut tiles fit most showers. This upgrade is easy to install and instantly improves the bathroom’s visual flow.


18. Marble-Look Wallpaper for Accent Walls

Marble-effect wallpaper is a fast, low-cost alternative to real marble. Ideal for accent walls or behind vanities, it brightens the space. Peel-and-stick options simplify installation. Pair with minimal fixtures to ensure the wall remains a feature rather than a distraction.


19. Marble Soap or Lotion Dispensers

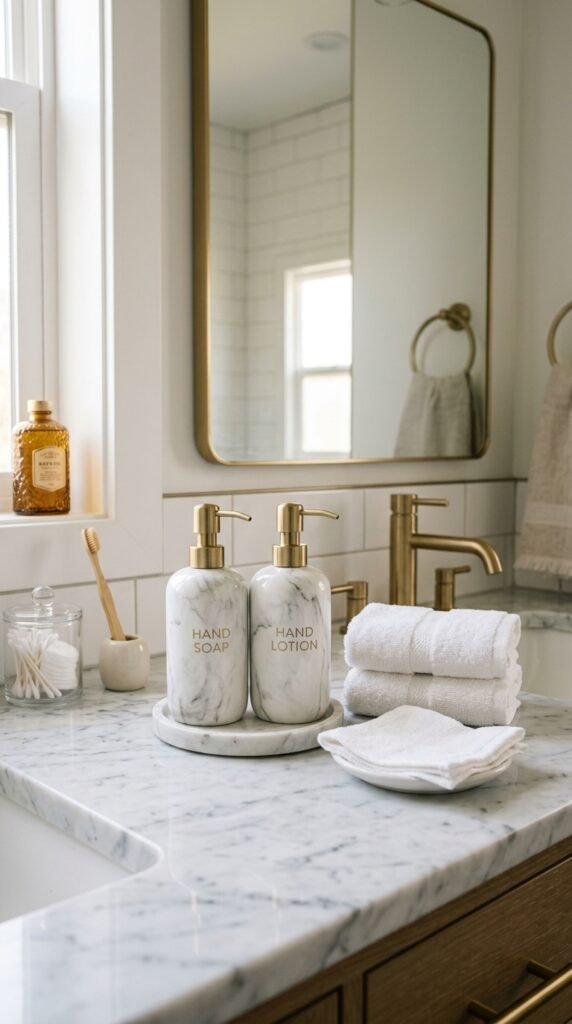
Upgrade small details with marble soap and lotion dispensers. They’re affordable, stylish, and add cohesion to the marble theme. Even if your main surfaces aren’t real marble, these accessories maintain a polished, unified look.


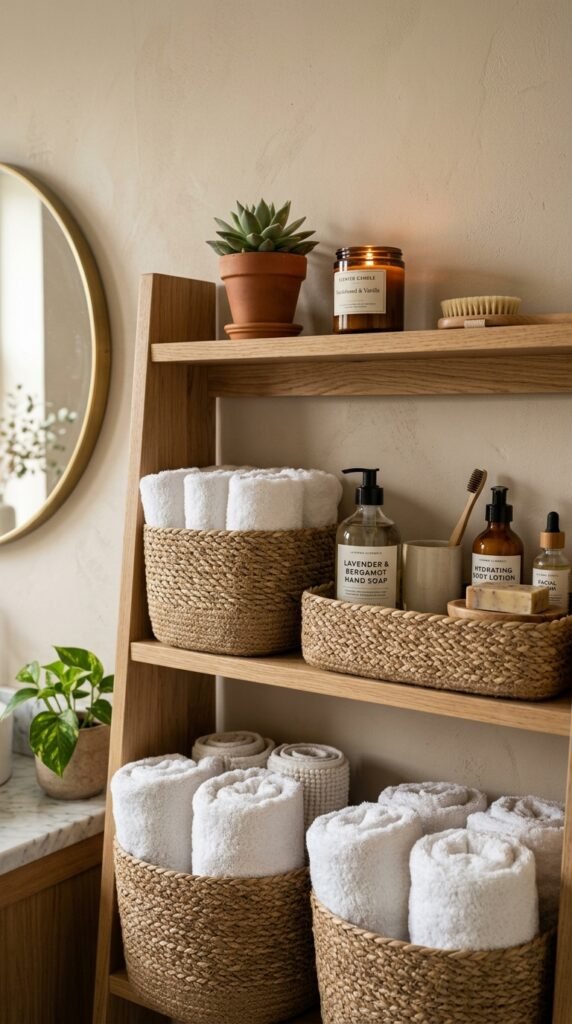
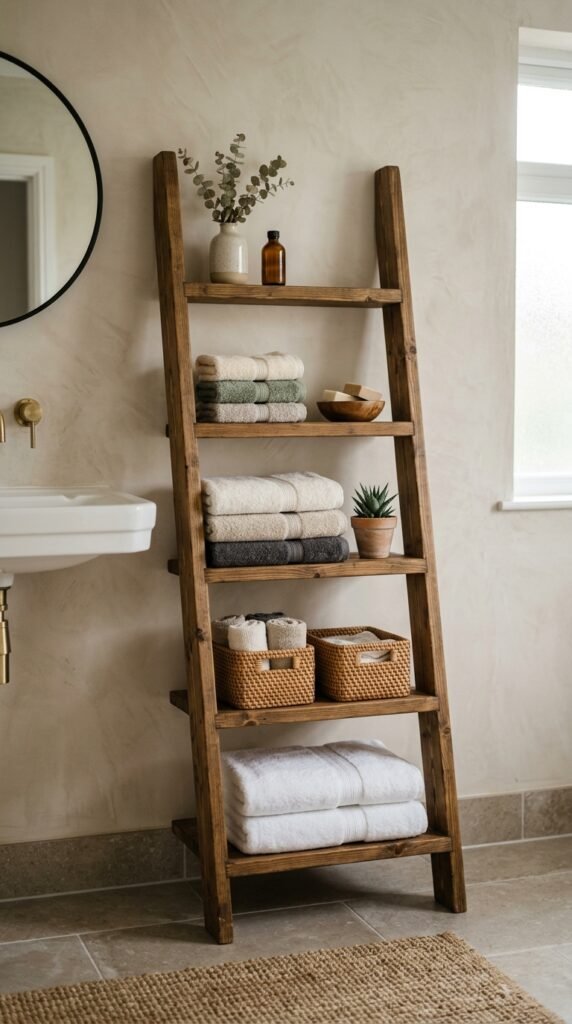
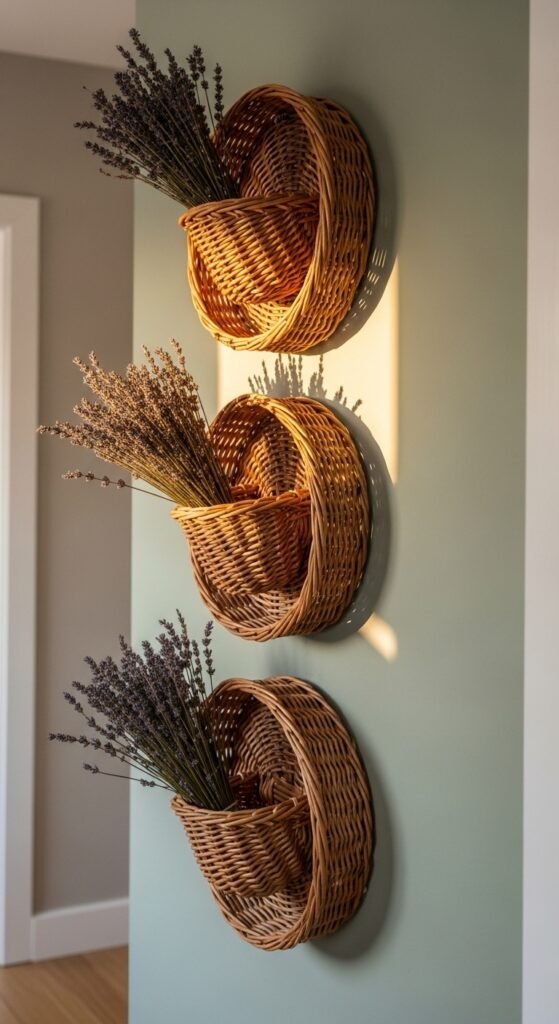
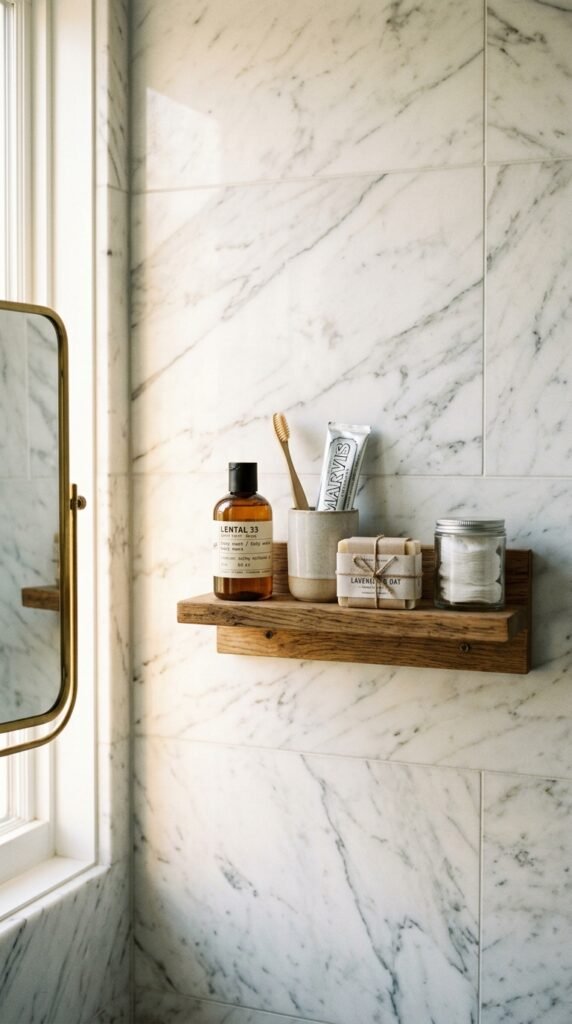
20. Marble Shelves in Shower or Tub Area

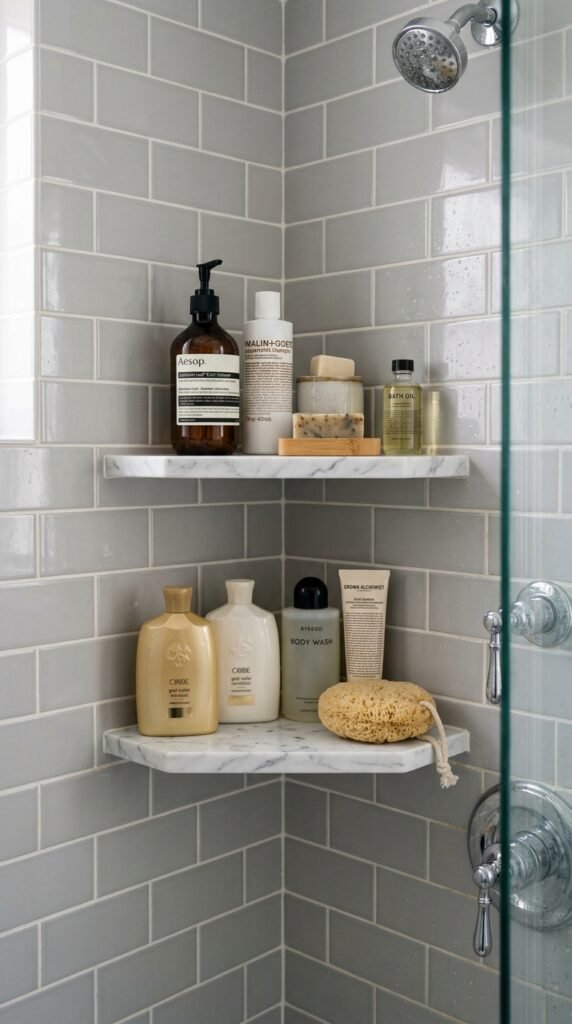
Marble shelves in wet areas combine elegance and function. They hold soaps, shampoos, or plants without cluttering. For DIY, cut small marble or marble-look tiles to size. Shelves reflect light and tie in other marble elements, enhancing the room’s bright aesthetic.


21. Marble Floor Mat Accent

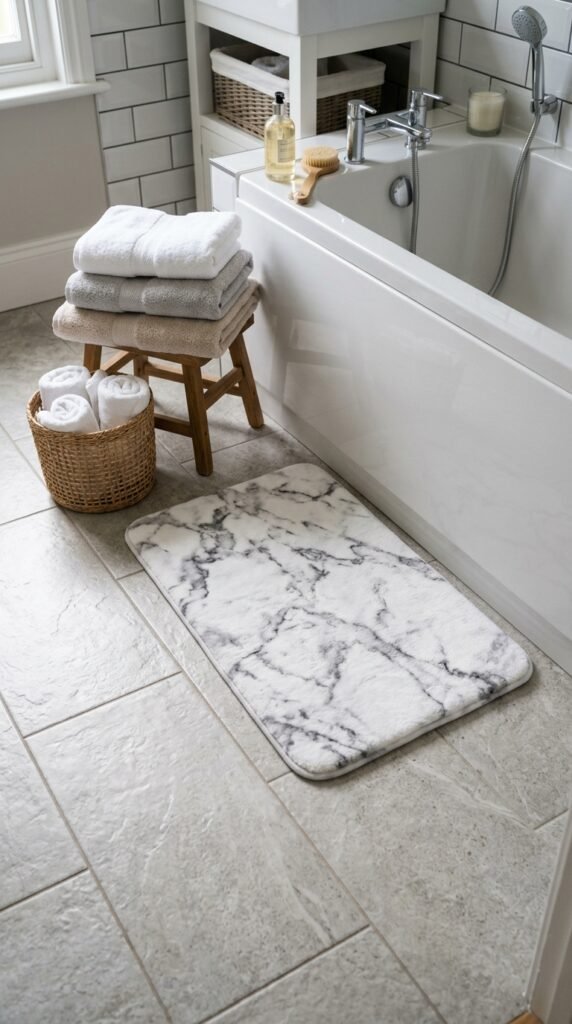
Even small touches like a marble-pattern mat can reinforce the theme. Lightweight and affordable, these mats are easy to replace and clean. They add continuity to your marble elements without overwhelming the space.


22. Marble Window Frames

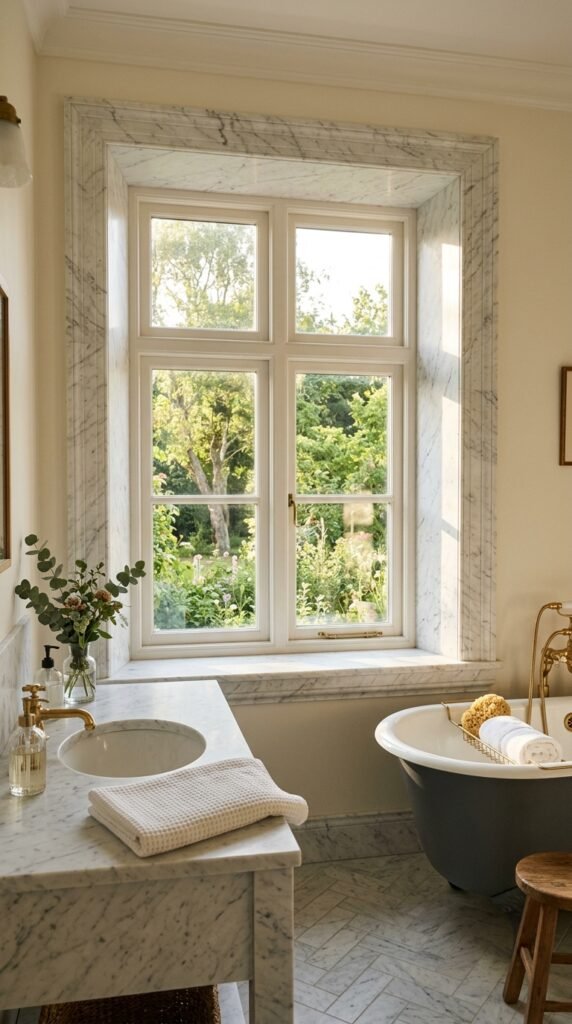
Consider marble window frames for a permanent, elegant upgrade. They enhance natural light reflection and complement marble counters or floors. For budget options, marble-look trims or laminates offer similar visual impact without full construction.


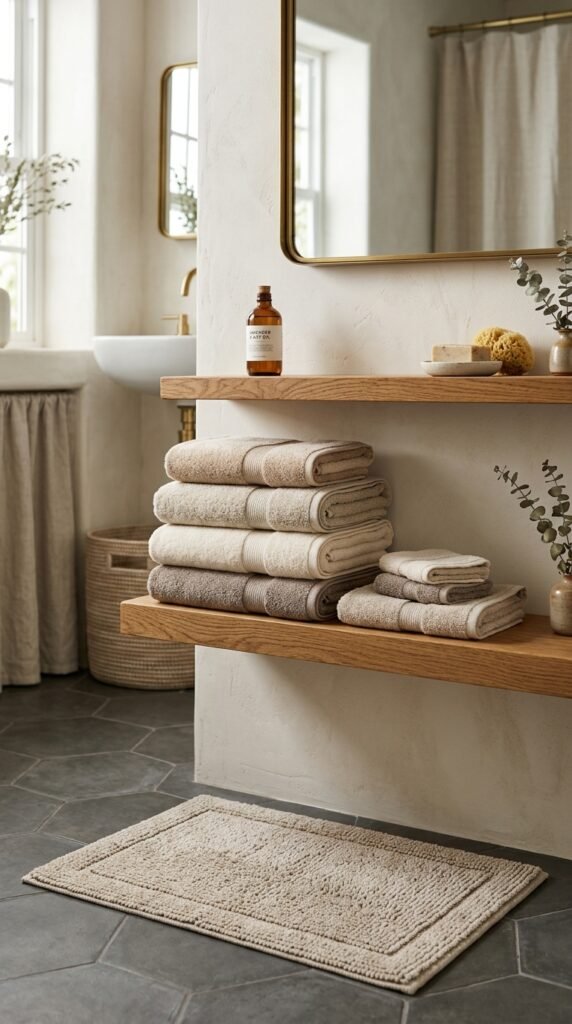
23. Layering Textures with Marble and Soft Linens

Pair marble surfaces with soft textiles like towels, rugs, or shower curtains. The contrast between smooth marble and cozy fabrics softens the room. This is an easy, low-cost way to keep the bathroom inviting and luxurious without large renovations.


Conclusion

White marble can transform a bathroom into a bright, timeless retreat. From full marble walls to small accessories, each detail contributes to a polished and welcoming space. By combining budget-friendly DIY projects with simple accents, you can create an elegant look without overspending. Try one or several of these 23 ideas to make your bathroom feel open, luminous, and effortlessly stylish.


Claire Anderson

20 Creative Marble Bathroom Decor Ideas for a Polished Designer Finish


Marble bathrooms instantly give a sense of style and elegance. But achieving a designer finish doesn’t mean spending a fortune. Small changes in decor, accessories, and layout can make a big impact. From subtle DIY upgrades to smart styling tricks, these ideas focus on practical, budget-friendly ways to highlight marble’s natural beauty. Whether you’re updating a small powder room or revamping a master bath, these tips will help your space feel polished, luxurious, and approachable.


1. Mix Marble with Wood Accents

Combining marble with wood adds warmth and a natural touch. Even small wooden shelves or a wooden stool can break the cold look of marble. You can repurpose old wood planks for shelves or a stool to save money. A light oak or walnut tone works beautifully against white or gray marble. Add small plants on these shelves for a lively feel. This mix creates a balanced, designer-inspired vibe without large renovations. The wood draws attention to marble’s veins while keeping the space welcoming.


2. Create a Marble Feature Wall

A feature wall makes your bathroom look high-end instantly. Focus on the shower area or behind the vanity for maximum effect. You don’t need full coverage—removable marble tiles or vinyl marble panels are cost-effective alternatives. Arrange tiles vertically for a modern look, or diagonally for visual interest. Accent with minimal hardware and a neutral palette to highlight marble’s pattern. Even a single statement wall adds depth and a polished feel without major construction.


3. Add Marble-Top Vanities

Marble countertops elevate the vanity instantly. You can find affordable marble slabs or marble-look laminate options that mimic real stone. Keep accessories simple—soap dishes, a small vase, or hand towels complement the marble without clutter. Painting the vanity a soft gray or navy makes the marble stand out more. Small touches, like drawer handles in brass or chrome, enhance the overall look. A marble-top vanity is an easy way to get a designer-level update with minimal effort.


4. Use Marble Accessories

Not every surface needs marble. Accessories like trays, soap dishes, or containers can add marble accents affordably. Look for small items online or at home stores for a budget-friendly boost. Mixing marble with metallics, like gold or chrome, creates contrast. Even a few pieces strategically placed near the sink or shower add luxury. This is perfect for renters or anyone who wants a stylish update without permanent changes.


5. Install Marble Backsplashes

A backsplash instantly refreshes a bathroom. Choose marble slabs, tiles, or peel-and-stick options for a DIY-friendly project. Position behind the sink or along a vanity countertop. Keep grout lines minimal to make the marble pattern pop. Even a small backsplash draws attention to a key area and makes your bathroom feel elegantly finished. You can update colors of accessories to match the marble for a cohesive look.


6. Layer Marble with Mirrors

Mirrors amplify light and showcase marble’s beauty. Pair a marble vanity with a decorative mirror to create a focal point. Frameless mirrors provide a modern feel, while black or metallic frames create contrast. For a small bathroom, mirrored walls over marble surfaces add depth. DIY tip: use adhesive mirrors to save on installation. The combination of reflective surfaces with marble patterns gives a luxurious designer impression without a big budget.


7. Use Marble Flooring Patterns

Marble flooring sets the tone for the entire bathroom. You don’t need expensive large slabs; patterned tiles are budget-friendly. Hexagon or herringbone patterns add sophistication. Light-colored tiles make small spaces feel bigger, while darker tiles create drama. Combine with neutral walls and simple fixtures to highlight the floor. Even a small floor update can dramatically change the space.


8. Highlight Marble with Lighting

Good lighting brings out marble’s textures. LED strips under counters or around mirrors emphasize veins. Warm light adds coziness, while cooler light enhances modern elegance. Use dimmers for flexibility. Even inexpensive clip-on lights or stick-on LED strips can create a designer effect. Position lights to highlight features like a marble wall or countertop for maximum impact.


9. Incorporate Marble in Shelving

Floating marble shelves combine function with style. You can use small marble slabs from tile stores and attach them to walls with brackets. They hold essentials like soaps, towels, or plants. Pair with wooden or metallic accents for contrast. This DIY trick is affordable and makes the bathroom feel curated and polished without clutter.


10. Add Marble Shower Niches

Shower niches keep products organized and stylish. Marble-lined niches are simple to DIY using smaller tiles or slabs. They prevent clutter and enhance the bathroom’s luxurious feel. Keep edges clean and grout minimal for elegance. Adding small LED lights inside the niche gives it a spa-like effect. This inexpensive change makes marble functional and visually appealing.


11. Combine Marble with Brass Fixtures

Brass or gold fixtures pair beautifully with marble. Faucets, towel racks, and handles create contrast. Even a single brass element elevates the look. Affordable taps are available online or in hardware stores. Keep surrounding accessories simple so the fixtures shine. The marble-plus-metal combo instantly reads designer without a full remodel.


12. Marble Wall Panels

Wall panels are cost-effective for a seamless look. Stick-on or lightweight panels save time and money. Focus on small areas like the shower or behind the vanity. Minimal grout makes the marble look expansive and polished. Panels are great for renters or DIYers aiming for a high-end finish without heavy construction.


13. Mix Marble with Matte Finishes

Glossy marble with matte cabinetry or tiles creates contrast. Matte finishes prevent the bathroom from feeling too sterile. Paint or laminate cabinets for a budget-friendly update. The mix adds depth and highlights marble surfaces. Even a single matte element, like a black drawer front, can make marble feel more curated and designer-friendly.


14. Use Marble Planters

Plants soften marble’s coldness. Small marble planters on counters or shelves are affordable and stylish. DIY: use marble-look spray paint on terracotta pots. The green of plants complements marble veins. Even a few touches of greenery make the bathroom feel lively and sophisticated.


15. Marble Towel Holders

Towel holders are functional decor. Marble or marble-look holders reinforce the theme without clutter. Pair with brass or black hooks for contrast. DIY options include cutting marble tiles to size or using marble slabs from craft stores. Small details like this enhance the overall designer feel.


16. Marble Soap Trays and Dispensers

Soap trays and dispensers are tiny but impactful. Choose pieces that complement countertop colors. Affordable options include marble-effect ceramics. Keep only essentials on display to avoid clutter. Even subtle touches like this reinforce a cohesive, polished bathroom look.


17. Marble Bathtub Surround

Wrap a bathtub in marble or marble tiles for instant drama. You can use peel-and-stick tiles for a budget solution. The surround acts as a small ledge for candles or bath products. Simple touches like a bath pillow or rolled towels complete the look. This small investment makes a bath area feel luxurious and intentional.


18. Marble Accent in Flooring

Accent tiles break monotony and add interest. Use marble in borders, patterns, or inserts in plain flooring. You can DIY by mixing plain tiles with small marble hexagons. Even subtle accents give a designer-finished vibe at a fraction of the cost of full marble floors.


19. Layer Marble with Textiles

Textiles soften marble’s look. Rugs, towels, and shower curtains in neutral or contrasting colors add warmth. Choose textures that complement marble, like cotton, linen, or woven materials. This is a cost-effective way to introduce personality while keeping the marble elegant. Even small textile swaps update the room instantly.


20. Marble-Look Wallpaper

Wallpaper is a fast, affordable alternative to tiles. Choose realistic marble patterns for walls or small accent sections. Peel-and-stick options make installation easy and renter-friendly. Pair with simple hardware and mirrors to avoid overwhelming the space. Wallpaper can transform a room quickly and give the polished appearance of real marble.


Conclusion

Marble doesn’t have to be expensive to feel luxurious. Small updates, thoughtful decor, and strategic accents can make any bathroom look polished and designer-ready. From affordable accessories to DIY upgrades, these ideas show that style and practicality can coexist. Start with one or two changes, experiment with combinations, and enjoy a marble bathroom that looks elegant without breaking the bank.


Claire Anderson

27 Budget-Friendly Modern Small Bathroom Ideas for an Affordable Makeover

Small bathrooms can feel cramped and outdated, but a stylish update does not have to cost a lot. With smart choices, simple materials, and a little DIY effort, even the smallest bathroom can feel modern and comfortable. The key is focusing on small details that create a big visual impact. Paint, lighting, storage tricks, and affordable decor can transform the entire space.

Many homeowners assume renovations must be expensive. That is not true. Simple updates such as new hardware, better lighting, and clever storage can dramatically change how a bathroom looks and feels. These ideas focus on practical changes you can actually complete without hiring professionals or spending a large budget.

Below are 27 realistic and affordable modern small bathroom ideas that can help you create a cleaner, brighter, and more stylish space without overspending.


Paint the Walls a Light Neutral Color

A new coat of paint is one of the easiest and cheapest ways to transform a small bathroom. Light neutral colors instantly make the space feel bigger and brighter.

Soft shades such as warm white, pale gray, or light beige work very well. They reflect light and reduce the boxed-in feeling common in small bathrooms.

Paint is inexpensive and beginner friendly. Even a weekend DIY project can completely change the room.

Start by cleaning the walls and using painter’s tape along edges. Apply a moisture-resistant bathroom paint so it holds up against humidity.

For extra style, paint the ceiling the same shade as the walls. This removes visual breaks and makes the room feel taller.

Pair the light paint with simple decor and clean surfaces. A light background also makes mirrors and fixtures stand out more.

A gallon of paint costs far less than a renovation, yet the visual difference is dramatic.

Small effort. Big result.


Install a Floating Vanity

Floating vanities are popular in modern bathrooms for a good reason. They free up floor space and create a more open look.

Instead of a bulky cabinet touching the floor, the vanity mounts directly on the wall. The empty space underneath makes the room feel larger.

Budget options are widely available. Many affordable floating vanities come ready to install.

You can also convert a standard cabinet into a floating style by mounting it securely to wall studs.

The area underneath can store baskets or a small bin for towels. This keeps the bathroom organized without adding clutter.

Light wood finishes look modern and warm. White cabinets create a bright and clean look.

Pair the vanity with a simple round mirror and basic lighting for a balanced design.

A floating vanity instantly makes the room feel updated without changing the entire layout.


Add Peel-and-Stick Floor Tiles

Floor replacement sounds expensive, but peel-and-stick tiles offer an easy solution.

These tiles install directly over many existing surfaces. No complicated tools or professional help required.

Patterns such as geometric designs, marble looks, or classic black and white styles can completely change the room.

Many homeowners install them in a single afternoon.

Start by cleaning the floor thoroughly. Measure carefully and cut tiles with a utility knife.

Press each tile firmly so it sticks well. The process is simple and beginner friendly.

These tiles are water resistant and designed for bathroom use.

A bold floor pattern adds personality while the rest of the room stays simple.

This creates a modern look without spending hundreds on new flooring.

Affordable, fast, and visually impactful.


Use Open Shelving for Storage

Storage is always limited in small bathrooms.

Open shelving solves the problem while adding style.

Simple wooden shelves above the toilet or beside the sink provide space for towels, baskets, and toiletries.

You can install them with basic brackets and a power drill.

Light wood shelves feel warm and modern. White shelves blend seamlessly with light walls.

Keep the shelves tidy. Fold towels neatly and use small baskets for items like hair tools or extra soap.

A small plant or candle can add a relaxing touch.

Open shelving costs very little yet creates useful storage space.

It also helps keep the room organized, which is key in small areas.


Upgrade to a Large Round Mirror

Mirrors dramatically change how a small bathroom feels.

A large round mirror reflects light across the room and adds modern style.

Round shapes soften the space compared to square mirrors.

They work well above compact vanities and help the room appear wider.

Budget mirrors are easy to find in home stores or online.

Installation usually requires only two wall anchors and screws.

Choose a simple black frame for contrast. Gold or brushed metal frames add warmth.

The mirror becomes a focal point without taking up extra space.

It is a simple update with strong visual impact.


Replace Old Cabinet Hardware

Small details matter in modern bathrooms.

Old handles and knobs can make the entire vanity look outdated.

Replacing them with modern hardware is quick and affordable.

Matte black, brushed brass, or simple chrome styles look clean and modern.

You only need a screwdriver to swap them.

Most hardware sets cost very little yet instantly update cabinets.

Try matching the hardware with the faucet or towel bars for a coordinated look.

This tiny change can make older furniture look brand new.


Hang a Simple Shower Curtain

A shower curtain can change the mood of the room.

Choose a simple design in white, soft gray, or subtle patterns.

Avoid busy prints that crowd the space.

A clean curtain keeps the bathroom looking calm and modern.

Pair it with a black or metal curtain rod for contrast.

Fabric curtains also feel more stylish than plastic liners alone.

This update is quick and affordable.


Install Wall Hooks Instead of Towel Bars

Wall hooks are practical in small bathrooms.

They take up less space than long towel bars and hold multiple items.

Hooks can be installed behind the door or beside the shower.

They cost very little and install in minutes.

Black or metal hooks add a modern touch while keeping towels organized.


Add a Small Indoor Plant

Plants make bathrooms feel calm and welcoming.

Choose low-light plants such as pothos or snake plants.

Place one on the vanity or a shelf.

Green leaves add life to neutral bathrooms.

A small plant costs little yet improves the room’s overall look.


Use Baskets for Hidden Storage

Baskets hide clutter while keeping items accessible.

Place them under the vanity or on open shelves.

Use them for towels, extra toilet paper, or grooming tools.

Woven baskets add texture and warmth.

They are inexpensive and easy to move around.


Install Stick-On LED Mirror Lighting

Good lighting changes how a bathroom feels.

Stick-on LED strips around a mirror provide bright, even light.

They install without wiring.

Many sets run on batteries or USB power.

This simple update makes the space feel modern.


Try a Minimalist Color Palette

Small bathrooms benefit from simple color schemes.

Use two or three colors only.

White, gray, wood, and black work well together.

Fewer colors create a calm and organized look.

Paint, towels, and accessories can follow the same palette.


Replace the Faucet

A new faucet makes the sink area feel modern.

Many affordable models install easily using basic tools.

Black or brushed metal finishes look clean and stylish.

The change takes less than an hour for most DIYers.


Use Vertical Storage Cabinets

Tall cabinets use vertical space efficiently.

They fit well in narrow corners.

Shelves inside can store toiletries and cleaning items.

This keeps counters clear and organized.


Add Framed Wall Art

Wall art adds personality without taking floor space.

Choose calm colors and simple designs.

One or two frames are enough for small rooms.

Affordable prints work perfectly.


Install a Slim Towel Ladder

Towel ladders are stylish and practical.

They lean against the wall and require no installation.

They hold several towels while taking little space.

Light wood styles match modern bathrooms well.


Replace Old Lighting Fixtures

Old lighting can make bathrooms look dated.

Swap it for a simple modern fixture.

Better lighting improves daily routines like shaving or makeup.

Many fixtures install using existing wiring.


Use Matching Storage Containers

Matching containers keep countertops tidy.

Glass jars work well for small items.

They create a clean and organized appearance.

Budget stores offer many affordable options.


Add a Narrow Rolling Cart

Rolling carts fit into tight spaces.

They provide extra storage beside the sink or toilet.

The wheels make them easy to move when cleaning.

Metal carts are durable and inexpensive.


Try Peel-and-Stick Wall Panels

Peel-and-stick panels add texture quickly.

Use them behind the sink or along one wall.

They mimic tile or stone without heavy installation work.

This is a simple weekend project.


Install a Corner Shelf

Corner shelves use space that normally goes unused.

They are great inside showers or beside sinks.

Installation takes only a few screws.

They add useful storage without crowding the room.


Use Neutral Towels and Mats

Textiles affect the overall look of the room.

Neutral towels create a calm style.

White, beige, or gray options match almost any design.

They also make the bathroom feel clean and tidy.


Add a Frameless Glass Shower Panel

Frameless panels make small bathrooms feel larger.

They allow light to move across the room.

Simple glass panels cost less than full enclosures.

The result feels clean and modern.


Replace the Toilet Seat

Old seats can look worn.

Replacing one takes only minutes.

New designs feel cleaner and match modern bathrooms better.

It is one of the easiest updates possible.


Install a Small Accent Tile Backsplash

A backsplash protects the wall while adding style.

Peel-and-stick tile sheets make installation simple.

Use them behind the sink area.

This small section adds visual interest.


Keep the Countertop Minimal

Less clutter makes small bathrooms feel larger.

Store extra items in cabinets or baskets.

Keep only daily essentials on the counter.

This simple habit keeps the room tidy.


Use Coordinated Accessories

Matching accessories tie the room together.

Choose simple materials like ceramic or glass.

Soap dispensers, trays, and holders can match in color.

These small details complete the look.


Conclusion

A stylish bathroom makeover does not require a large renovation budget. Small improvements like new paint, better lighting, clever storage, and updated hardware can completely change the look of the room. Many of these ideas take only a few hours and basic tools. Pick two or three projects and start there. Over time, these simple upgrades can turn even the smallest bathroom into a modern and comfortable space that feels organized, bright, and welcoming.

Claire Anderson

20 Gorgeous Modern Small Master Bathroom Ideas for a Luxurious Update

A small master bathroom does not have to feel cramped or plain. With the right layout choices, lighting tricks, and simple design upgrades, even the smallest space can feel calm, polished, and comfortable. Modern design focuses on clean lines, smart storage, and light colors that visually expand the room.

Many updates do not require a full renovation. A few DIY adjustments such as floating shelves, improved lighting, or a new mirror can quickly change the feel of the space. The ideas below focus on practical improvements that work in real homes and real budgets.

Each idea shows how small adjustments can help a compact master bathroom feel organized, stylish, and relaxing.


Floating Vanity for an Airy Look

A floating vanity makes a small master bathroom feel larger almost instantly. Because the cabinet sits off the floor, more tile remains visible. That open space creates the illusion of a wider room.

Many homeowners install floating vanities as a weekend upgrade. Wall-mounted cabinets are widely available in compact sizes. Pair one with a slim countertop and a single sink to save space.

Underneath the vanity, you can place small baskets. These hold extra towels or toiletries without cluttering the countertop.

Lighting also matters here. A round mirror above the vanity reflects more light around the room. Wall sconces on both sides create balanced lighting for daily routines.

A simple DIY step is replacing bulky hardware with sleek matte black or brushed metal handles. Small details make the vanity feel modern.

Budget tip: Look for ready-made floating vanities at home improvement stores. Many cost far less than custom cabinets and still provide storage.

The result feels open, clean, and organized. Perfect for a compact master bathroom.


Frameless Glass Shower Panels

Traditional shower curtains or framed enclosures break up visual space. Frameless glass panels remove that barrier and make the bathroom feel wider.

Clear glass allows the eye to travel across the room without interruption. Even in a very small bathroom, this creates a calmer layout.

If a full enclosure feels expensive, a single glass panel works well for walk-in showers. Many homeowners install them themselves using simple mounting brackets.

Use large tiles inside the shower so the design flows across the room. Matching floor and shower tiles make the space appear longer.

A rainfall shower head adds a relaxing feel without taking extra room. Wall niches inside the shower hold soap and bottles neatly.

Budget tip: Instead of custom glass, many stores sell standard-size panels that cost much less.

Keep the glass looking clean with a quick wipe after showers. This small habit prevents water spots.

The end result feels modern and uncluttered while still practical for everyday use.


Light Marble or Stone Tiles

Light stone tiles help brighten a small bathroom. White or soft gray surfaces reflect light and make the room appear larger.

Marble-style tiles are widely available in porcelain versions. These cost less and require less maintenance than real stone.

Use the same tile on both the floor and shower walls. This keeps the design simple and continuous.

Large tiles work best in small bathrooms. Fewer grout lines create a cleaner look.

For a budget-friendly update, consider marble-pattern peel-and-stick wall panels behind the vanity. They add texture without full renovation work.

Pair the tile with warm lighting so the room feels comfortable instead of cold.

Small touches like matching soap dispensers or folded white towels add a calm spa feeling.

A bright tile palette keeps the room looking clean and polished year-round.


Wall Niches for Hidden Storage

Storage is often the biggest challenge in a small master bathroom. Wall niches solve this without taking extra space.

These recessed shelves sit inside the wall between studs. They hold everyday items while keeping surfaces uncluttered.

A shower niche is one of the most useful additions. It keeps soap and shampoo within reach without hanging caddies.

You can also add a niche beside the vanity for small items like skincare products.

DIY versions are available as pre-built inserts. These slide into the wall and tile around easily.

For style, use accent tile inside the niche. A darker color or mosaic pattern adds contrast.

LED strip lighting inside a niche adds a soft glow and makes the space feel polished.

This simple feature keeps the bathroom tidy while adding visual interest.


Oversized Mirror to Expand the Room

Mirrors are one of the easiest tricks for making a small bathroom feel bigger.

An oversized mirror above the vanity reflects light and doubles the sense of space.

Instead of a small framed mirror, try a wall-to-wall mirror panel. It visually stretches the room.

Many homeowners install mirror sheets themselves using adhesive backing.

Add soft LED lighting around the mirror edges. This improves visibility while creating a calm atmosphere.

Round mirrors also work well in tight bathrooms. Their shape softens the room’s lines.

Keep the countertop simple so the mirror reflection does not look cluttered.

Budget tip: Home improvement stores sell affordable mirror panels that can be cut to size.

A large mirror instantly makes a compact bathroom feel brighter and more open.


Vertical Storage Cabinets

Floor space disappears quickly in small bathrooms. Vertical storage solves this problem.

Tall cabinets use wall height instead of width. This keeps the layout comfortable.

A slim cabinet beside the vanity can store towels, cleaning supplies, and toiletries.

Open shelving at the top adds display space for small decor like plants or candles.

Closed cabinet doors below hide less attractive items.

DIY builders often convert narrow bookcases into bathroom storage by adding moisture-resistant paint.

Hooks on the cabinet side can hold robes or extra towels.

Choose light colors so the cabinet blends into the wall instead of feeling bulky.

This simple storage idea keeps the bathroom organized without sacrificing walking space.


Soft LED Lighting Layers

Lighting changes how a small bathroom feels. A single ceiling light often leaves shadows.

Layered lighting creates a calm and balanced environment.

Start with ceiling spotlights for general brightness.

Add LED strips behind the mirror for gentle glow lighting.

Under-vanity lights create a floating effect and add soft nighttime illumination.

Many LED strips come with adhesive backing and plug-in power supplies. Installation is simple.

Choose warm white lighting instead of cool blue tones. The space feels more comfortable.

Motion sensor lights under the vanity are useful during the night.

Good lighting improves both function and style in a compact bathroom.


Compact Double Sink Vanity

Couples often want two sinks even in a small master bathroom. Compact double vanities make this possible.

Look for narrow sinks with slim spacing between them.

Wall-mounted faucets also save countertop space.

Drawers under each sink help keep personal items separated.

If the bathroom width is limited, consider a floating double vanity. It keeps the floor visible and the room open.

DIY tip: Convert a long dresser into a vanity by adding two small sinks.

Simple organizers inside drawers keep everything tidy.

Even in a compact bathroom, shared routines become easier with two sinks.


Large Format Floor Tiles

Small tiles create many grout lines that visually shrink a bathroom.

Large format tiles solve that problem.

Because there are fewer lines, the floor appears smoother and more open.

Rectangular tiles laid in a straight pattern help lengthen the room visually.

Choose light gray or beige tones for a calm look.

Many homeowners install click-lock tile systems that simplify DIY installation.

Grout colors that match the tile create a seamless effect.

Large tiles make cleaning easier as well.

This small design change can dramatically improve the overall feel of the space.


Built-In Towel Shelves

Built-in shelves keep towels organized while saving cabinet space.

These shelves fit between wall studs and sit flush with the wall.

They work well above the toilet or beside the shower.

Roll towels instead of folding them. This makes the shelves look tidy.

Wood shelves add warmth against light tile walls.

DIY wall niche kits simplify installation for homeowners.

Add a small plant or decorative basket for visual balance.

Built-in shelving helps maintain a clean and organized bathroom.


Matte Black Fixtures

Matte black fixtures bring a modern touch to any small bathroom.

They contrast nicely against white or marble surfaces.

Replacing faucets, towel bars, and drawer handles is a simple upgrade.

Many homeowners complete this project in a single afternoon.

Matte finishes hide fingerprints better than shiny metal.

Pair the fixtures with matching shower hardware for a cohesive style.

Even a small change like this can transform the room’s appearance.


Neutral Color Palette

Neutral colors make small bathrooms feel calm and open.

White walls reflect light and visually expand the space.

Beige and light gray add warmth without overwhelming the room.

Keep accessories simple so the palette stays consistent.

DIY painting projects are one of the easiest upgrades.

Use moisture-resistant bathroom paint for durability.

A neutral palette helps the space remain timeless.


Compact Walk-In Shower

Walk-in showers remove bulky doors and tubs.

This opens more floor space in a small bathroom.

A single glass panel prevents water splashes while keeping the layout open.

Use linear floor drains to simplify the shower floor design.

Wall niches provide storage without adding shelves.

Many homeowners convert old bathtubs into walk-in showers during remodels.

The room feels larger and easier to clean.


Warm Wood Accents

Wood accents bring warmth into modern bathrooms.

A wood vanity or shelving balances cool tile surfaces.

Choose sealed or water-resistant wood materials.

Even small pieces like a wooden tray or stool add texture.

DIY floating wood shelves are simple to install.

Natural materials make the space feel more inviting.


Hidden Drawer Organizers

Clutter quickly fills bathroom drawers.

Drawer organizers keep everything in place.

Small compartments hold brushes, razors, and skincare items.

Expandable plastic trays fit most drawers.

DIY wooden dividers also work well.

When items stay organized, countertops remain clean.

This simple habit keeps the bathroom tidy every day.


Minimal Decor Styling

Small bathrooms benefit from simple decor.

A plant, a candle, and folded towels often work well.

Too many items make the room feel crowded.

Choose accessories that match the color palette.

Neutral ceramic containers look clean and modern.

Minimal styling keeps the focus on the design itself.


Pocket Door Entry

Swing doors take up space.

Pocket doors slide into the wall instead.

This frees valuable floor area.

Many homeowners install sliding barn-style doors for a simpler alternative.

The change improves movement inside the bathroom.


Wall Mounted Toilet

Wall mounted toilets make floors easier to clean.

They also save visual space.

The tank hides inside the wall.

This gives the bathroom a streamlined appearance.

The floor beneath remains open, which helps the room look larger.


Backlit Mirror Feature

Backlit mirrors provide gentle lighting.

They remove the need for bulky fixtures.

Many models plug into standard outlets.

DIY installation takes very little time.

Soft lighting creates a relaxing atmosphere during evening routines.


Slim Freestanding Storage Ladder

A ladder shelf adds storage without heavy cabinets.

Lean it against the wall beside the vanity.

Towels fit nicely on each rung.

Small baskets hold toiletries.

The design keeps the room light and open.


Conclusion

A small master bathroom can still feel comfortable, organized, and stylish. Simple layout adjustments, smart storage, and clean design choices make a noticeable difference. Many of these ideas require only small DIY updates or affordable materials. Start with one change such as better lighting, a floating vanity, or improved storage. Gradually add other improvements until the space feels calm, practical, and polished.

Claire Anderson

24 Stunning Victorian Living Room Ideas for an Elegant Home Makeover


victorian living room

Victorian living rooms are all about charm, warmth, and timeless elegance. Even small touches can transform your space into a classic retreat. From cozy seating arrangements to intricate décor, there’s room to create sophistication without overspending. This guide offers practical, budget-friendly ideas to bring Victorian style into your home, blending rich textures, patterns, and colors with simple DIY and thrifty solutions. Let’s make your living room feel both elegant and inviting.


1. Embrace Velvet Seating

Embrace Velvet Seating

Velvet instantly adds luxury without major renovation. Look for second-hand shops or online marketplaces for affordable velvet chairs or sofas. Mix rich colors like deep green, burgundy, or navy to match classic Victorian palettes. Add throw pillows with floral or damask patterns for extra charm. Even a single velvet armchair can become the room’s focal point. For DIY, cover an old chair with velvet fabric using simple staples and cushions. Keep surrounding furniture minimal to let the plush texture shine. A floor lamp or small side table nearby completes the cozy corner.


2. Layer Persian-Style Rugs

Layer Persian-Style Rugs

Rugs are a cost-effective way to add Victorian warmth. Look for vintage or second-hand Persian-style rugs to bring patterns and color depth. Layering two rugs can create a lush, textured feel. Choose rugs in reds, blues, or golds to echo Victorian interiors. Keep furniture arrangement simple, letting the rugs anchor seating areas. DIY tip: if a full-size rug is pricey, combine smaller runners to mimic the layered effect. Rugs also soften hardwood floors and provide a visual break between furniture, making the space feel more inviting and authentic.


3. Display Ornate Mirrors

Display Ornate Mirrors

Mirrors expand light and add classic Victorian elegance. Opt for ornate or gilded frames, even budget-friendly ones from thrift stores. Hang above mantels or sofas for maximum impact. Mirrors can also reflect your favorite artwork or chandelier, creating a layered decorative effect. DIY idea: repaint an old wooden frame with gold or silver spray paint and distress slightly for an antique look. Place small table mirrors on sideboards or shelves for additional sparkle. A few well-positioned mirrors instantly make your living room feel brighter and more polished.


4. Add Decorative Molding

Add Decorative Molding

Molding gives walls instant character. Crown molding, wainscoting, or ceiling medallions create the traditional Victorian structure. You don’t need expensive carpentry—foam or MDF molding is lightweight and easy to paint. Apply chair rails along walls to divide color or wallpaper sections. Even adding a small frame molding around doorways lifts the space. Paint molding in a slightly lighter or darker shade than the wall for subtle contrast. Simple DIY installation kits and tutorials make this an affordable way to transform plain walls into Victorian features.


5. Introduce Patterned Wallpaper

Introduce Patterned Wallpaper

Victorian interiors love pattern. Floral, damask, or geometric wallpapers instantly add depth. For budget-friendly options, peel-and-stick wallpaper works without commitment. Apply on one accent wall behind a fireplace or sofa for dramatic effect. Pair with neutral furniture to balance bold patterns. Small DIY tip: combine wallpaper remnants in frames for artwork instead of covering a full wall. Even a partial wall can add that signature Victorian flair, creating a cozy yet elegant ambiance.


6. Incorporate Antique Cabinets

Incorporate Antique Cabinets

A vintage cabinet adds both function and style. Look for second-hand or thrifted antique cabinets to store books, décor, or curios. Dark woods like mahogany or walnut complement Victorian interiors. DIY touches like polishing or swapping old knobs can refresh pieces inexpensively. Place near seating for easy access to books or decorative items. A well-chosen cabinet acts as a statement piece, elevating the room’s character without breaking the budget.


7. Use Heavy Drapes

Use Heavy Drapes

Victorian windows deserve attention. Layer velvet or brocade curtains over sheer lace for texture and privacy. Choose warm tones that match rugs and seating. Affordable option: buy fabric and sew or use clip-on curtain rings. Floor-length drapes make ceilings look higher and rooms more dramatic. Tiebacks in tassels or ropes can create the finishing touch. Even budget-conscious rooms can achieve the classic Victorian elegance with smart curtain choices.


8. Feature a Marble or Faux Marble Fireplace

Feature a Marble or Faux Marble Fireplace

Fireplaces are the heart of a Victorian living room. If a real marble fireplace is costly, faux marble panels or peel-and-stick tiles can mimic the effect. Decorate the mantel with framed photos, candlesticks, or small plants. Even a non-functional fireplace can serve as a cozy focal point. Layer a small rug in front to define the space. This adds elegance without extensive renovations.


9. Include Brass Accents

Include Brass Accents

Brass adds warm metallic charm. Use lamps, frames, or candleholders to subtly highlight Victorian elegance. Affordable brass items can be found at thrift stores or online marketplaces. Even small touches, like drawer pulls or vases, create cohesion. Polish lightly to maintain a warm glow. Pair with dark wood and rich fabrics to complete the look. Brass accents bring a vintage feel that is timeless and budget-friendly.


10. Display Vintage Artwork

Artwork sets the tone. Hunt for vintage prints, old maps, or classic portraits. Thrift shops, flea markets, or print reproductions are budget-friendly. Use a gallery wall for visual impact or a single large frame above the mantel. DIY tip: repaint frames in gold or cream to match your décor. Layer small frames on shelves for a casual display. Vintage art adds personality while keeping the Victorian charm alive.


11. Use Classic Lighting Fixtures

Lighting creates mood. Look for antique-style chandeliers or wall sconces with crystal or brass details. Affordable replicas work just as well. Place a chandelier above the main seating area or use sconces for subtle ambiance. Pair with warm bulbs to soften the room. DIY tip: spray-paint older fixtures in metallic tones to refresh them. Proper lighting instantly enhances the Victorian atmosphere.


12. Mix Dark Wood with Light Fabrics

Balance is key. Dark wood furniture feels classic; light fabrics keep the room airy. Use cream or pastel cushions and throws to offset heavier tones. DIY idea: reupholster old chairs in lighter fabrics for a fresh look. This mix creates depth without feeling heavy. Even a single dark wooden piece with light textiles makes the space visually appealing and cozy.


13. Add Decorative Shelving

Shelving displays personality. Choose ornate brackets or carved wood shelves. Display books, collectibles, or plants. Mix heights for interest. DIY tip: paint simple shelves in antique white and add decorative brackets for Victorian flair. Shelves help organize while showing off style. Even budget-friendly options elevate the room instantly.


14. Incorporate Floral Arrangements

Fresh or artificial flowers bring life. Choose classic blooms like roses, peonies, or hydrangeas. Place in porcelain or brass vases for authenticity. DIY: use thrifted teacups or jars as unique flower holders. Even small arrangements on side tables or mantels add Victorian charm. Flowers soften interiors and make rooms feel welcoming.


15. Choose Patterned Throw Pillows

Mix textures and patterns. Throw pillows in velvet, silk, or embroidered fabrics enhance seating areas. Rotate colors to match rugs or curtains. DIY: sew your own pillow covers using budget-friendly fabric scraps. Pillows are easy to switch seasonally and bring color and pattern without heavy investment. A few pillows can make a sofa feel sumptuous and lived-in.


16. Display Porcelain Figurines

Porcelain pieces are classic décor. Use vintage or reproduction figurines sparingly on shelves or mantels. Thrift stores often have affordable options. Mix with small plants or books to avoid clutter. DIY: repaint older figurines in subtle pastel shades to refresh. Even a few pieces bring authenticity to a Victorian living room, giving it personality and charm.


17. Install a Reading Nook

Create a quiet corner. Add a comfortable chair, small table, and lamp for reading. Layer with throw blankets and pillows. DIY: repurpose an old armchair with new fabric and a small rug underneath. Include a shelf or basket for books. A reading nook adds function and elegance without taking much space.


18. Incorporate Tapestries

Tapestries add texture and color. Look for affordable vintage-style or reproduction tapestries. Hang above sofas or mantels as a centerpiece. DIY: frame smaller fabric pieces to create a gallery effect. Tapestries create warmth, soften walls, and bring traditional Victorian patterns into your living room on a budget.


19. Use Stained Glass Accents

Stained glass adds character. Small panes or inserts are cheaper than full windows. Hang or place near light sources to catch the sun. DIY: use adhesive stained-glass film on existing windows. Even a single accent panel adds Victorian charm and color play, making the room feel historic and artistic.


20. Feature a Curved or Wingback Chair

Wingback chairs are elegant and inviting. Look for thrifted or online second-hand options. Add a throw or pillow to match your décor. DIY: repaint wooden legs or reupholster in velvet for a fresh look. One statement chair can anchor the room and instantly bring Victorian style to your seating area.


21. Layer Candles and Holders

Candles add ambiance. Use clusters of varying heights in brass or glass holders. Mix with small décor items for layered effect. DIY: repurpose jars as candle holders and paint or embellish. Candles create soft light and warmth, perfect for evenings. Even a few strategically placed candles enhance Victorian sophistication.


22. Highlight Ceiling Details

Ceilings matter. Add painted medallions, beams, or simple crown molding. DIY: stencil patterns using paint or adhesive kits. Focus on areas around lighting fixtures for a dramatic effect. Even subtle ceiling décor draws eyes upward, making your living room feel taller and more refined.


23. Incorporate Small Greenery

Plants soften interiors. Ferns, ivy, and palms suit Victorian aesthetics. Use decorative pots or stands to lift plants. DIY: repurpose teapots or antique tins as planters. Small greenery adds freshness and texture without cluttering the room. It’s a simple way to bring life into traditional interiors.


24. Add Personal Collectibles

Show personality with curated items. Family photos, vintage trinkets, or heirlooms add warmth. Display on shelves, mantels, or tables. DIY: create a small display corner with frames or boxes. These touches make the room feel lived-in while keeping Victorian elegance. Personal items complete the space without major costs.


Conclusion

Creating a Victorian living room doesn’t require a fortune. By combining affordable furniture, DIY décor, and classic patterns, you can craft a warm, elegant space. Simple touches—like velvet seating, layered rugs, ornate mirrors, and cozy corners—bring sophistication and charm. Start with one or two ideas, mix in your personal style, and gradually transform your living room into a timeless retreat. Victorian elegance is attainable, inviting, and uniquely yours.


Claire Anderson

22 Gorgeous Victorian Living Room Ideas for a Timeless and Cozy Look


victorian living room ideas

Victorian living rooms are all about charm, comfort, and elegance. They balance ornate details with cozy touches, making any space inviting. Whether you love antique accents, floral fabrics, or rich wood tones, these 22 ideas will inspire you to create a timeless and cozy atmosphere without overspending. From DIY updates to clever décor swaps, you can bring a Victorian touch into your home in simple, practical ways.


1. Embrace Rich Velvet Sofas

Embrace Rich Velvet Sofas

Velvet instantly adds a luxurious feel to your living room. Opt for a rich color like emerald, burgundy, or navy. You don’t need a brand-new sofa—check thrift stores or second-hand shops for affordable pieces. A tufted back adds authenticity, and layering with patterned throw pillows keeps it cozy. If buying velvet is too expensive, consider slipcovers for your current sofa—they mimic the look without the price tag.


2. Layer with Oriental Rugs

Layer with Oriental Rugs

Oriental rugs are a Victorian staple. They ground the space and add pattern and warmth. Look for pre-owned or online deals for budget-friendly options. Layering smaller rugs over a neutral base rug can create a rich, textured look. Don’t forget to rotate your rugs to protect high-traffic areas. Pair them with simple curtains to avoid overwhelming the room visually.


3. Display Antique Mirrors

Display Antique Mirrors

Mirrors in gold or carved frames instantly enhance Victorian charm. Position them above mantels or console tables to reflect light and make the room feel larger. Hunt for thrift store finds—they can often be polished or repainted for a fraction of the cost of new ones. Mixing mirrors of different shapes on a gallery wall adds character without clutter.


4. Add Carved Wooden Furniture

Add Carved Wooden Furniture

Intricately carved furniture defines the Victorian aesthetic. You can restore older furniture with a simple sanding and wood polish to revive its beauty. Even one statement piece, like a sideboard or coffee table, brings authenticity. For a lighter touch, mix carved pieces with simpler modern items to prevent the room from feeling heavy.


5. Choose Floral Wallpaper

Choose Floral Wallpaper

Floral wallpapers are classic Victorian. Stick to muted tones like blush, sage, or cream for a subtle backdrop. Peel-and-stick wallpaper makes DIY updates easy and affordable. Focus on one accent wall instead of covering the entire room to keep the look cozy, not overwhelming.


6. Display Vintage Books

Display Vintage Books

Victorian rooms love books. Use leather-bound or hardback editions for a classic look. Even if you don’t own antiques, thrift shops have affordable books that mimic the style. Arrange by color or size for a curated appearance. Adding a small reading nook encourages comfort and warmth.


7. Incorporate Lace Curtains

 Incorporate Lace Curtains

Lace curtains bring soft elegance and diffuse natural light beautifully. They work well alone or layered with heavier drapes for a Victorian vibe. Inexpensive lace panels can be sewn or hung as-is. Consider adding a ribbon tieback for a subtle decorative touch.


8. Highlight a Statement Fireplace

Highlight a Statement Fireplace

Fireplaces are central to Victorian charm. You don’t need a working fireplace—a decorative mantel with candles or logs works too. Paint an older mantel for a refreshed look. Surrounding it with framed art or vintage mirrors enhances coziness and visual interest.


9. Layer Soft Throws and Pillows

Layer Soft Throws and Pillows

Mix textures with wool, velvet, and embroidered fabrics. Layering throws and pillows adds comfort and warmth. This is a budget-friendly way to refresh your space each season. Swap patterns and colors to reflect holidays or your current mood without permanent changes.


10. Add Crystal or Brass Lighting

Add Crystal or Brass Lighting

Lighting sets the mood. Crystal chandeliers or brass lamps bring elegance instantly. Second-hand shops often have affordable lighting options. Combine a chandelier with table or floor lamps to balance light and create cozy corners.


11. Use Ornate Frames for Art

Use Ornate Frames for Art

Art in ornate frames complements Victorian décor. You don’t need originals—print classic artworks and frame them in vintage-style frames. Arrange in clusters or galleries for impact. This is a low-cost way to add sophistication and personality.


12. Introduce Houseplants

Greenery softens ornate rooms. Tall ferns, palms, or trailing plants feel natural and inviting. Victorian homes often included indoor plants as décor. Choose easy-care plants and decorative pots that match your furniture for a seamless style.


13. Add a Victorian Tea Table

Add a Victorian Tea Table

A tea table adds function and charm. Vintage or thrifted tables are affordable. Decorate with lace runners, a vase of flowers, or your favorite books. It encourages cozy gatherings and fits small spaces easily.


14. Decorate with Porcelain Figurines

Decorate with Porcelain Figurines

Porcelain figurines add character without cluttering. Look for small pieces at flea markets. Group them in odd numbers for visual balance. Mix with small plants or framed mini-art to avoid over-decoration.


15. Use Patterned Cushions on Chairs

Use Patterned Cushions on Chairs

Floral or damask cushions enhance the Victorian vibe. They’re affordable and easy to swap seasonally. Mix patterns with solids to create visual depth. Small cushions can revive old chairs without reupholstery.


16. Highlight Ceiling Moldings

Highlight Ceiling Moldings

Crown moldings elevate the room’s elegance. Even if your ceiling lacks detail, lightweight DIY plaster moldings are inexpensive and easy to install. Paint them in subtle contrasting colors to draw attention upward and make the room feel taller.


17. Incorporate Stained Glass Accents

Incorporate Stained Glass Accents

Stained glass adds color and charm. Use small panels in windows or as decorative inserts. Affordable options include acrylic stained glass or DIY kits. It creates warm, colorful light that changes with the day.


18. Place a Decorative Screen

Place a Decorative Screen

Screens are both decorative and functional. They add depth, hide clutter, or define spaces. Look for second-hand wooden or metal screens. Even a DIY painted canvas screen can serve as a beautiful focal point.


19. Highlight Wooden Floors

Highlight Wooden Floors

Dark wood floors are traditional and elegant. If you have older floors, polish them to bring out natural beauty. Rugs can be layered for warmth. Adding small painted accents or DIY stenciling creates personal touches while maintaining Victorian character.


20. Showcase Family Heirlooms

Showcase Family Heirlooms

Heirlooms personalize your living room. Display them with intentional grouping to create stories and memories. Even one small item like a clock or vase can anchor a cozy corner and tie the room together.


21. Mix Dark Woods with Soft Textiles

Mix Dark Woods with Soft Textiles

Contrast creates balance. Pair heavy wooden furniture with soft throws, cushions, and rugs. This prevents the space from feeling too heavy. Experiment with different textures to maintain comfort and warmth.


22. Create a Reading Nook

Pick a quiet corner for reading. Add a comfortable chair, good lighting, and a small table. Throw in a cozy blanket and pillow. This turns any Victorian room into a functional, inviting space without major renovation.


Conclusion

Victorian living rooms combine elegance with comfort, offVictorian living room ideas that blend elegance and comfort—use rich fabrics, vintage accents, and budget-friendly décor to create a cozy, timeless space.ering a cozy retreat at home. By mixing rich fabrics, vintage accents, layered rugs, and personal touches, you can create a space that feels timeless yet practical. Small DIY updates, budget-friendly shopping, and thoughtful décor swaps let anyone achieve this style. Start with one or two elements, and gradually build your dream Victorian living room that’s inviting for family and guests alike.


Claire Anderson

21 Cozy Dark Bedroom Ideas for a Warm and Relaxing Feel

dark cozy bedroom ideas

Dark bedrooms create a calm and comforting place to rest. Rich colors absorb light and make the room feel quiet and protected. When paired with warm lighting, soft textures, and simple decor, a dark bedroom can feel deeply relaxing.

Many people think dark interiors are expensive or hard to decorate. That is not true. With a few thoughtful choices, anyone can create a cozy dark bedroom without spending much money. Paint, lighting, fabrics, and simple DIY projects can completely change the mood of the space.

The ideas below focus on comfort, warmth, and affordable updates. Each one offers practical steps you can try today. Small changes such as layered bedding, warm light bulbs, or darker curtains can make a big difference.

If your bedroom feels plain or too bright, these cozy dark bedroom ideas will help you create a soothing retreat that feels welcoming every night.


1. Deep Charcoal Walls for Instant Comfort

Deep Charcoal Walls for Instant Comfort

Charcoal walls create a calm and grounded atmosphere. The color feels strong yet peaceful. It wraps the room in a quiet mood that works well for sleep.

Paint is also one of the most affordable upgrades. A single gallon can transform the entire room.

Choose matte or eggshell paint. These finishes soften the light and reduce glare.

Pair charcoal walls with lighter bedding. Cream, warm beige, or soft gray work well. The contrast keeps the room from feeling heavy.

Add a warm bedside lamp. A yellow-tone bulb makes the dark walls feel inviting.

DIY tip:
Paint only the wall behind the bed if you want a smaller project. This still creates a dramatic look.

Wood furniture also works beautifully with charcoal paint. Even thrifted nightstands can look great after a quick sanding and stain.

Finish the space with one cozy throw blanket. Texture adds warmth and prevents the room from feeling flat.

Small steps like these create a bedroom that feels peaceful every night.


2. Layered Bedding for a Soft and Relaxing Look

Layered Bedding for a Soft and Relaxing Look

Layered bedding is the easiest way to make a dark bedroom feel cozy.

Start with a soft neutral sheet set. Cotton or microfiber works well and stays affordable.

Next, add a quilt or comforter. Choose deeper colors such as charcoal, espresso brown, or forest green.

Then place a textured throw blanket at the end of the bed. Chunky knit blankets instantly add warmth to the room.

Pillows also matter. Use two sleeping pillows and two decorative ones. Different fabrics create visual comfort.

Budget tip:
Look for quilts and blankets at discount stores or secondhand shops. Many barely used pieces are sold for very low prices.

Keep the color palette simple. Two or three shades are enough.

Layering fabrics makes the room feel full and restful without clutter.

At night, the bed becomes the focus of the room. Soft lighting hitting those layers makes everything feel inviting.

It is a simple upgrade that changes the entire mood of a dark bedroom.


3. Warm Lighting Instead of Bright White Bulbs

Warm Lighting Instead of Bright White Bulbs

Lighting controls how a dark bedroom feels.

Bright white bulbs can make dark paint look cold. Warm bulbs create a soft glow that feels comforting.

Choose bulbs labeled 2700K warm light. This tone feels gentle in the evening.

Bedside lamps are helpful for creating small pockets of light. The room stays dim but still functional.

Table lamps with fabric shades soften the glow even more.

Budget idea:
Replace bulbs before buying new lamps. This simple swap often changes the whole mood.

You can also add soft string lights behind the headboard. They give a calm evening glow.

Floor lamps in corners work well too. They prevent the room from feeling too shadowy.

Keep overhead lighting minimal. A dim ceiling light is enough for cleaning or getting dressed.

Good lighting makes a dark bedroom feel welcoming rather than gloomy.


4. Dark Wood Furniture for Natural Warmth

Dark Wood Furniture for Natural Warmth

Dark wood furniture adds warmth that balances deep wall colors.

Walnut, espresso, or stained pine work beautifully in a dark bedroom.

Wood grain introduces natural texture. This keeps the room from looking flat.

You do not need expensive furniture either.

Secondhand stores often have solid wood pieces that only need minor updates.

DIY idea:
Lightly sand an old dresser and apply a darker stain. The change takes only a few hours.

Pair wood furniture with soft bedding. The contrast between hard wood and soft fabric creates comfort.

Nightstands are a good place to start if you want a small project.

Add a lamp, a small plant, and a book. Simple styling keeps the room relaxed.

Dark wood pieces make the bedroom feel warm, stable, and welcoming.


5. Soft Area Rugs to Warm Up Dark Floors

Soft Area Rugs to Warm Up Dark Floors

Floors can make a dark bedroom feel cold if they are bare.

A soft rug solves that quickly.

Choose a plush or shag rug that feels good under your feet.

Light neutral rugs create contrast with dark walls.

Place the rug partly under the bed so it extends outward. This makes the room feel larger.

Budget option:
Try layering two smaller rugs instead of buying one large rug.

Flat woven rugs also work well if you prefer something thinner.

Textures matter more than patterns in a cozy bedroom.

A thick rug adds warmth visually and physically.

Morning routines feel better when your feet land on something soft.

This small addition helps the entire room feel comfortable and relaxing.


6. Dark Accent Wall Behind the Bed

Dark Accent Wall Behind the Bed

Painting one wall dark creates a cozy focal point.

The wall behind the bed works best. It frames the headboard and anchors the room.

Deep colors such as charcoal, midnight blue, or dark green work beautifully.

The rest of the walls can stay lighter if you prefer a balanced look.

This approach is perfect for renters who want a smaller project.

DIY tip:
Use painter’s tape to create clean edges.

Accent walls also look great with simple wall art or framed photos.

A small gallery of black frames adds character without clutter.

The dark backdrop makes bedding and lamps stand out more.

This simple update changes the atmosphere of the bedroom quickly.


7. Heavy Curtains for a Calm Nighttime Feel

Heavy Curtains for a Calm Nighttime Feel

Curtains influence both comfort and sleep quality.

Heavy curtains block outside light and create a quiet environment.

Dark fabrics also support the cozy theme.

Charcoal, navy, or deep brown curtains work well.

Blackout curtains are helpful for people who wake easily from sunlight.

Budget tip:
Add a blackout liner behind regular curtains.

This option costs less and works just as well.

Hang the curtain rod slightly higher than the window. This makes the room feel taller.

Soft folds in the fabric create visual warmth.

Curtains frame the room and make the bed area feel sheltered.


8. Textured Throw Blankets for Instant Warmth

Textured Throw Blankets for Instant Warmth

Texture brings life into a dark bedroom.

Throw blankets are perfect for this purpose.

Chunky knit, fleece, or woven cotton all feel inviting.

Drape the blanket loosely across the bed or a chair.

Even one throw can change the room’s mood.

Budget idea:
Look for handmade blankets at local markets or thrift stores.

Choose warm neutral shades such as cream, mocha, or soft gray.

Texture stands out against dark paint and adds depth.

It also makes the bedroom feel ready for rest at any moment.


9. Soft Wall Art with Dark Frames

Soft Wall Art with Dark Frames

Wall art adds personality without clutter.

In a dark bedroom, simple artwork works best.

Choose calming prints such as landscapes, abstract shapes, or nature photos.

Black or dark wood frames keep the look cohesive.

Budget tip:
Print artwork at home or from affordable online sources.

Then place them in basic frames from discount stores.

A small gallery wall above the bed works well.

Keep spacing even so the display looks tidy.

The artwork softens the room and adds visual comfort.


10. Cozy Reading Corner with a Soft Chair

Cozy Reading Corner with a Soft Chair

A reading corner makes a bedroom feel more personal.

Place a comfortable chair in an unused corner.

Add a small floor lamp for warm lighting.

Then drape a soft blanket across the chair.

This corner becomes a quiet place to read or relax before bed.

Budget idea:
Look for chairs at secondhand shops. Many only need a new cushion cover.

A small side table helps hold books or tea.

This simple setup adds character to the room.


11. Dark Green Walls for a Nature Feel

Dark Green Walls for a Nature Feel

Forest green creates a peaceful mood similar to a quiet woodland.

This color pairs beautifully with wood furniture and cream bedding.

The result feels calm and grounded.

Paint is affordable and easy to apply over a weekend.

Keep decor simple so the color remains the star.

Add warm lighting to soften the deep shade.

Plants also work well with green walls.

Even a small potted plant on the nightstand adds life.

This color choice makes the bedroom feel calm and restful.


12. Minimal Decor for a Calm Atmosphere

Minimal Decor for a Calm Atmosphere

Too many objects can make a dark room feel crowded.

Minimal decor keeps the space calm.

Choose a few meaningful pieces instead of many decorations.

A lamp, a framed photo, and a plant are enough for most nightstands.

Clear surfaces help the room feel tidy.

Budget tip:
Store extra items in baskets or drawers.

This keeps the bedroom focused on comfort and rest.

A calm room often leads to better sleep.


13. Fabric Headboards for Added Softness

Fabric Headboards for Added Softness

Fabric headboards add softness to a dark bedroom.

They create a comfortable backdrop for reading or relaxing.

Neutral fabrics such as linen or cotton work well.

DIY option:
Attach foam padding to plywood and wrap it in fabric.

Then mount it behind the bed.

This project costs much less than buying a new headboard.

The fabric texture warms the entire space.


14. Candle-Style Lighting for Evening Relaxation

Candle-Style Lighting for Evening Relaxation

Soft lighting creates a peaceful mood before sleep.

Battery candle lights are a safe option.

They provide a gentle glow without open flames.

Place two on a nightstand or dresser.

The flickering light adds warmth to dark walls.

Evening routines feel calmer with this lighting style.


15. Dark Bedding for a Hotel-Style Look

Dark Bedding for a Hotel-Style Look

Dark bedding creates a comfortable and stylish look.

Charcoal, navy, or deep brown work well.

Pair the bedding with lighter sheets for contrast.

This combination looks polished yet relaxed.

Add two or three pillows for comfort.

The bed becomes the center of the room.


16. Warm Metallic Accents

Warm Metallic Accents

Warm metallic touches brighten a dark space.

Brass or gold lamps add gentle shine.

Use them sparingly.

One lamp or tray is enough.

The metal reflects light and keeps the room from feeling too dim.

Small details can make a big visual difference.


17. Soft Wall Sconces for Gentle Lighting

Soft Wall Sconces for Gentle Lighting

Wall sconces save space and provide soft lighting.

They work well beside the bed.

The light spreads across the wall and creates a calm glow.

Many affordable plug-in sconces are easy to install.

This simple lighting update adds warmth quickly.


18. Neutral Curtains with Dark Walls

Neutral Curtains with Dark Walls

Light curtains balance dark paint.

Cream or beige fabrics soften the room.

They also reflect a bit of daylight.

The mix of dark walls and light curtains feels comfortable.

This combination works in small bedrooms too.


19. Cozy Bench at the Foot of the Bed

Cozy Bench at the Foot of the Bed

A small bench adds comfort and function.

Place it at the foot of the bed.

It holds extra blankets or pillows.

You can also sit there while putting on shoes.

Budget tip:
Use a simple wooden bench with a cushion on top.

The room feels complete with this small addition.


20. Dark Ceiling for a Cocoon Effect

Dark Ceiling for a Cocoon Effect

Painting the ceiling dark creates a cocoon-like feeling.

It makes the room feel sheltered and calm.

Use a slightly lighter shade than the walls.

Warm lighting keeps the space welcoming.

This idea works especially well in bedrooms with tall ceilings.


21. Small Plants for Natural Balance

Small Plants for Natural Balance

Plants soften dark interiors.

Even small ones add life to the room.

Snake plants and pothos are easy to care for.

Place them on nightstands or shelves.

Green leaves stand out beautifully against dark walls.

Budget option:
Start with one small plant.

Over time, you can add more.

The natural touch makes the bedroom feel peaceful.


Conclusion

A cozy dark bedroom does not require expensive furniture or major renovation. Simple updates such as deeper paint colors, warm lighting, soft fabrics, and thoughtful decor can transform the space. Small DIY changes, thrifted pieces, and layered textures create comfort while staying budget friendly. Try one or two ideas first, then slowly add more elements that make the room feel calm and welcoming. Over time, your bedroom will become a warm retreat that feels relaxing every night.

Claire Anderson

24 Genius Small Hallway Ideas for a Bigger and Brighter Entry


Small Hallway Ideas

A small hallway doesn’t have to feel cramped or dull. With the right touches, even the narrowest entry can feel open, welcoming, and full of light. By using smart colors, clever storage, reflective surfaces, and simple DIY tricks, you can transform your hallway into a bright and inviting space. These ideas focus on practical, budget-friendly solutions that anyone can implement, making your entryway feel larger without expensive renovations.


1. Use Light, Neutral Paint Colors

Use Light, Neutral Paint Colors

Painting your walls in light shades like cream, soft gray, or pale beige instantly opens up a small hallway. Light colors reflect more natural light, making the space feel larger. For a low-cost approach, choose washable matte or eggshell paint that’s easy to maintain. You can also add subtle accent trims or a single soft wall stripe to draw the eye upward, giving a taller appearance. A weekend DIY painting project can completely change the mood, and using leftover paint from other rooms can save money. Pair light walls with a pale runner to reinforce the bright effect. Even a small coat of fresh paint on baseboards or doors can add contrast and dimension, making the entry feel clean and airy.


2. Hang Slim Mirrors

Hang Slim Mirrors

Mirrors can double the sense of space in a narrow hallway. Choose slim, full-length mirrors that reflect both light and movement. Position them opposite windows or light fixtures to maximize brightness. DIY tip: repurpose an old frame and add mirrored panels inside for a custom, budget-friendly look. Even a small cluster of mirrors arranged vertically can create a gallery-style effect while making the hallway feel wider. Mirrors also allow guests to quickly check their appearance without taking up extra space. Consider placing a narrow shelf below the mirror for keys or decorative items, keeping it functional yet visually open.


3. Install Slim Console Tables

Install Slim Console Tables

A slim console table fits perfectly in narrow hallways without crowding the space. Look for tables with open shelves or thin legs to maintain airflow and light passage. These tables can hold keys, mail, or small decorative items, keeping clutter off the floor. DIY hack: Use a narrow wooden plank with brackets for an instant wall-mounted console under $50. Adding a small lamp or a vase of fresh flowers enhances both light and appeal. Stick to minimal decorations to prevent a cramped look. A lightweight table that’s easy to move also doubles as seasonal décor space without permanent installation.


4. Layer with Light Runners

Layer with Light Runners

A well-chosen runner elongates a small hallway visually. Choose light, neutral tones or subtle patterns to keep the space airy. Avoid dark colors that make the corridor feel closed in. Runners with vertical lines or stripes naturally draw the eye forward, enhancing the sense of length. For a DIY approach, use a wide strip of painted canvas or inexpensive flat-weave rugs and secure it with non-slip tape. Layering runners with complementary smaller mats can add texture and style without overpowering the narrow space. A soft rug also adds comfort underfoot and reduces echo in long hallways.


5. Add Wall-Mounted Hooks

Add Wall-Mounted Hooks

Wall-mounted hooks free up floor space while keeping essentials handy. They’re ideal for coats, scarves, or bags in a compact entry. Install them at varying heights to suit adults and children. For a budget-friendly DIY, repurpose old knobs or decorative handles as hooks for a unique look. Keep hooks minimalist and evenly spaced to avoid visual clutter. Adding a small shelf above hooks allows a spot for hats or small baskets, keeping the hallway functional without taking up extra room. A set of bright-colored hooks can also add personality and contrast against light walls.


6. Use Floating Shelves

Use Floating Shelves

Floating shelves keep the hallway open while adding storage. Install slim, sturdy shelves for keys, small decor, or plants. DIY options include repurposing wooden crates cut to size or using inexpensive IKEA-style boards with hidden brackets. Keep the arrangement simple and uncluttered—a few items per shelf maintain visual flow. Adding small greenery or framed prints can make the hallway feel warm and inviting. Floating shelves also draw the eye horizontally, making a narrow hallway feel longer.


7. Incorporate Vertical Storage

Incorporate Vertical Storage

Vertical storage makes the most of limited floor space. Think tall cabinets, open shelving, or stacked baskets. Use baskets or boxes to keep items organized and out of sight. For DIY, stack crates or paint a narrow bookshelf to match wall color. Keeping items off the floor maintains the sense of openness. Vertical lines naturally draw attention upward, giving the illusion of higher ceilings. A slim storage tower can also double as a display for decorative objects or plants without overwhelming the hallway.


8. Bright Artwork and Prints

Bright Artwork and Prints

Art can make a small hallway feel personal and inviting. Choose light, airy prints or abstract designs that complement wall color. Avoid large, heavy frames that crowd the walls. DIY tip: Print your favorite photos and frame them in simple white or light wood frames. Hang them in a straight line or gallery style to create movement and interest. Art at eye level draws attention horizontally, giving the hallway more perceived width. Even a single large print can act as a focal point, making the space feel curated without clutter.


9. Optimize Lighting with Wall Sconces

Optimize Lighting with Wall Sconces

Good lighting brightens and enlarges a space. Wall sconces are perfect for small hallways—they don’t take up floor space and provide even illumination. Choose fixtures that direct light upward for a soft glow. DIY option: Install battery-operated LED sconces to avoid wiring costs. Pair sconces with light walls and mirrors to multiply brightness. A warm, consistent light makes the hallway feel welcoming while also highlighting key décor or artwork along the walls.


10. Use Clear or Glass Furniture

Use Clear or Glass Furniture

Transparent furniture reduces visual weight, making the hallway appear larger. Consider acrylic or glass tables and small stools. DIY ideas: Repurpose an old table with a glass top or add acrylic legs to a wooden tabletop. Transparent pieces allow light to pass through and maintain open sightlines, essential in tight spaces. Even a small glass shelf can hold keys or decor without crowding the floor.


11. Paint Doors in Light Shades

Paint Doors in Light Shades

Painting doors in light, coordinated shades extends the wall visually. White, cream, or pale gray doors reduce visual breaks in the corridor. For a budget DIY, use leftover wall paint for doors. A light-colored door paired with matching trim keeps the look cohesive and bright. Avoid dark colors, which shrink space perception. A uniform palette helps the hallway flow seamlessly from one room to the next.


12. Add a Slim Bench

Add a Slim Bench

A narrow bench offers seating and storage without crowding the space. Look for benches with hidden baskets or open shelves underneath. DIY: Repurpose a small wooden crate or build a simple bench with plywood and brackets. Adding a soft cushion or pillow keeps it inviting. Keep accessories minimal to maintain openness. A well-placed bench doubles as a functional accent and visually anchors the hallway without closing it in.


13. Keep Flooring Light

Keep Flooring Light

Light floors reflect natural light and make hallways feel longer. Consider pale wood, laminate, or light tiles. DIY budget tip: Apply a light wood stain to existing floors or laminate planks over old flooring. Avoid dark rugs that break visual flow. Lighter flooring works with any color scheme and pairs well with runners or minimal rugs, creating a spacious feel while still adding texture.


14. Create a Focal Wall

Create a Focal Wall

A single focal wall draws the eye forward, lengthening perception. Choose a subtle, light color or soft pattern. DIY option: Use removable wallpaper or paint a geometric design. Keep the rest of the hallway neutral to maintain brightness. This technique also allows small décor items like a vase or lamp to stand out without cluttering. A focal wall creates depth and visual interest even in narrow spaces.


15. Hang Floating Baskets

Hang Floating Baskets

Floating baskets provide storage and decoration without taking floor space. Use baskets for mail, keys, or small accessories. DIY: Attach baskets to a wooden plank painted to match walls. Arrange them vertically for height or horizontally for width. The open weave keeps them light and airy, and they can easily be changed seasonally. Floating baskets combine practicality and charm without making the hallway feel crowded.


16. Use Reflective Décor

Use Reflective Décor

Metallic or mirrored décor bounces light and opens up space. Small mirrors, gold hooks, or silver trays reflect both natural and artificial light. DIY: Spray-paint an old tray metallic or add mirrored tiles to a tabletop. Keep accents minimal to avoid clutter. Reflective items make the hallway feel brighter and more dynamic without needing structural changes.


17. Add Indoor Plants

Add Indoor Plants

Plants bring life to hallways without taking much space. Choose small or hanging plants for narrow areas. DIY tip: Use mason jars or repurposed containers for low-cost planters. Even a few leafy greens brighten and freshen the entryway. Grouping plants at varying heights adds interest while keeping floors clear. Plants also provide natural color that complements light walls and flooring.


18. Use Subtle Wall Patterns

Use Subtle Wall Patterns

Soft patterns add depth without overwhelming a small space. Choose pale, subtle designs to maintain light flow. DIY: Use patterned contact paper on one wall or create stencils for a painted design. Keep other walls neutral to avoid visual clutter. Patterns create texture and interest, helping the hallway feel stylish and layered without reducing openness.


19. Install Slim Shoe Racks

Install Slim Shoe Racks

Slim shoe racks keep floors clear while storing essentials. Vertical or wall-mounted options save space. DIY: Use a narrow wooden board with hooks or small crates mounted sideways. Keeping shoes organized prevents a cramped look. Open racks allow airflow and make it easy to grab items quickly. A tidy shoe area contributes to a clean, spacious appearance.


20. Highlight with Accent Lighting

Highlight with Accent Lighting

Accent lighting draws attention to walls or décor and adds warmth. Use LED strips under shelves, along baseboards, or above artwork. DIY: Stick battery-operated LED strips behind shelves or along moldings. Soft lighting creates depth without overwhelming space. Highlighting certain areas visually expands the hallway while making it more inviting.


21. Use Transparent Doors

Use Transparent Doors

Glass or frosted doors allow light to pass between rooms, opening up the hallway. Frosted glass adds privacy while keeping brightness. DIY: Apply adhesive frosted film to existing doors. Transparent doors extend natural light flow and make the entry feel airy and connected to adjacent rooms.


22. Keep Minimal Decor

Keep Minimal Decor

Minimal decor prevents visual clutter. Stick to one or two statement items per wall. DIY tip: Rotate small items seasonally or use a single decorative tray to hold essentials. Less is more in small hallways. A minimalist approach keeps the area open and visually appealing, giving breathing room for guests and homeowners alike.


23. Use Light Curtains

Use Light Curtains

Sheer curtains maximize natural light while softening the space. Avoid heavy drapes that block light and narrow the hallway visually. DIY: Use inexpensive sheer panels or lightweight fabric tied with rope for a budget-friendly approach. Light curtains maintain privacy while enhancing brightness, keeping the entryway airy and welcoming.


24. Paint Ceiling a Lighter Shade

Paint Ceiling a Lighter Shade

A lighter ceiling makes a hallway feel taller and more spacious. Even subtle differences in shade enhance perception. DIY: Use leftover light paint to brighten the ceiling. This simple change adds vertical dimension and works with light walls and floors to maximize the open feeling of the hallway.


Conclusion

Transforming a small hallway into a bright, inviting space doesn’t require major renovations. By using light colors, mirrors, smart storage, and simple DIY touches, you can create the illusion of space while keeping your entry functional and stylish. Many of these ideas are budget-friendly and easy to implement over a weekend. Start with one or two changes, and watch your narrow hallway feel bigger, brighter, and welcoming for every guest who steps through your door.


Claire Anderson

27 Simple Tiny Hallway Ideas for Better Function and Flow


Tiny Hallway Ideas

A small hallway can feel cramped and uninviting, but simple changes can make it both practical and stylish. From clever storage to bright accents, tiny hallways can serve as functional, welcoming spaces. These 27 tiny hallway ideas focus on creating flow, adding personality, and keeping things budget-friendly. Whether you rent or own, each tip is easy to try without major renovations.


1. Slim Console Tables for Essentials

Slim Console Tables for Essentials

A slim console table fits perfectly in tight hallways. It offers a spot for keys, mail, or small décor without blocking foot traffic. Choose one with drawers to hide clutter. If buying isn’t in the budget, repurpose a narrow bookshelf sideways or a floating shelf at waist height. Adding a small lamp or a mirror above can brighten the space instantly. Try painting the table a light color to blend with walls. The key is balance: keep surfaces tidy to maintain openness.


2. Floating Shelves for Display

Floating Shelves for Display

Floating shelves save floor space and display personality. They can hold plants, photos, or decorative baskets. Mix heights and stagger them to create visual interest. Lightweight items prevent the shelves from feeling heavy. For a budget approach, paint simple wooden planks and attach them with basic brackets. Avoid overcrowding—less is more in a narrow space. Adding baskets on lower shelves keeps everyday items like scarves or gloves organized. Floating shelves can also double as a mini gallery, making your hallway feel curated without feeling cluttered.


3. Mirrors to Expand Space

Mirrors to Expand Space

Mirrors instantly make hallways feel wider and brighter. A tall standing mirror or a series of small wall-mounted ones works well. Place them opposite a light source if possible. For renters, try adhesive mirrors that don’t damage walls. Mirrors also provide a quick check before heading out, combining style with function. Frameless designs keep things modern, while wooden frames add warmth. You can create a gallery effect by grouping multiple small mirrors. Even a simple, full-length mirror against the wall can visually double the space, making tiny hallways feel airy and open.


4. Runner Rugs to Add Color

Runner Rugs to Add Color

Runner rugs define a hallway and soften footsteps. Choose light colors or subtle patterns to avoid overwhelming the space. Thin rugs work best in tiny hallways. For renters, non-slip pads prevent shifting. Budget-friendly DIY options include fabric remnants or layering smaller rugs. A runner can tie together your hallway’s color palette and make it feel intentional. It’s also an easy swap if you want a seasonal refresh. Layering rugs can create texture and warmth without taking up space. The rug becomes both decorative and functional, adding comfort and guiding the eye through the hallway.


5. Hooks for Coats and Bags

Hooks for Coats and Bags

Wall-mounted hooks keep items off the floor while staying accessible. Place them at varying heights for adults, kids, or different bag sizes. For a DIY approach, screw hooks into a painted wooden plank for a cohesive look. Hooks are especially useful near entrances for quick grab-and-go storage. Pair with a small bench or shoe tray underneath to keep shoes and bags tidy. Even a row of simple hooks can prevent clutter from building up. Painted hooks can also add a pop of color, turning a functional item into a design element.


6. Built-in Storage Cubes

Built-in Storage Cubes

Storage cubes maximize vertical space. Stackable cubes hold shoes, hats, or small baskets for accessories. They are easy to assemble and move. Use baskets inside to keep things hidden and neat. Wooden or plastic cubes can fit any style. Adding labels or small tags makes items easy to find. Cubes are flexible—they can double as a mini seating area if sturdy enough. They keep tiny hallways functional without feeling crowded.


7. Wall-mounted Lighting

Wall-mounted Lighting

Wall lighting frees up floor space while adding ambiance. Sconces or clip-on lamps work well for narrow hallways. Choose warm light to make the space inviting. Battery-operated options remove wiring headaches. Position lights to highlight art, shelves, or mirrors. Wall lighting also reduces shadows and keeps the hallway feeling open. If your hallway lacks natural light, even a few sconces can dramatically brighten it. Using dimmable options adds flexibility for morning and evening moods.


8. Small Benches with Storage

Small Benches with Storage

Benches provide seating and hidden storage. Choose one with drawers or a lift-top for shoes, scarves, or hats. Add a cushion for comfort. Even a simple wooden crate with a pillow works for a temporary solution. Benches are practical for putting on shoes and can make a hallway feel homey. Pair with hooks or a small shelf above for a complete entry setup. Benches with storage combine style and function in one compact piece.


9. Paint Contrasting Doors

 Paint Contrasting Doors

A pop of color on a door or trim adds character. Bright or deep shades can create a focal point in a narrow hallway. Stick to paint that’s easy to remove or repaint if renting. Contrasting doors break up monotony and guide the eye, making the hallway feel longer. For renters, removable adhesive door film is an option. Even subtle shades like muted blue or sage green add personality. This small change can have a surprisingly big impact on the overall vibe.


10. Minimalist Wall Art

Minimalist Wall Art

Artwork adds interest without taking floor space. Choose one or two simple pieces to avoid overwhelming a tiny hallway. Affordable options include prints, DIY paintings, or photos in thrifted frames. Keep frames uniform for a cohesive look. Rotate art seasonally for a fresh feel. Wall art can enhance color schemes and make the hallway feel intentional. Even a single large print can serve as a statement piece.


11. Use Vertical Planters

Use Vertical Planters

Vertical planters bring life without cluttering floors. Hang a few small pots in staggered arrangements. Use low-maintenance plants like pothos or succulents. Planters can also double as a visual separator between entry zones. Lightweight pots make it renter-friendly. Greenery softens hard edges and adds warmth, making the hallway feel fresh.


12. Sliding Doors to Save Space

Sliding Doors to Save Space

Sliding doors free up space that swinging doors would occupy. They’re ideal for closets or bathrooms in tight hallways. Budget-friendly kits and DIY options are widely available. Choose neutral tones to blend with walls. Sliding doors maintain flow and reduce obstruction, allowing even narrow hallways to feel open.


13. Patterned Wallpaper for Depth

Patterned Wallpaper for Depth

Wallpaper adds texture and depth. Vertical stripes make the hallway feel taller. Choose light patterns for a tiny space. Removable wallpaper is perfect for renters. A patterned accent wall draws the eye and adds personality without overwhelming. Pair with simple décor to maintain balance.


14. Coat Cabinets with Mirrors

Coat Cabinets with Mirrors

Mirrored coat cabinets combine storage and visual expansion. Keep coats behind closed doors for a tidy look. Mirrors enhance light and give the impression of more space. Choose a compact design to avoid crowding. Even a small mirrored cabinet keeps a hallway organized and airy.


15. Transparent Furniture

Transparent Furniture

Acrylic or glass furniture keeps sightlines open. Clear tables or shelves reduce visual clutter. Perfect for small hallways where solid furniture feels heavy. Budget-friendly options include thrifted acrylic pieces. Transparent surfaces also reflect light, adding brightness.


16. Pegboards for Custom Storage

Pegboards for Custom Storage

Pegboards are flexible storage solutions. Hang baskets, hooks, or small shelves. Adjust items as your needs change. Paint the board to match your walls for a subtle look. Pegboards keep clutter off floors and can hold keys, hats, or even mail.


17. Overhead Shelves

Overhead Shelves

High shelves make use of vertical space. Store rarely used items or décor boxes. Ensure they’re securely anchored. Overhead shelves keep hallways tidy without encroaching on walking space. They’re ideal for small apartments with limited storage.


18. Narrow Shoe Racks

Narrow Shoe Racks

Shoe racks prevent clutter at entrances. Slim, tiered designs fit tiny hallways. Use baskets on top for gloves or hats. DIY options include stacked crates or repurposed spice racks. Keeping shoes organized keeps hallways functional and visually calm.


19. Add Hooks Inside Closet Doors

Add Hooks Inside Closet Doors

Hooks inside doors maximize hidden space. Hang bags, umbrellas, or scarves. It keeps surfaces clean and reduces clutter. Affordable adhesive hooks make it renter-friendly. It’s a small change with big organizational payoff.


20. Soft Lighting from Floor Lamps

Soft Lighting from Floor Lamps

Floor lamps add soft light without wall installation. Choose slim or tripod styles for minimal intrusion. Ideal for areas where wall wiring isn’t possible. A warm glow makes the hallway cozy and inviting.


21. Decorative Trays for Small Items

Decorative Trays for Small Items

Trays corral small items and reduce clutter. Perfect for keys, coins, or wallets. Affordable wooden or metal trays work well. They keep surfaces neat and make items easy to grab.


22. DIY Pegboard Jewelry Organizer

DIY Pegboard Jewelry Organizer

Use a small pegboard for jewelry or accessories. Hooks keep items untangled. Paint it to match the hallway. Compact and functional, it turns a small wall into useful storage.


23. Sliding Mirror Panels

Sliding Mirror Panels

Sliding mirrored panels serve dual purposes: storage access and reflection. They save space and enhance light. Great for narrow hallways where swinging doors aren’t practical.


24. Foldable Seating

Foldable Seating

Foldable seating provides occasional rest without permanent obstruction. Ideal for tiny entryways. Pull down when needed, tuck away when not. Simple, functional, and space-saving.


25. Minimal Shoe Mat

Minimal Shoe Mat

A small mat keeps floors clean. Choose neutral tones to blend with décor. Budget-friendly and practical, it prevents dirt tracking while keeping the hallway open.


26. Slim Umbrella Stand

Slim Umbrella Stand

Umbrella stands keep wet items contained. Slim designs fit tight corners. Affordable options include DIY wooden boxes or repurposed containers. They keep hallways dry and organized.


27. Color-Coordinated Storage Bins

Color-Coordinated Storage Bins

Matching bins create visual order. Use on shelves or benches. Affordable and functional, they keep small items together. Color coordination makes the space feel intentional and tidy.


Conclusion

A tiny hallway doesn’t have to feel cramped or chaotic. With simple solutions like mirrors, slim furniture, hooks, and vertical storage, you can create flow, functionality, and personality on a budget. These 27 ideas make hallways feel brighter, organized, and welcoming. Small changes, thoughtful layouts, and affordable DIY projects can transform even the narrowest passage into a space that works for your everyday life.


Claire Anderson

23 Trendy Modern Small Hallway Ideas for a Clean and Sleek Upgrade


modern small hallway ideas

A small hallway doesn’t have to feel cramped or dull. With the right touches, you can transform it into a bright, stylish, and functional space. Modern small hallway designs focus on clean lines, clever storage, and smart lighting. Whether you’re working with a narrow corridor or a compact entrance, simple adjustments can make your hallway feel open, welcoming, and organized. From DIY wall hooks to sleek floating shelves, these ideas offer practical solutions that are easy on the budget and simple to implement.


1. Floating Shelves for Slim Storage

Floating Shelves for Slim Storage

Floating shelves keep your hallway clutter-free while adding visual interest. Install them at eye level for easy access to keys, mail, or small décor pieces. They don’t take up floor space, which makes a narrow hallway feel roomier. You can paint them the same color as the wall for a minimal look or choose natural wood for warmth. Budget tip: simple MDF shelves from a local store can be painted to match your theme. For a DIY twist, add small baskets or jars to hold loose items neatly.


2. Slim Console Tables

Slim Console Tables

A slim console table is perfect for narrow hallways. It provides surface space without crowding the floor. Choose one with open storage underneath or add a small basket for shoes. You can decorate it with a few statement pieces like a small plant, tray, or lamp. Budget-friendly tip: upcycle an old table by sanding and painting it for a fresh, modern look. Position a slim mirror above it to reflect light and expand the space visually.


3. Wall-Mounted Hooks

Wall-Mounted Hooks

Wall-mounted hooks are practical and space-saving. They keep jackets, bags, and hats off the floor while adding style. Arrange them in a straight line or staggered pattern for a modern feel. You can mix metal and wood hooks to match your décor. DIY idea: repurpose old knobs or handles as unique hooks. Hooks near the entrance also encourage tidiness by giving everyone a designated spot for their items.


4. Slim Shoe Racks

Slim Shoe Racks

Shoes can take over a small hallway fast. A slim shoe rack keeps them organized and accessible. Look for racks that fit into narrow spaces or under a console table. For a budget option, repurpose wooden crates stacked horizontally. Adding a small mat in front of the rack helps keep floors clean. This simple change instantly makes the hallway feel cleaner and more intentional.


5. Minimalist Mirrors

 Minimalist Mirrors

Mirrors do double duty: they create the illusion of space and add style. A slim, full-length mirror works well in a narrow hallway. For a modern vibe, pick a frameless or thin-framed design. Mount it vertically to draw the eye upward, making ceilings appear higher. Budget-friendly tip: thrift a mirror and spray-paint the frame for a fresh, modern look. Pair it with a small console table for a functional entry setup.


6. Light-Colored Walls

Light-Colored Walls

Choosing light wall colors instantly brightens a small hallway. Whites, soft grays, or pale pastels reflect natural light and make the space feel larger. You can even combine two shades to add subtle depth. For a DIY update, a fresh coat of paint costs very little but transforms the area completely. Add small accent pieces in contrasting colors to prevent the hallway from feeling sterile.


7. LED Strip Lighting

LED Strip Lighting

LED strips offer soft, continuous lighting without bulky fixtures. Place them under shelves, along the floor, or above a console table. They enhance visibility and make narrow spaces feel welcoming. Energy-efficient LEDs also save money over time. Tip: choose warm white tones for a cozy feel or cool white for a clean, modern vibe. Most strips are easy to cut to size and attach with adhesive, making this a simple DIY lighting upgrade.


8. Vertical Wall Art

Vertical Wall Art

Vertical wall art draws the eye upward, adding height perception in a narrow hallway. Choose tall frames or artwork that complement your color palette. A mix of textures or simple patterns keeps the space modern and fresh. Budget idea: print your own photos or abstract designs and frame them cheaply. Rotating the pieces seasonally gives a dynamic and personal touch.


9. Narrow Bench with Storage

Narrow Bench with Storage

A narrow bench gives visitors a spot to sit while offering hidden storage underneath. Choose one with baskets or cubbies for shoes, hats, or bags. For a DIY project, repurpose a wooden pallet with a cushion on top. Even a small bench can make a hallway feel welcoming and functional, giving your entrance extra purpose without clutter.


10. Patterned Runners

Patterned Runners

A runner adds texture and style to a plain hallway. Patterns can distract from narrowness and add visual interest. Choose low-pile options for easy cleaning. Budget tip: small rugs can be stitched together or layered to create a long runner look. Make sure the color complements your walls and furniture. A well-chosen runner also protects flooring from daily wear.


11. Open Shelving for Décor

Open Shelving for Décor

Open shelves allow you to display items without overcrowding the space. Use them for small plants, picture frames, or seasonal decorations. Paint them to match the walls for a floating effect. For DIY, old wooden crates or planks can be mounted with brackets. Open shelving keeps your hallway stylish and organized at the same time.


12. Compact Coat Closets

Compact Coat Closets

Even a tiny hallway benefits from a hidden storage solution. Compact closets hide clutter and maintain sleek lines. Sliding doors save space over swinging doors. Add hooks inside for bags or keys. Budget tip: install a simple curtain if building a closet isn’t feasible. The result is a clean, modern look without sacrificing function.


13. Multi-Functional Furniture

Multi-Functional Furniture

Furniture with dual purposes keeps a hallway minimal yet practical. Drawers, shelves, and seating combined reduce the need for extra pieces. DIY: repurpose a desk or small dresser as a hallway console. Keep accessories minimal to maintain a modern, airy feel. Functionality and style can coexist without crowding the space.


14. Geometric Wall Panels

Geometric Wall Panels

Geometric panels add texture and depth to walls without heavy decoration. Stick to light colors for a clean modern feel. They’re lightweight, budget-friendly, and easy to mount. For DIY, foam panels can be painted and glued directly. This adds a subtle designer touch without overwhelming a small space.


15. Narrow Floating Cabinets

Narrow Floating Cabinets

Floating cabinets combine storage with clean lines. They free up floor space and make hallways look larger. Use them for keys, shoes, or decorative items. Budget tip: repurpose old cabinets with new handles and a coat of paint. This creates a modern storage solution without expensive remodeling.


16. Potted Plants

Potted Plants

Plants bring life and freshness to a small hallway. Opt for compact pots or hanging planters to save floor space. Easy-care options like succulents or snake plants thrive in low light. Budget-friendly tip: propagate plants from existing ones. Greenery softens modern minimalism, making the hallway feel inviting and vibrant.


17. Transparent Furniture

Transparent Furniture

Clear furniture is perfect for tight spaces. Acrylic or glass pieces don’t visually block the hallway, keeping it airy. You can place a lamp or vase on top without feeling cluttered. Budget tip: check thrift stores for old glass tables that can be sanded or painted for a modern look. The transparency makes even a tiny corridor feel spacious.


18. Track Lighting

Track Lighting

Track lighting adds adjustable brightness to highlight artwork or shelves. It’s minimalist and modern, avoiding bulky fixtures. Budget tip: simple LED track kits are affordable and easy to install. Directional lights can focus on key features, making the hallway both functional and stylish.


19. Wall-Mounted Storage Cubes

Wall-Mounted Storage Cubes

Wall-mounted cubes provide storage and a design statement. Mix vertical and horizontal placements for visual interest. Use them for books, plants, or daily essentials. DIY idea: wooden boxes painted to match the décor can be mounted with brackets. They make hallways organized and modern while keeping floors clear.


20. Accent Lighting Mirrors

Accent Lighting Mirrors

Mirrors with accent lights brighten hallways and add sophistication. LED borders create ambient glow, making spaces feel larger. Budget tip: add LED tape around a simple mirror for a similar effect. These mirrors combine practicality with a modern, stylish appearance.


21. Vertical Storage Ladder

Vertical Storage Ladder

A vertical ladder is a creative way to store items without taking floor space. Hang scarves, hats, or small baskets for a functional display. Lightweight ladders are easy to move and inexpensive. DIY: repurpose old wooden ladders with sanding and paint. It adds a modern rustic vibe without overwhelming a narrow corridor.


22. Minimal Wall Hooks with Shelf

Minimal Wall Hooks with Shelf

Combining hooks with a slim shelf maximizes vertical space. Place it near the entrance to keep essentials handy. DIY option: attach small brackets and a wooden plank. This creates a stylish modern entry station that keeps items off the floor and walls uncluttered.


23. Light Reflective Flooring

Light Reflective Flooring

Reflective flooring brightens small hallways and gives a spacious, modern feel. Tiles, polished concrete, or laminate with a subtle sheen work well. Budget tip: vinyl tiles mimic high-end materials at low cost. Paired with light walls and mirrors, reflective flooring makes your hallway feel open and inviting.


Conclusion

A small hallway can be transformed into a bright, functional, and stylish entry space without heavy renovation. By combining smart storage, reflective surfaces, and simple décor touches, you can create a modern hallway that feels spacious and organized. Start with one or two of these ideas—like floating shelves or a patterned runner—and gradually layer other elements. Small updates make a big visual impact, helping your home feel polished and welcoming from the very first step.


Claire Anderson
Next Page »

Primary Sidebar

More to See

27 Simple Tiny Hallway Ideas for Better Function and Flow

27 Simple Tiny Hallway Ideas for Better Function and Flow

March 26, 2026 By Claire Anderson

20 Aesthetic Small Apartment Hallway Ideas for a Stylish Rental Refresh

20 Aesthetic Small Apartment Hallway Ideas for a Stylish Rental Refresh

March 12, 2026 By Claire Anderson

23 Trendy Modern Small Hallway Ideas for a Clean and Sleek Upgrade

23 Trendy Modern Small Hallway Ideas for a Clean and Sleek Upgrade

March 26, 2026 By Claire Anderson

21 Elegant Small Entrance Hallway Ideas for a Welcoming Home Update

21 Elegant Small Entrance Hallway Ideas for a Welcoming Home Update

March 12, 2026 By Claire Anderson

24 Genius Small Hallway Ideas for a Bigger and Brighter Entry

24 Genius Small Hallway Ideas for a Bigger and Brighter Entry

April 1, 2026 By Claire Anderson

21 Elegant Victorian Living Room Decor Ideas for a Rich Layered Style

21 Elegant Victorian Living Room Decor Ideas for a Rich Layered Style

March 12, 2026 By Claire Anderson

22 Gorgeous Victorian Living Room Ideas for a Timeless and Cozy Look

22 Gorgeous Victorian Living Room Ideas for a Timeless and Cozy Look

April 7, 2026 By Claire Anderson

Copyright © 2025 · Haven Only