• Skip to main content
  • Skip to secondary menu
  • Skip to primary sidebar
Haven Only

Haven Only

Ad example
  • Home
  • St. Patrick’s Day
  • Valentine’s Day
  • Blog

Claire Anderson

20 Aesthetic Small Apartment Hallway Ideas for a Stylish Rental Refresh


Small Apartment Hallway Ideas

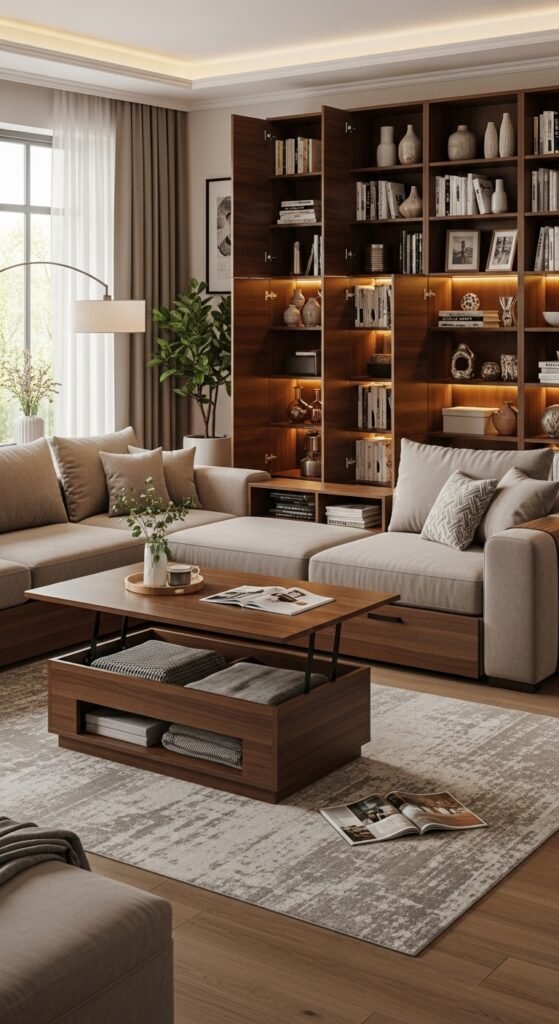
Small apartment hallways are often overlooked, but even a tiny corridor can feel welcoming, organized, and stylish. With a few simple tweaks, you can create a space that reflects your personality without permanent renovations. From clever storage hacks to budget-friendly décor updates, these ideas help you refresh your rental hallway while keeping things practical. You don’t need a large space to make a big impression—these tips will inspire a brighter, more functional, and aesthetically pleasing entryway.


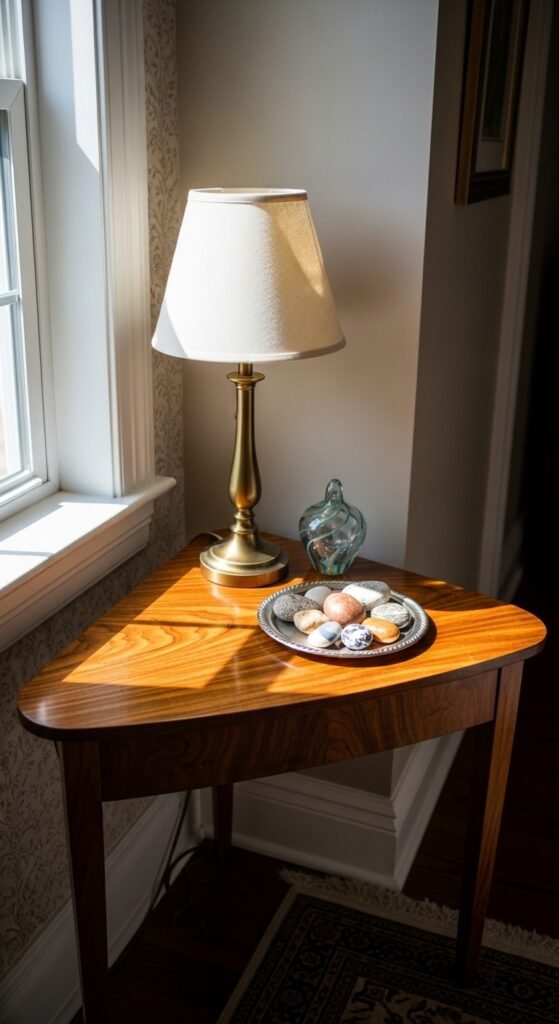
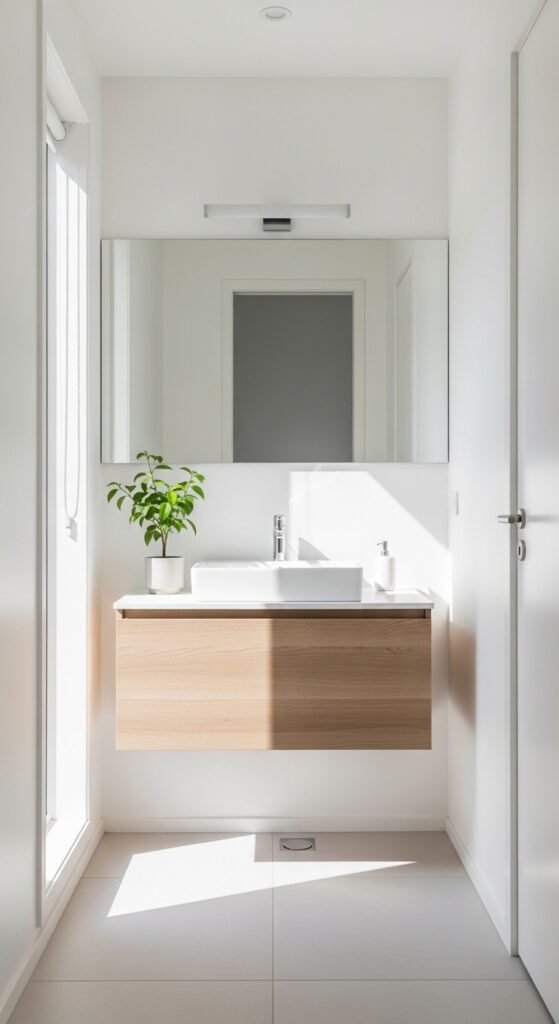
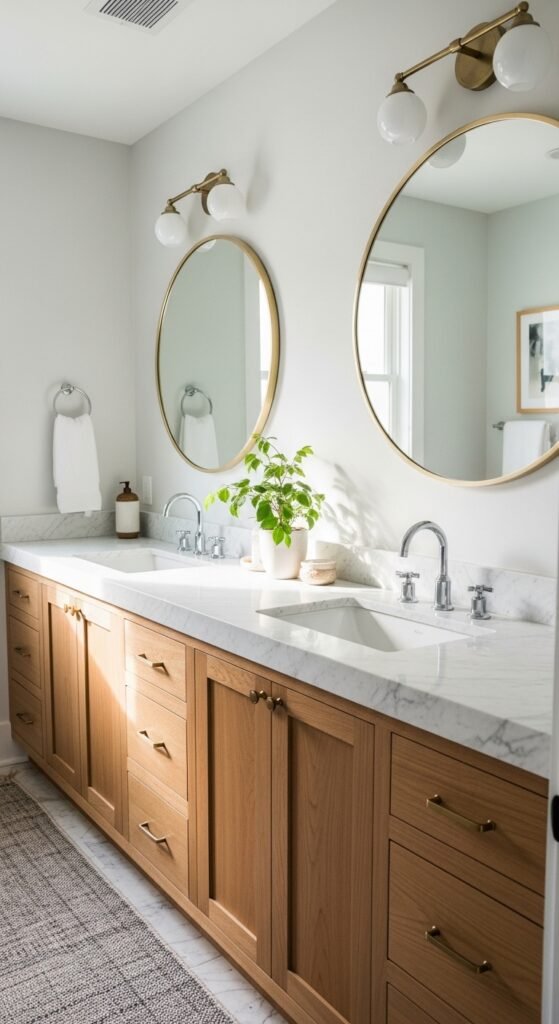
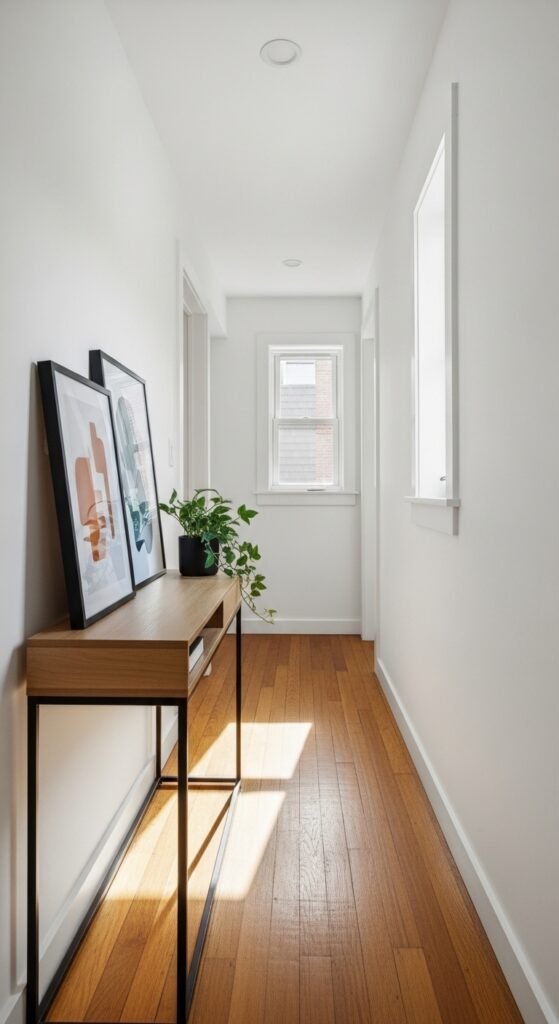
1. Slim Console Table with Floating Shelves

Slim Console Table with Floating Shelves

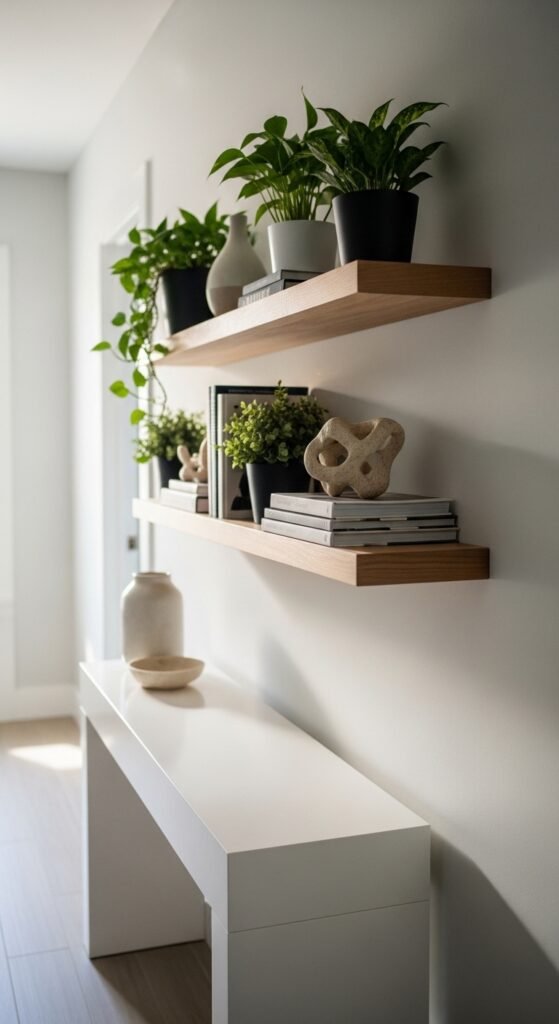
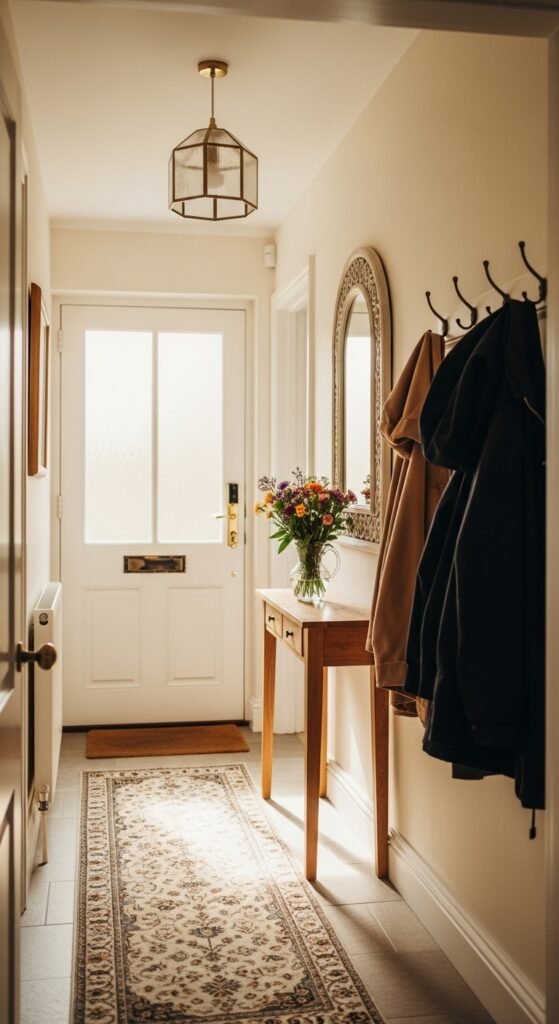
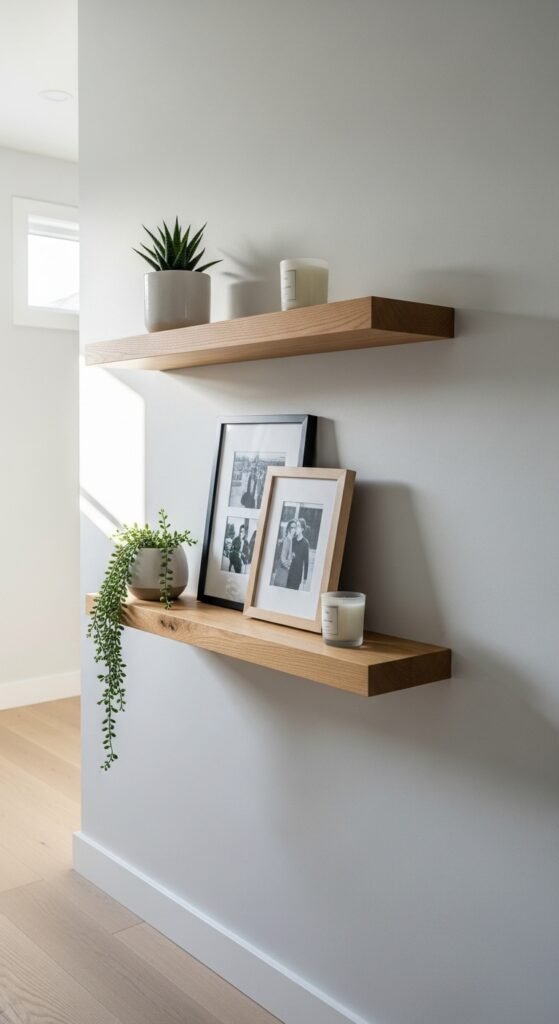
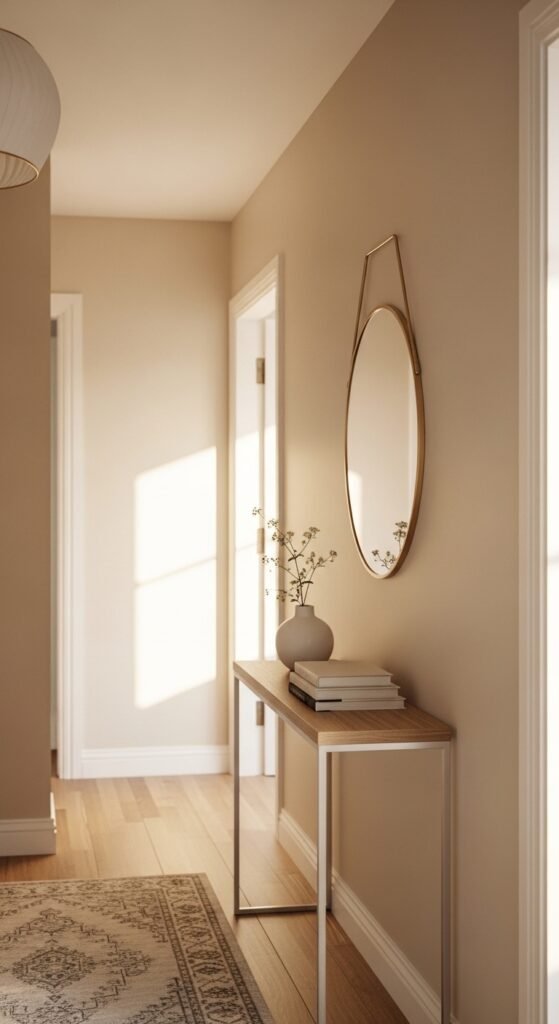
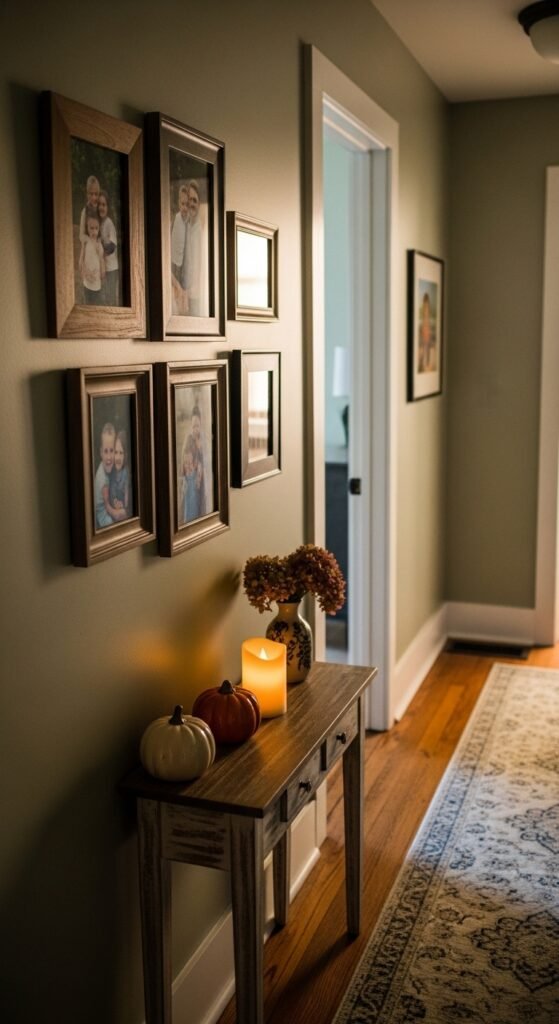
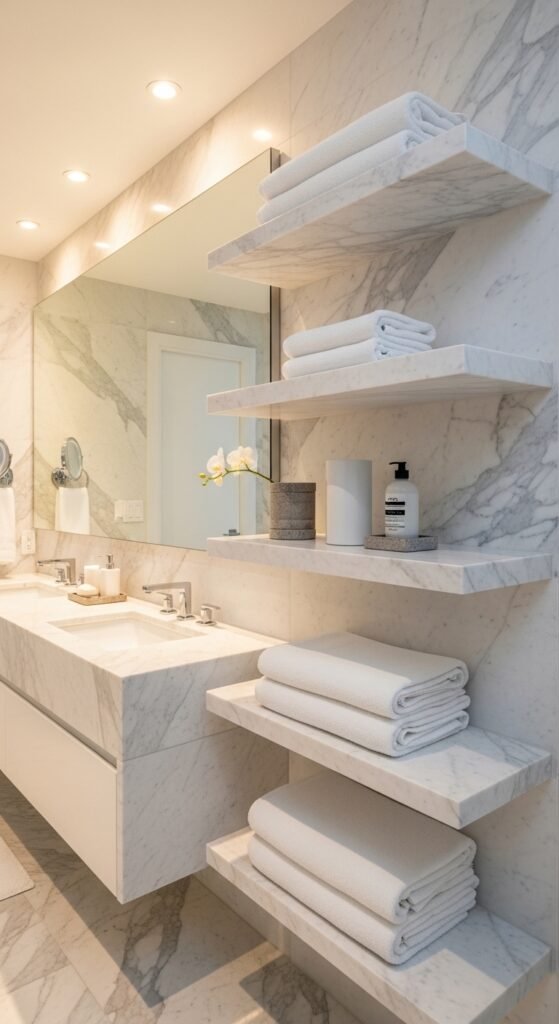
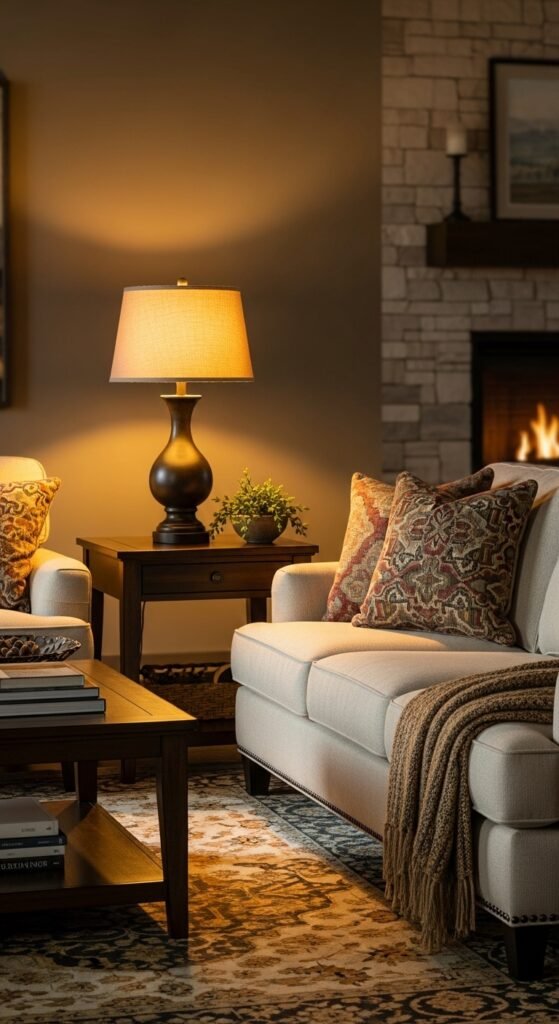
A slim console table is perfect for narrow hallways. Choose a table that doesn’t touch the floor fully, leaving the space feeling open. Add floating shelves above for extra storage without cluttering the walkway. Display small plants, framed photos, or lightweight décor items. For a rental-friendly touch, use removable hooks or adhesive strips to hang items. Keep it tidy by limiting décor to just a few pieces per shelf. This combo keeps essentials handy while maintaining a clean, stylish vibe.


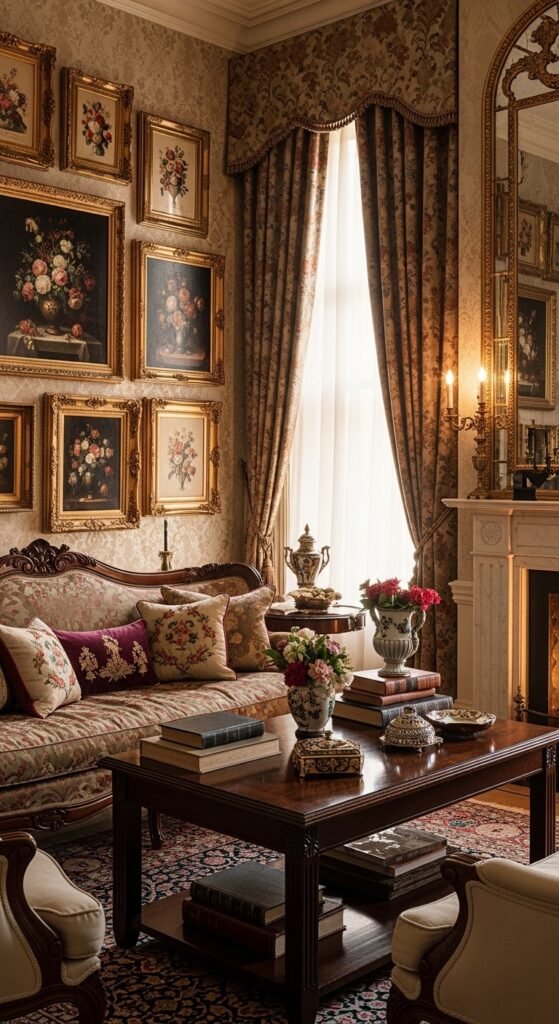
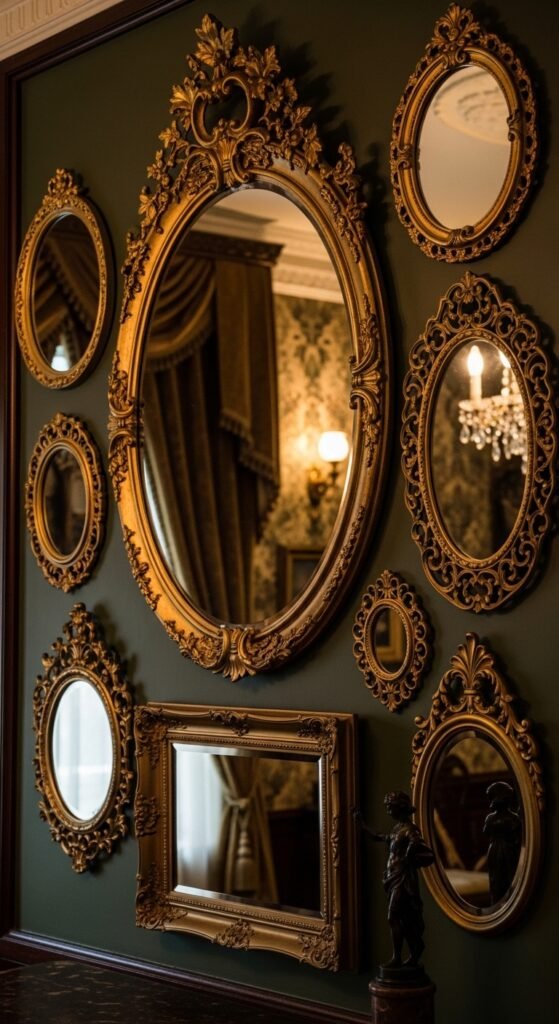
2. Gallery Wall with Rental-Friendly Frames

Gallery Wall with Rental-Friendly Frames

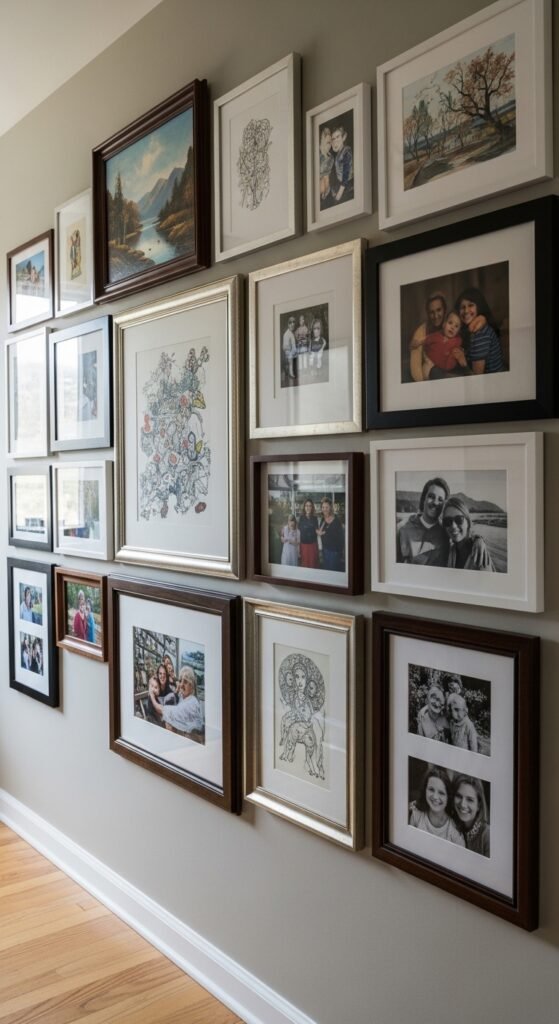
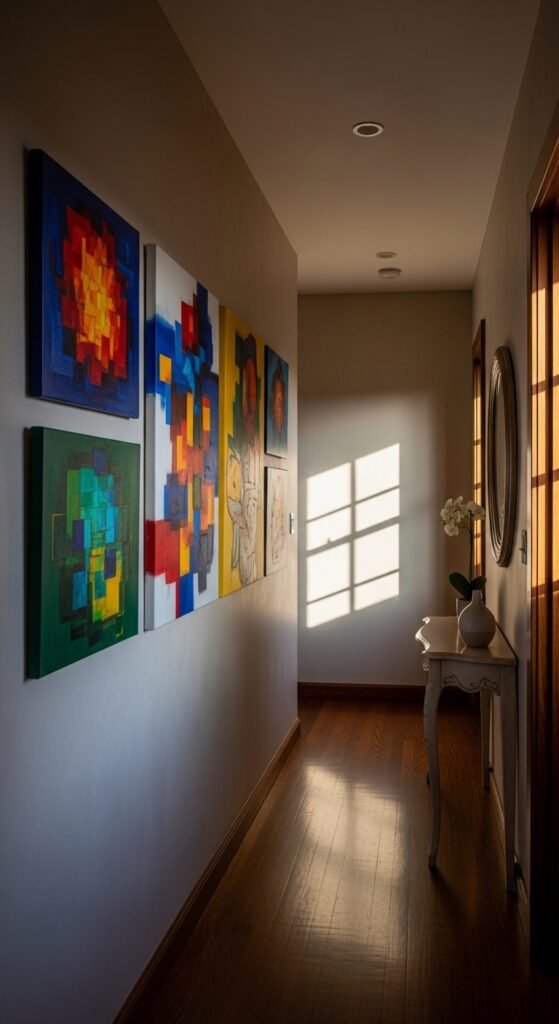
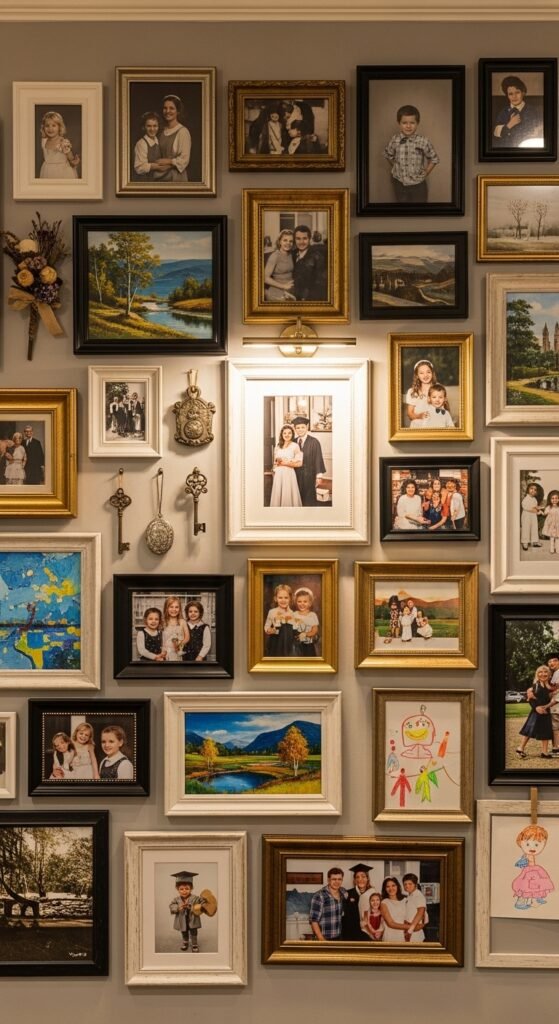
Create a gallery wall using lightweight, rental-safe frames. Stick with removable adhesive strips to avoid holes. Mix prints, photos, and small mirrors for visual interest. Vary frame sizes but keep a cohesive color scheme to avoid chaos. This turns a plain hallway into a curated mini-exhibit. Swap out pieces seasonally or as your style changes. A gallery wall is a budget-friendly way to inject personality without permanent changes.


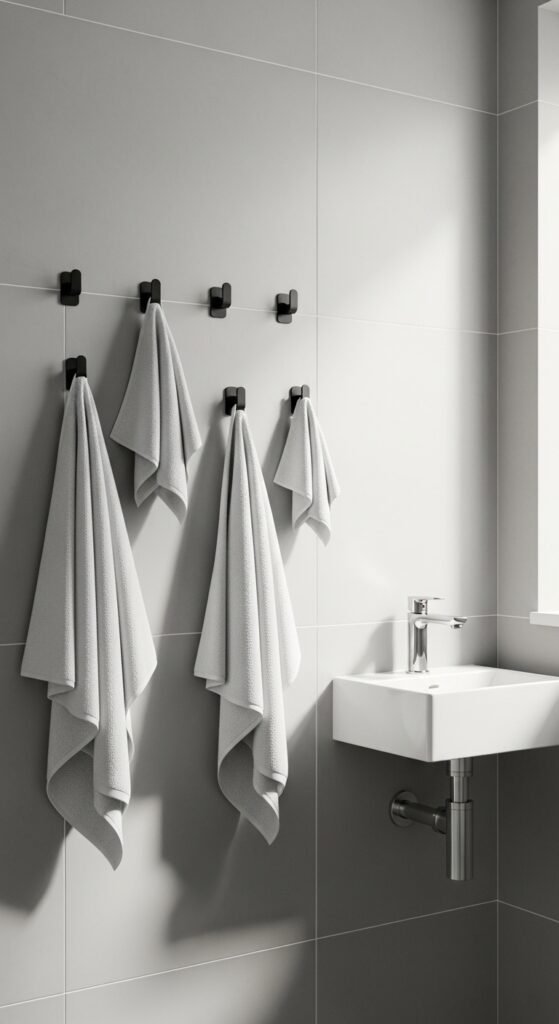
3. Wall-Mounted Coat Hooks

Wall-Mounted Coat Hooks

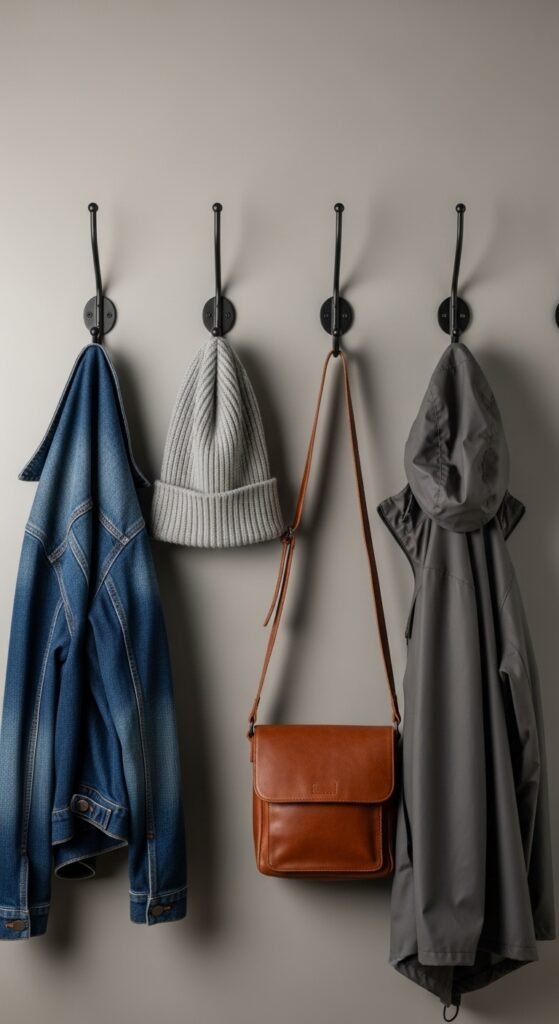
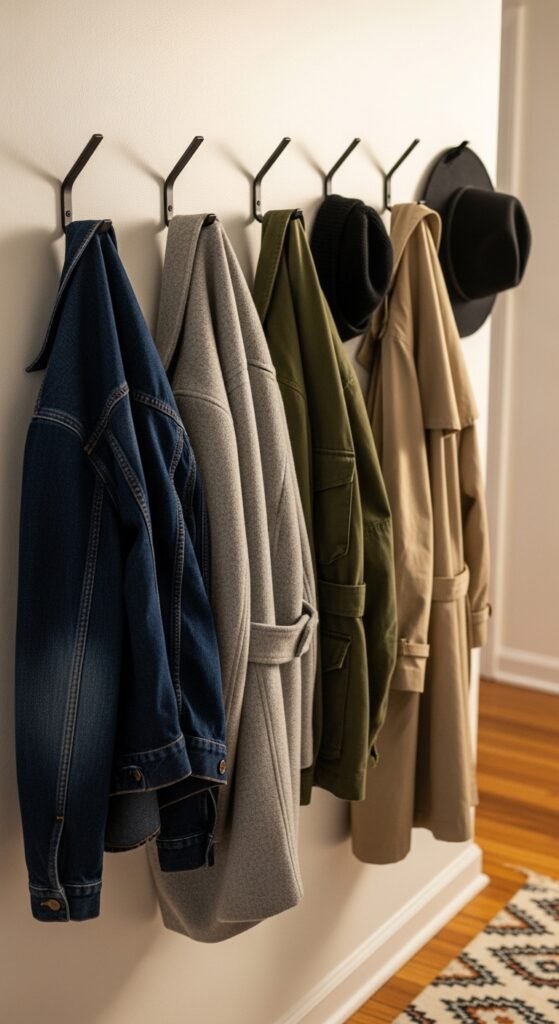
Wall-mounted hooks save floor space and keep essentials organized. Install a row near the entry to hang jackets, bags, or umbrellas. Use removable hooks for rental compliance. Choose hooks that match your décor—metal for modern, wooden for warm, natural vibes. Space hooks evenly for balance and easy access. Hooks keep clutter off the floor and make your hallway functional yet stylish without taking up much room.


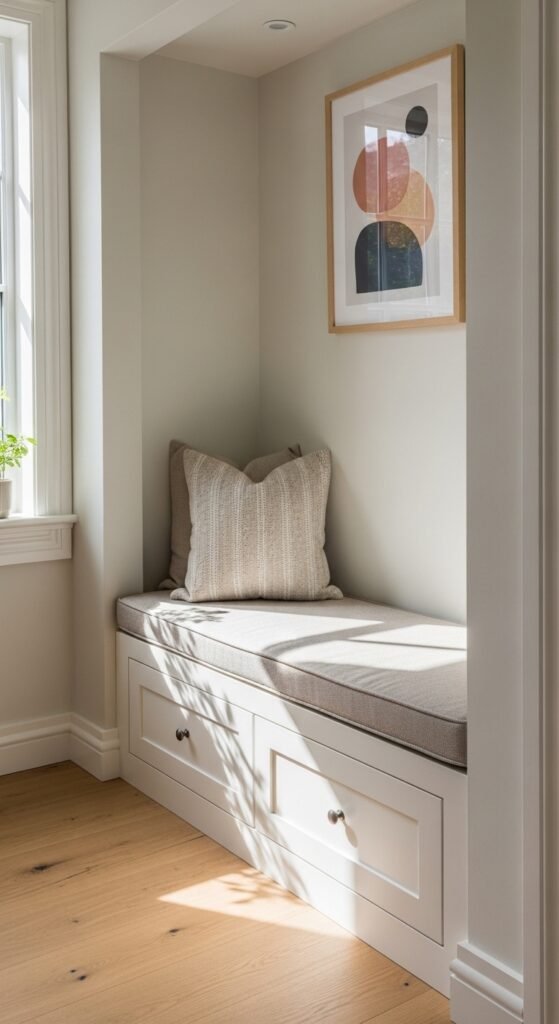
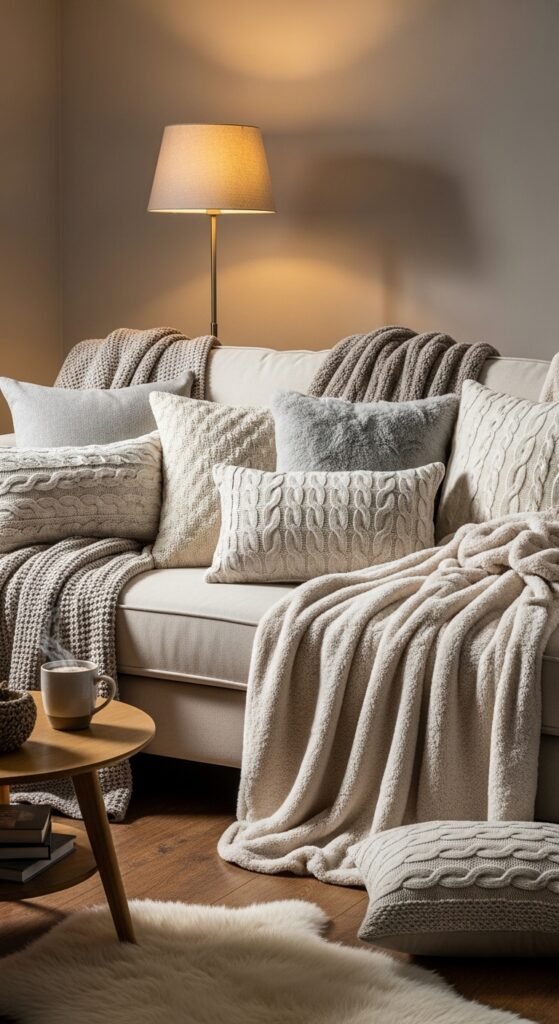
4. Slim Storage Bench

Slim Storage Bench

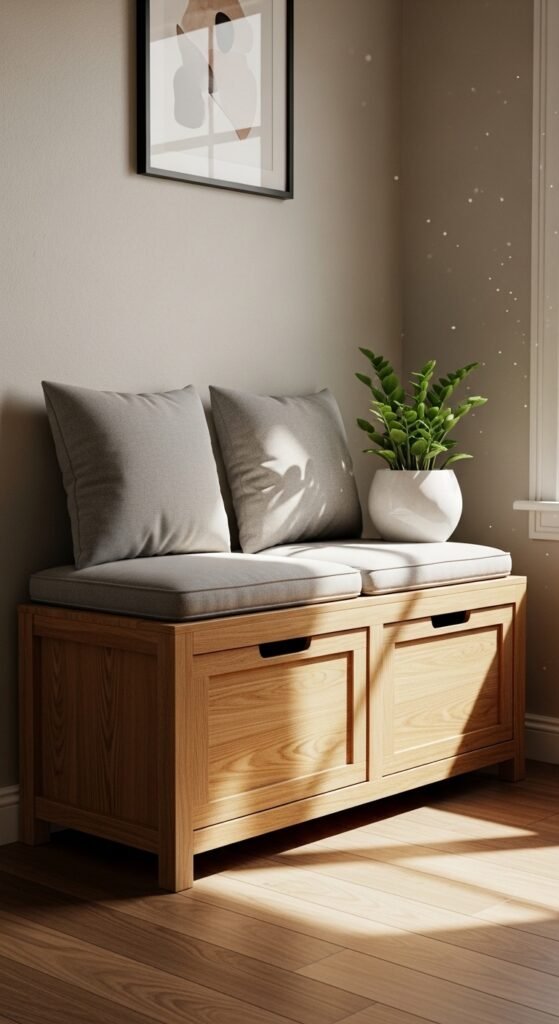
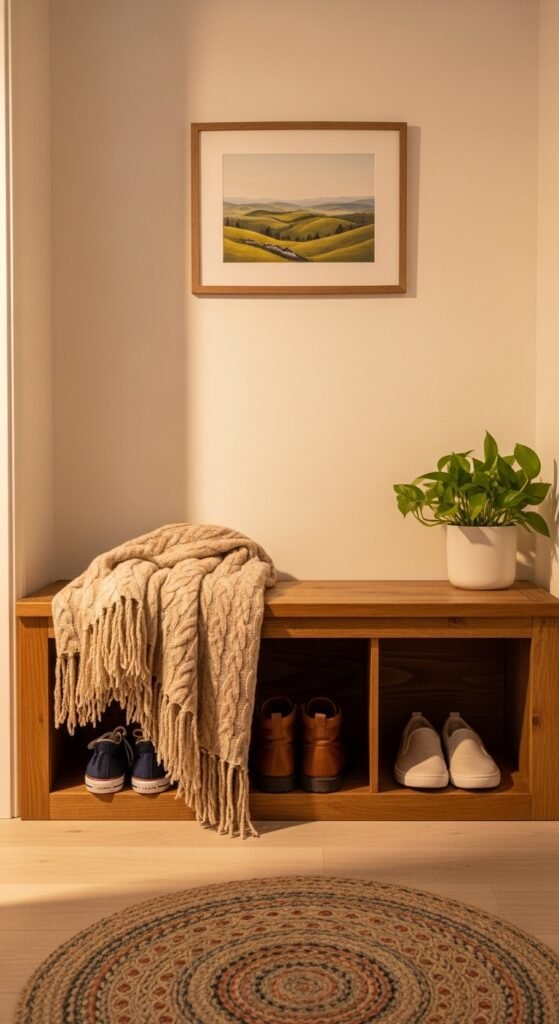
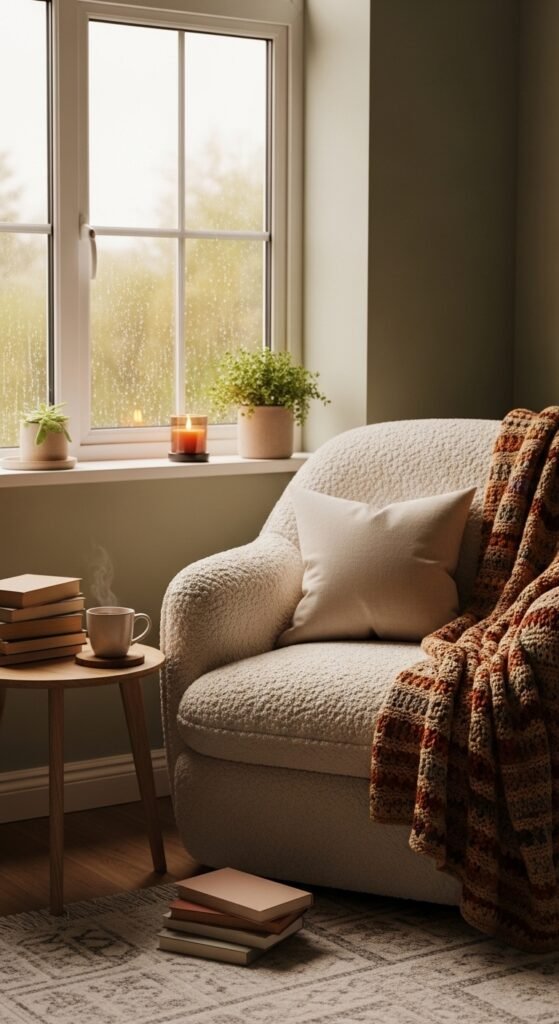
A slim storage bench adds seating and hidden storage. Perfect for putting on shoes or dropping bags. Look for benches with cubbies or baskets underneath to hide clutter. Add a soft cushion for comfort and a throw for style. Choose neutral tones to make the space feel larger. Benches double as décor and function, ideal for tight hallways where every inch counts.


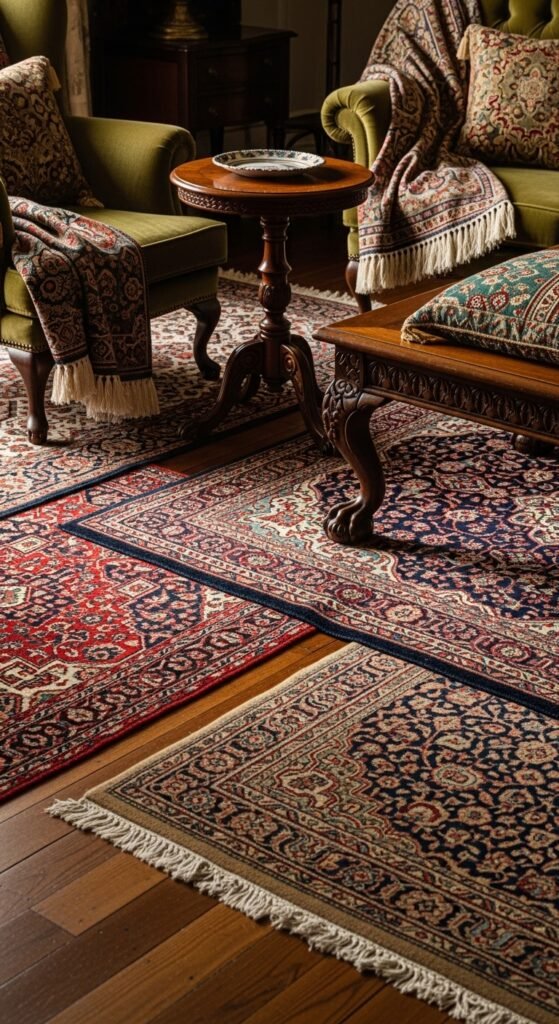
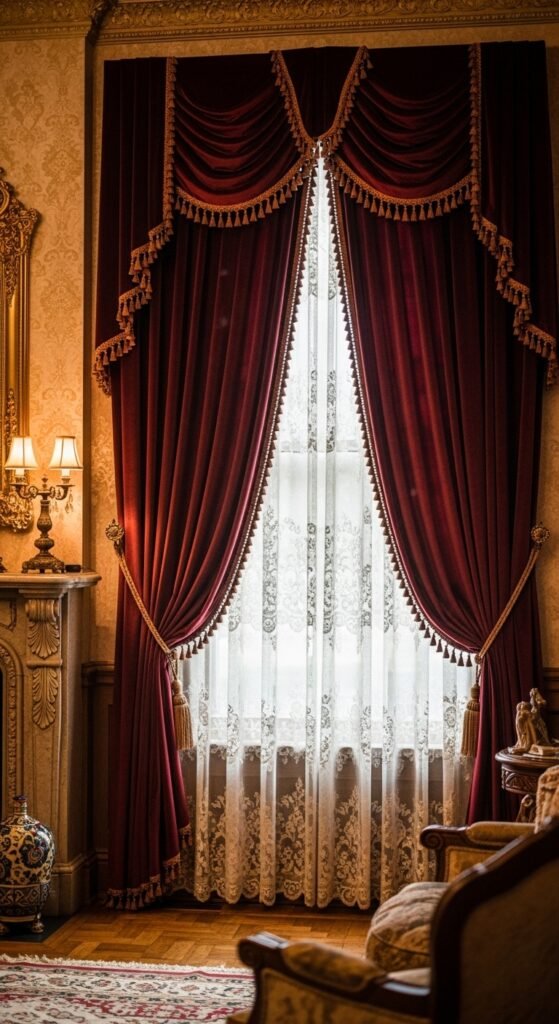
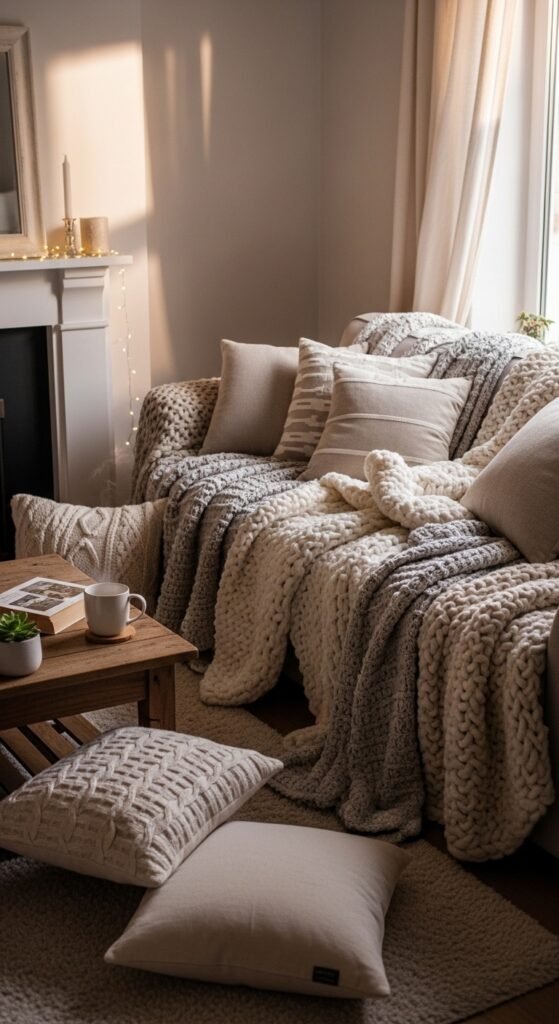
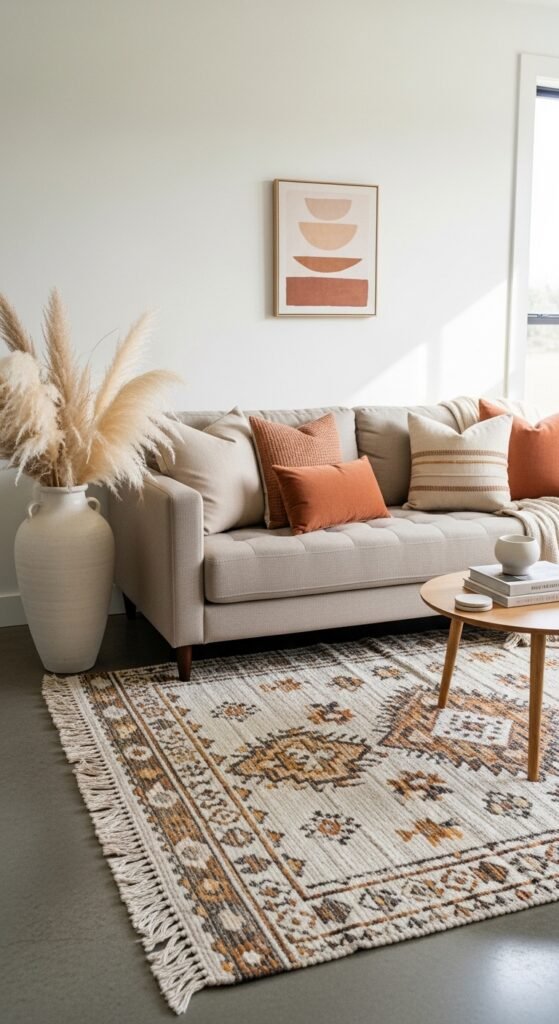
5. Statement Rug Runner

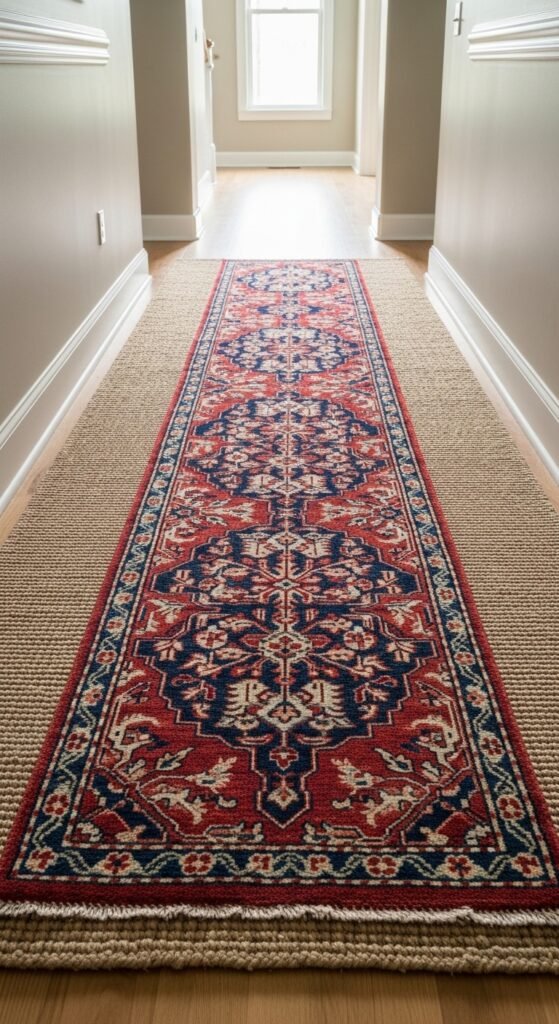
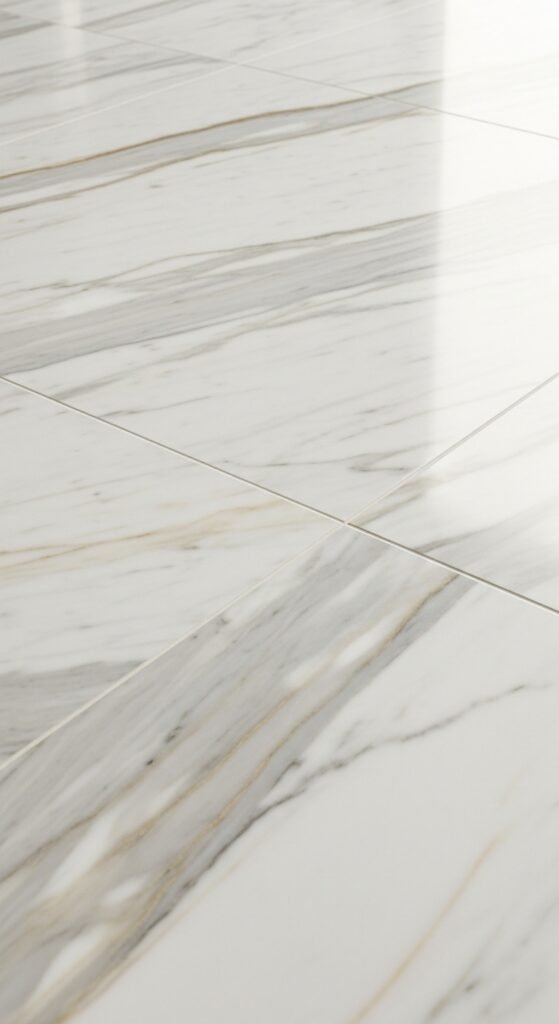
Add warmth and personality with a runner rug. Patterns or textures make a small hallway feel intentional. Opt for washable or low-maintenance rugs. Light-colored runners brighten the space, while bold patterns add a designer touch. Keep rugs slim so they don’t crowd the walkway. A rug instantly makes the hallway more inviting without permanent changes.


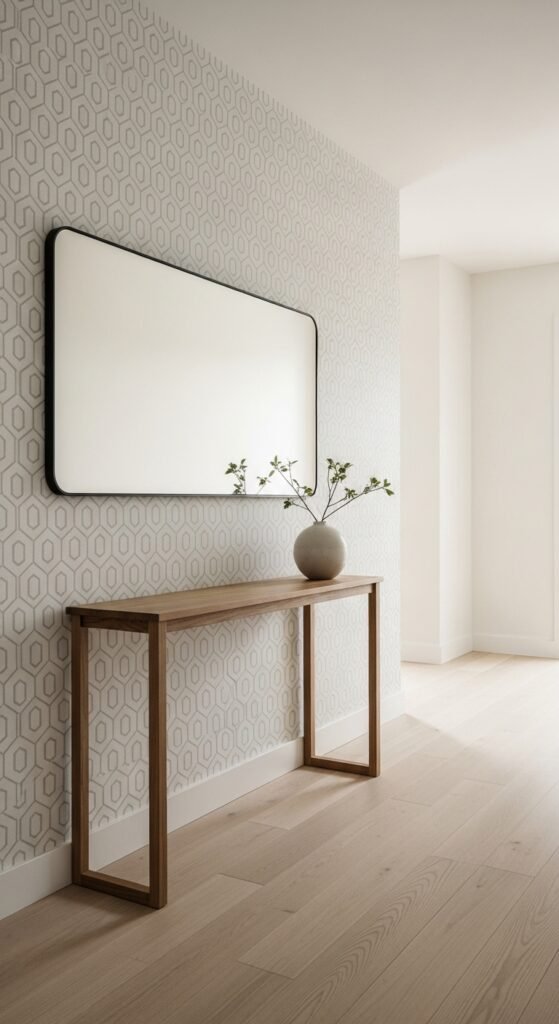
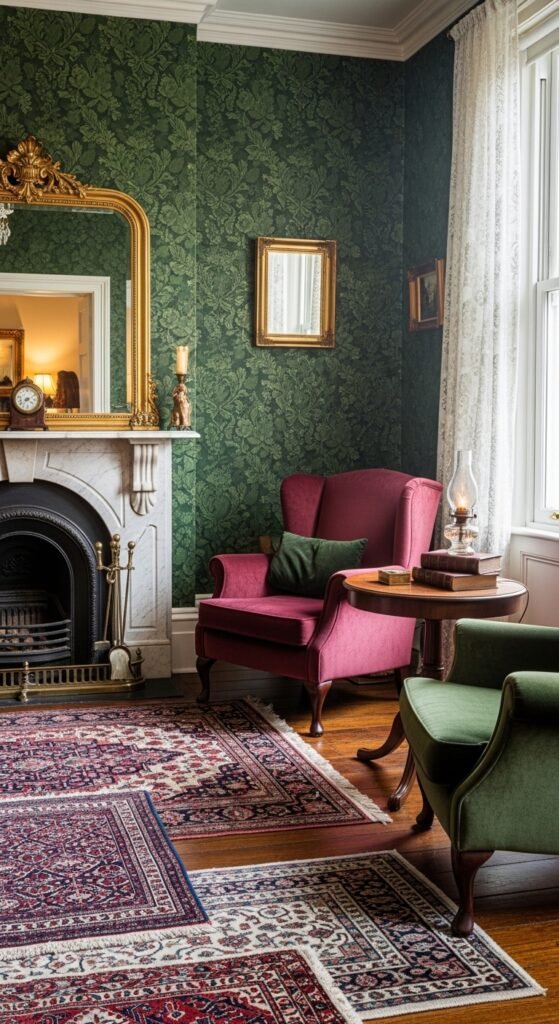
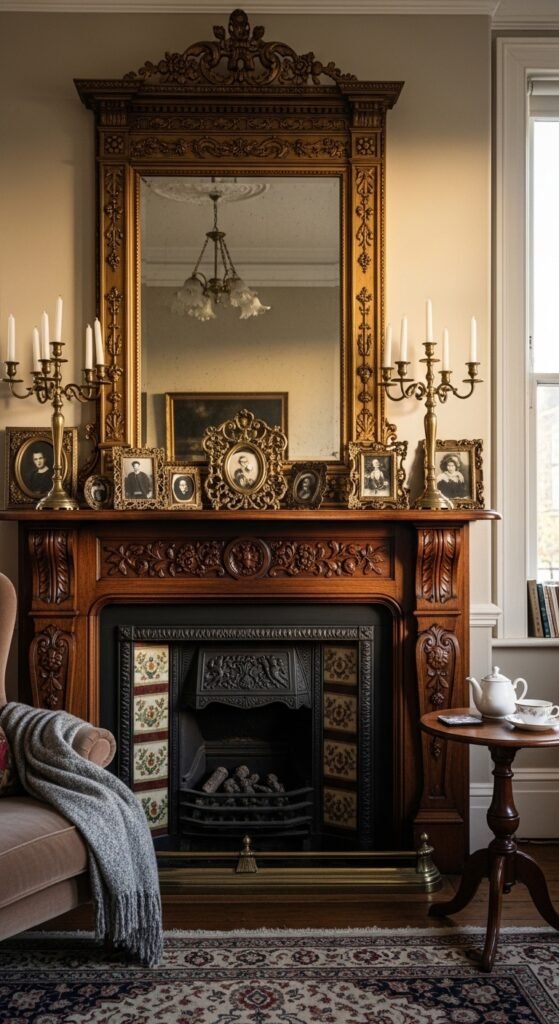
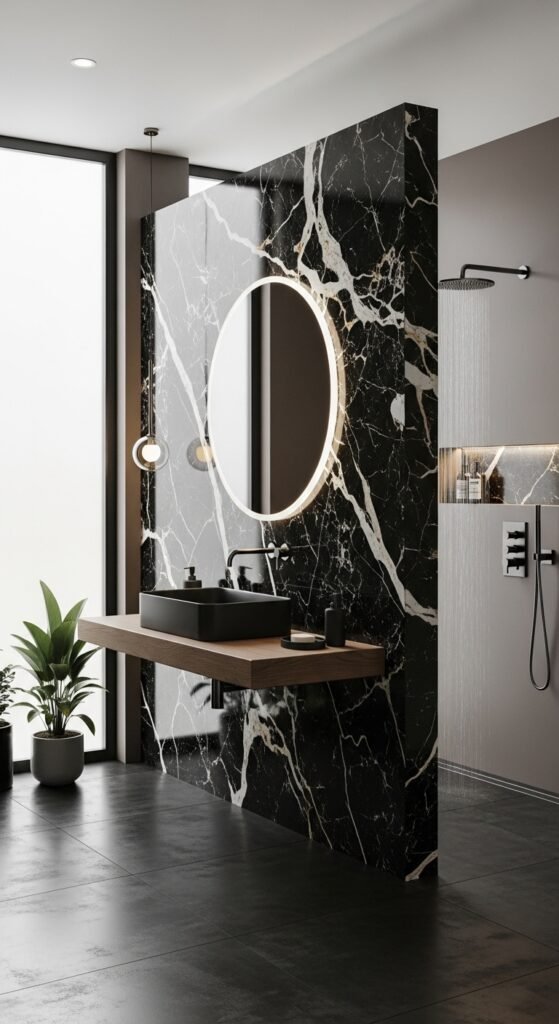
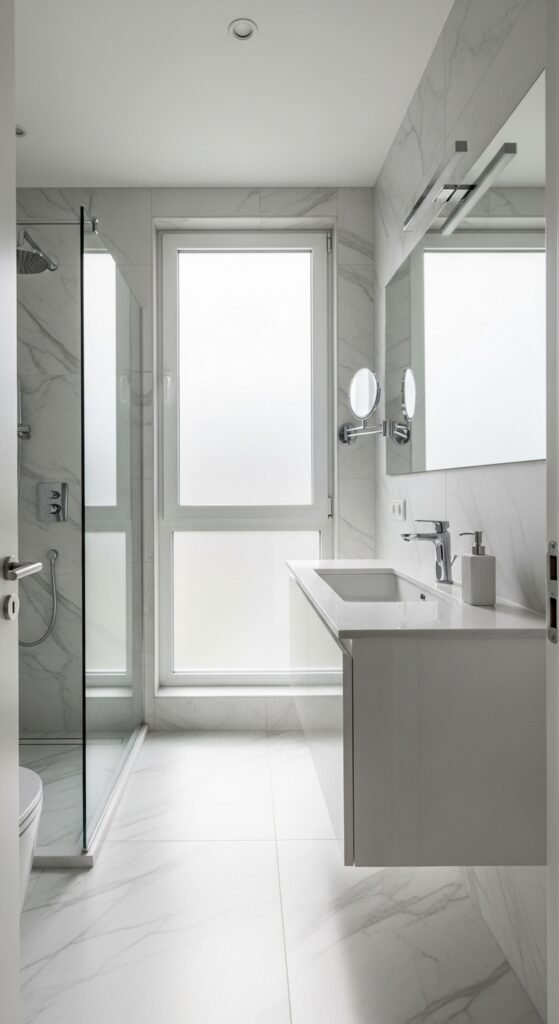
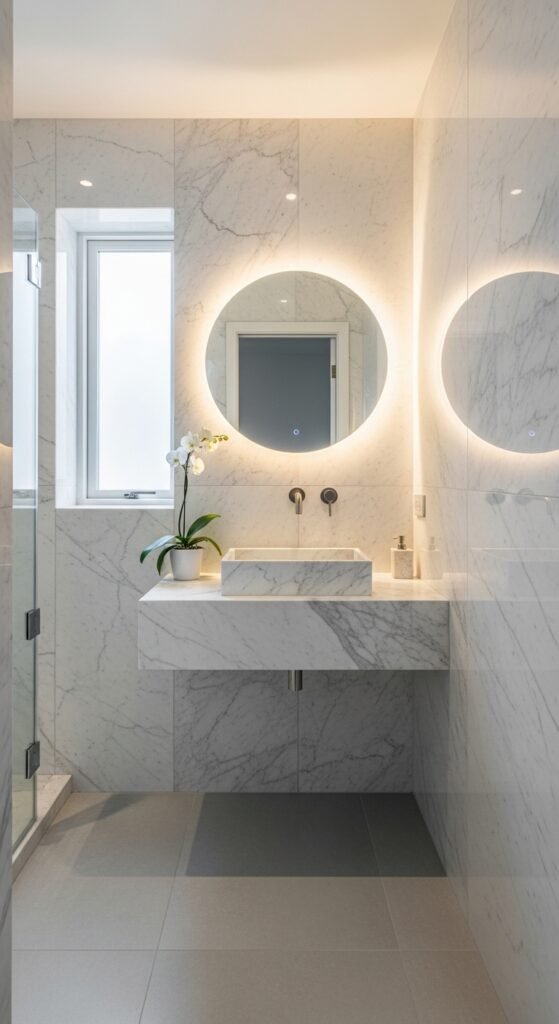
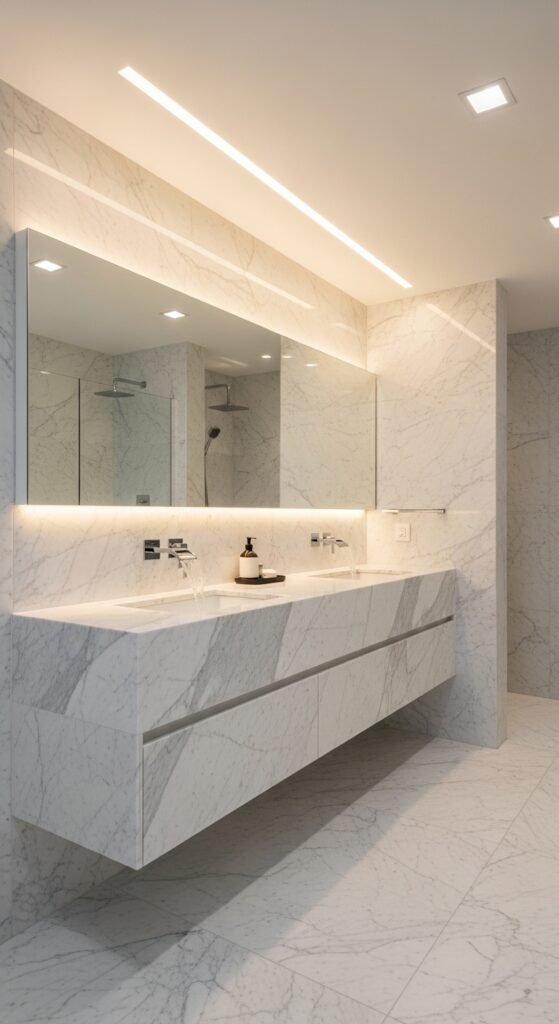
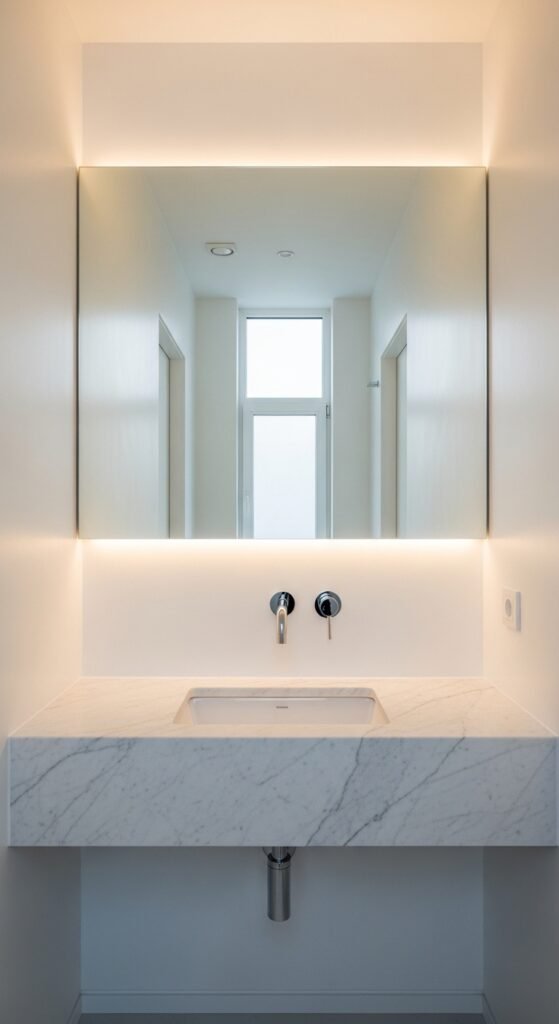
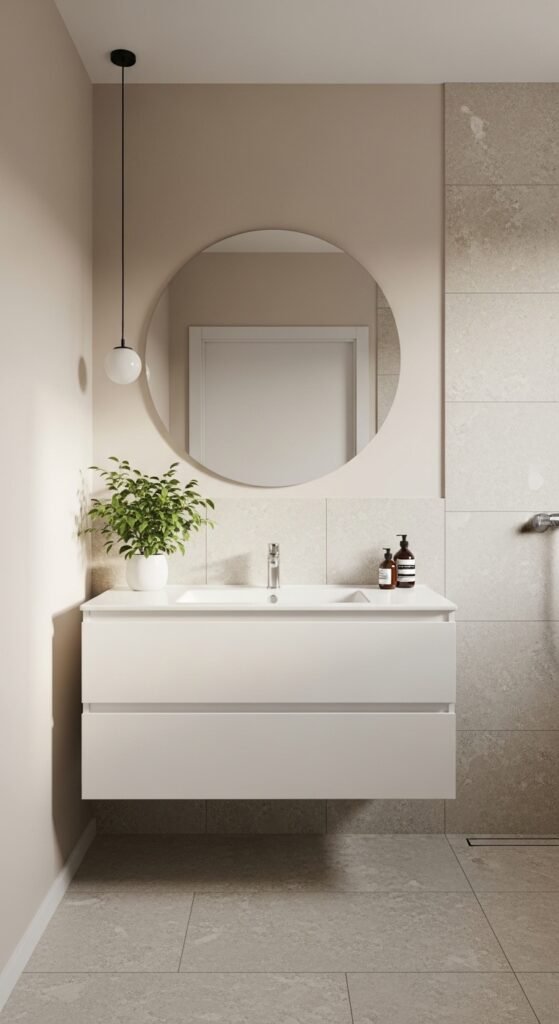
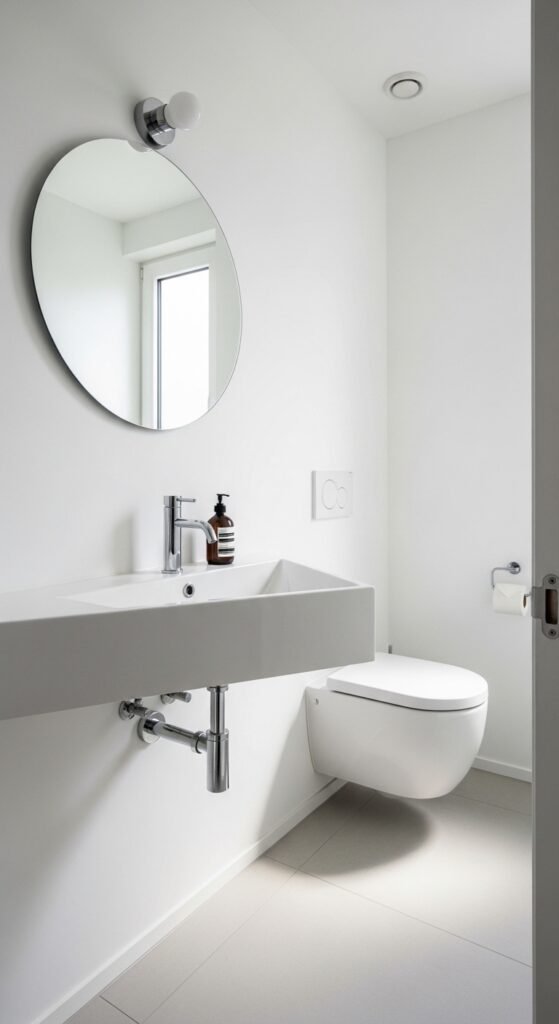
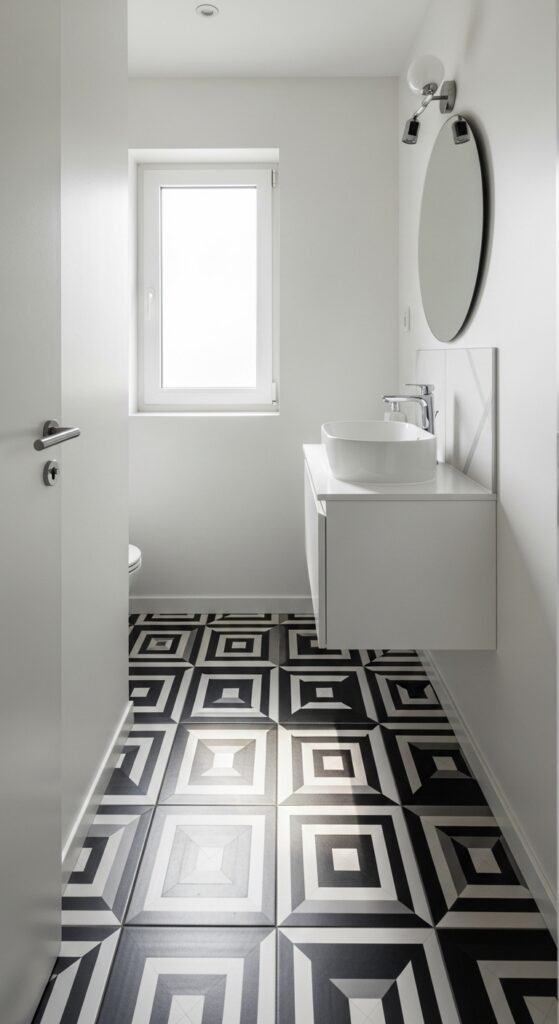
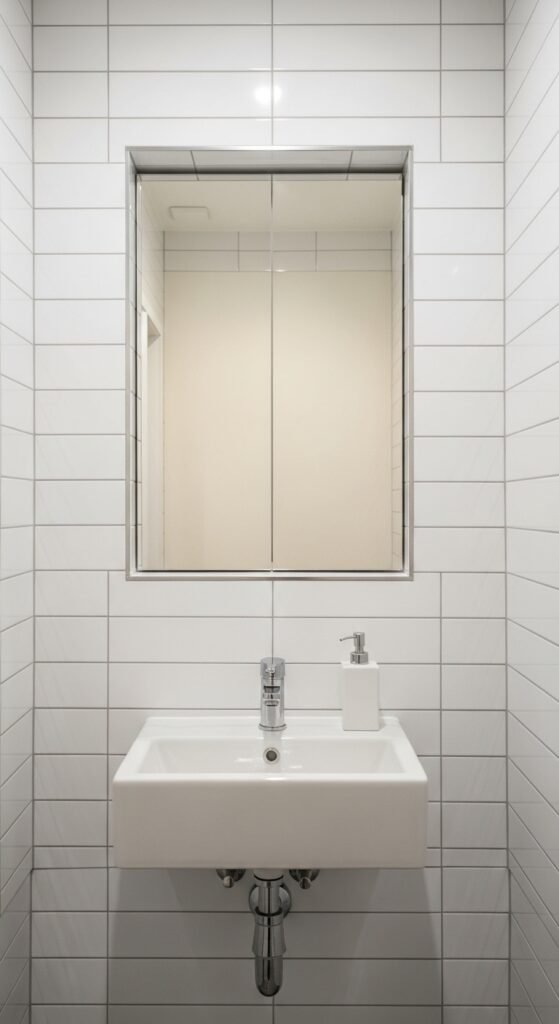
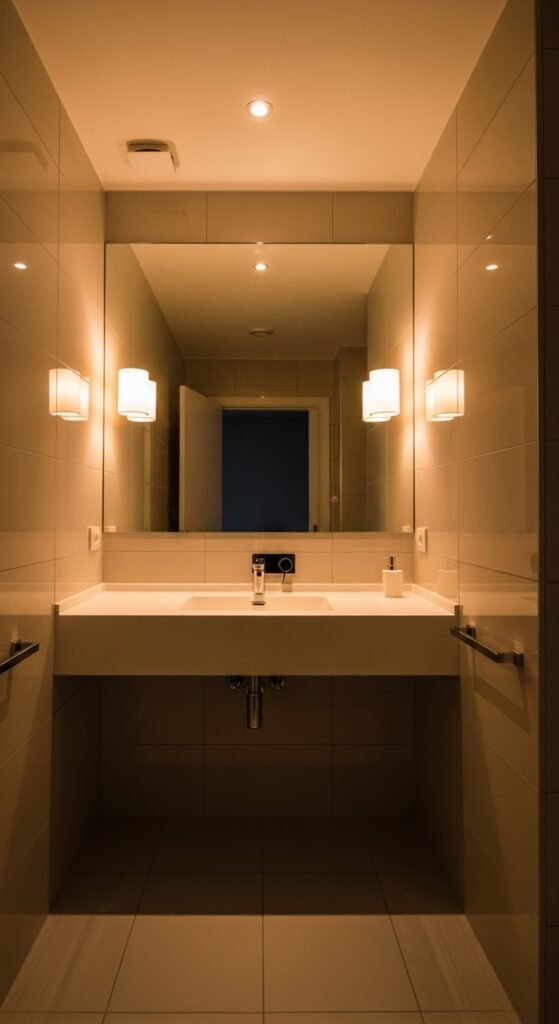
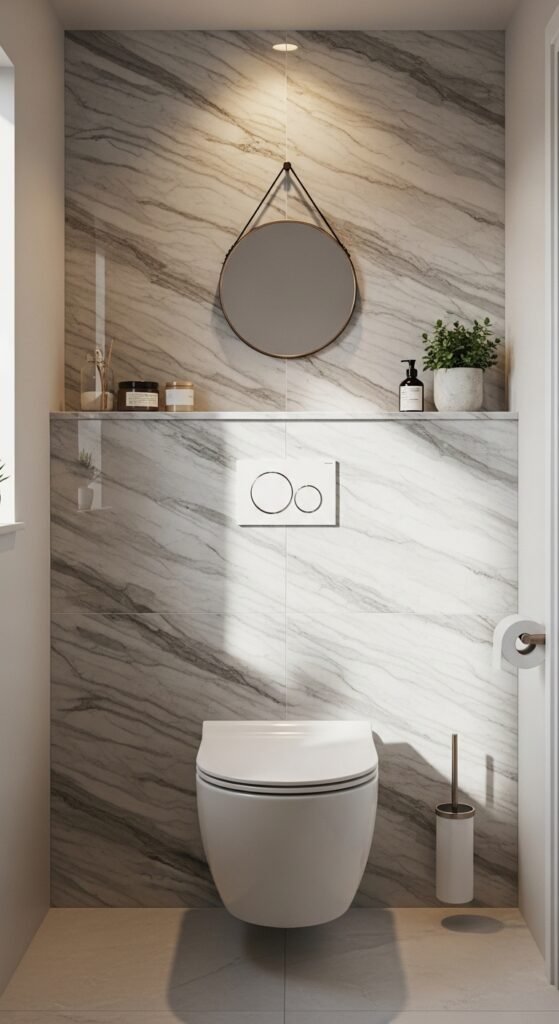
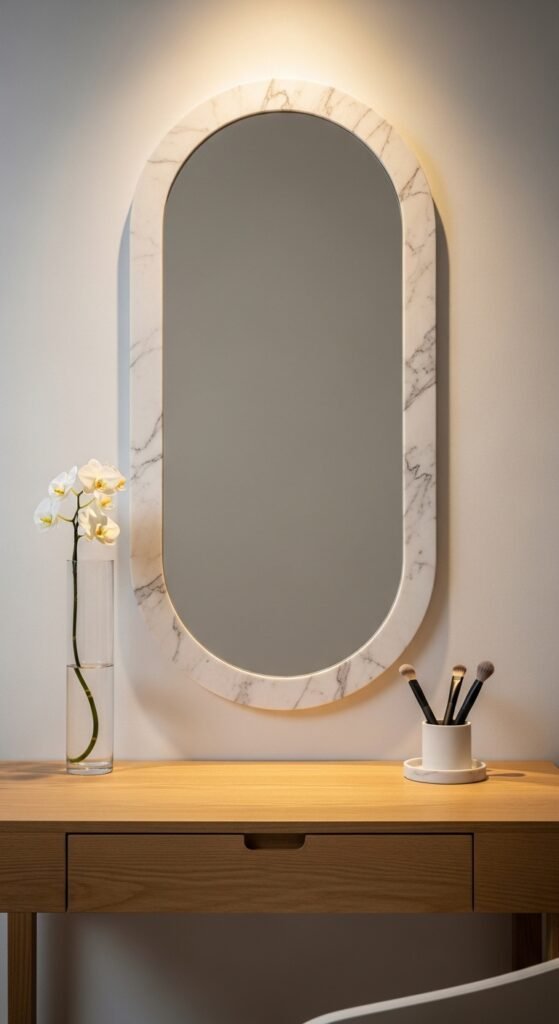
6. Mirror to Open Up Space

Mirror to Open Up Space

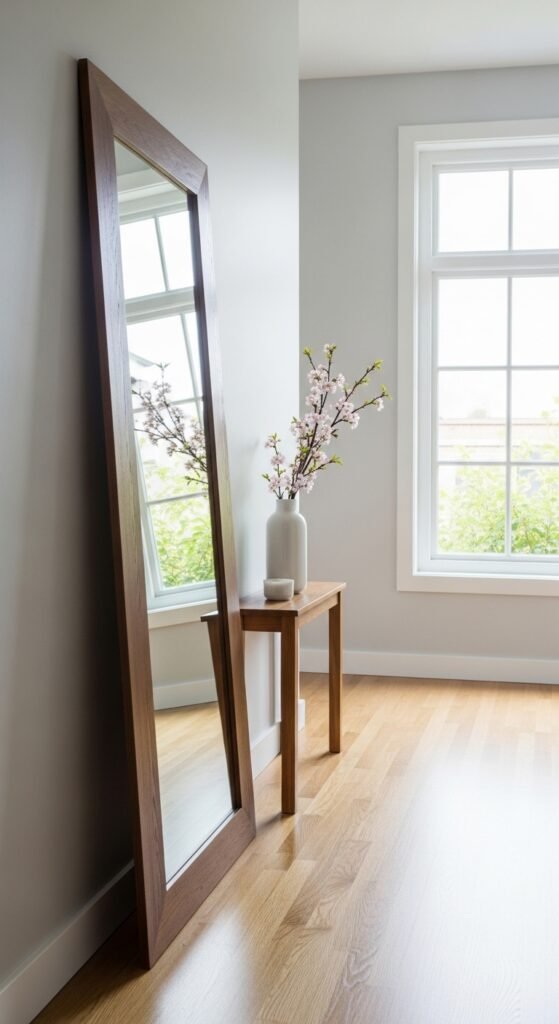
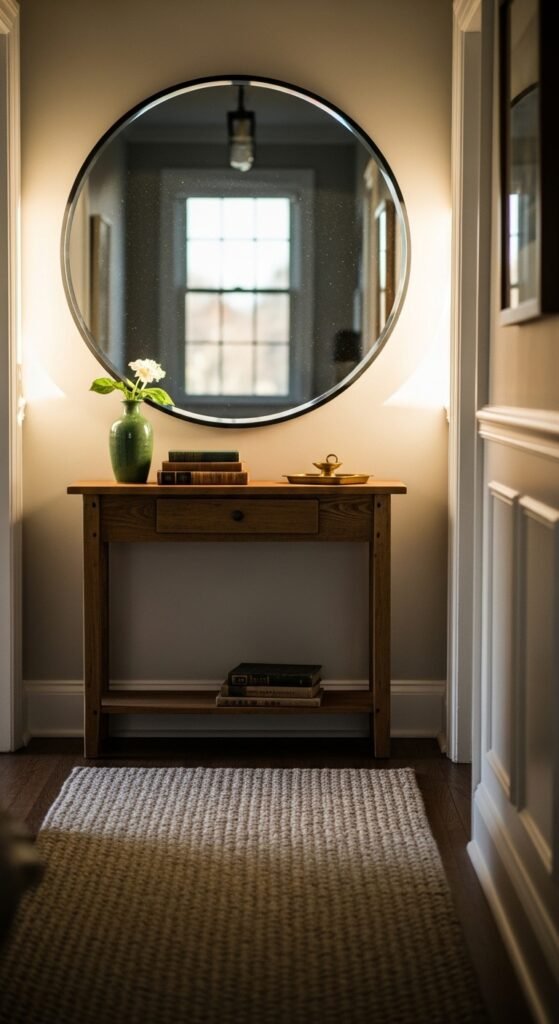
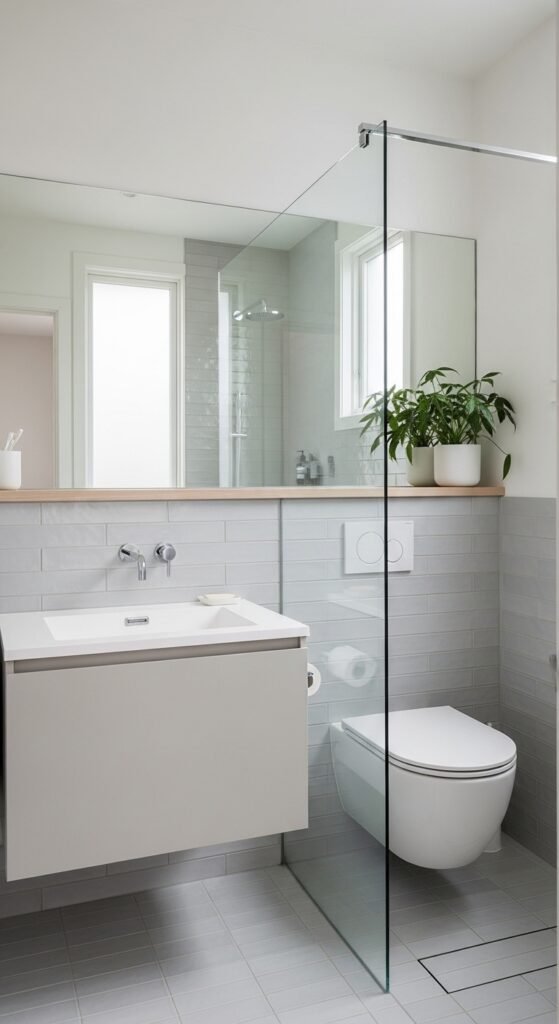
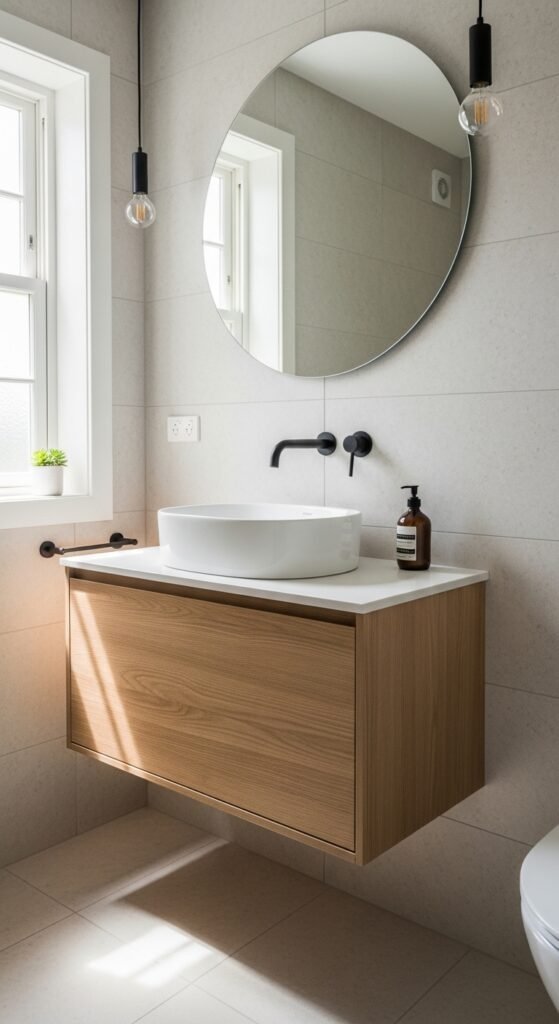
Mirrors make small hallways feel larger and brighter. Use a full-length leaning mirror or a wall-mounted version. Reflect light from windows or overhead lights to maximize brightness. Mirrors also double as décor and a last-minute outfit check. Place them opposite artwork or at the end of the hallway to create depth. No drilling? Opt for adhesive mirror strips designed for rentals.


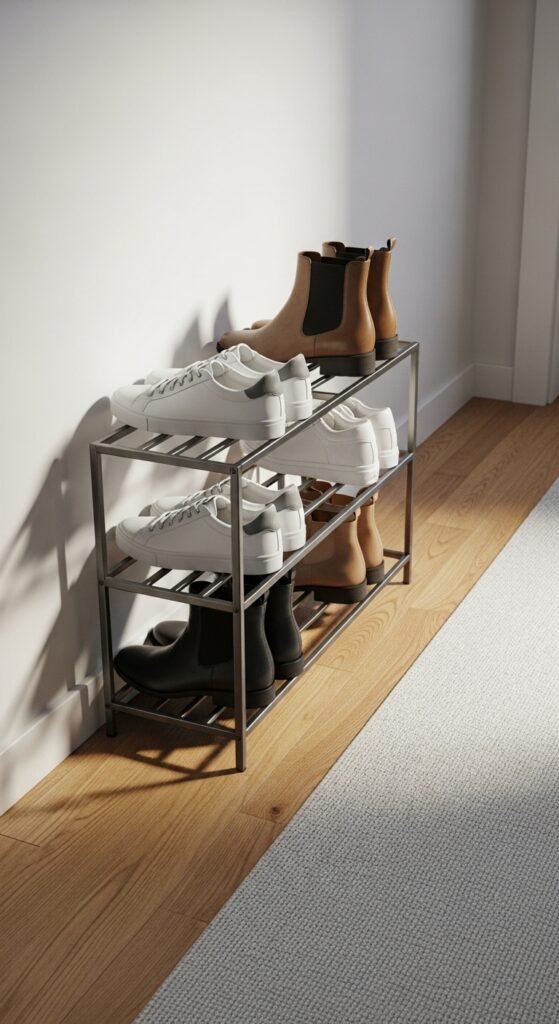
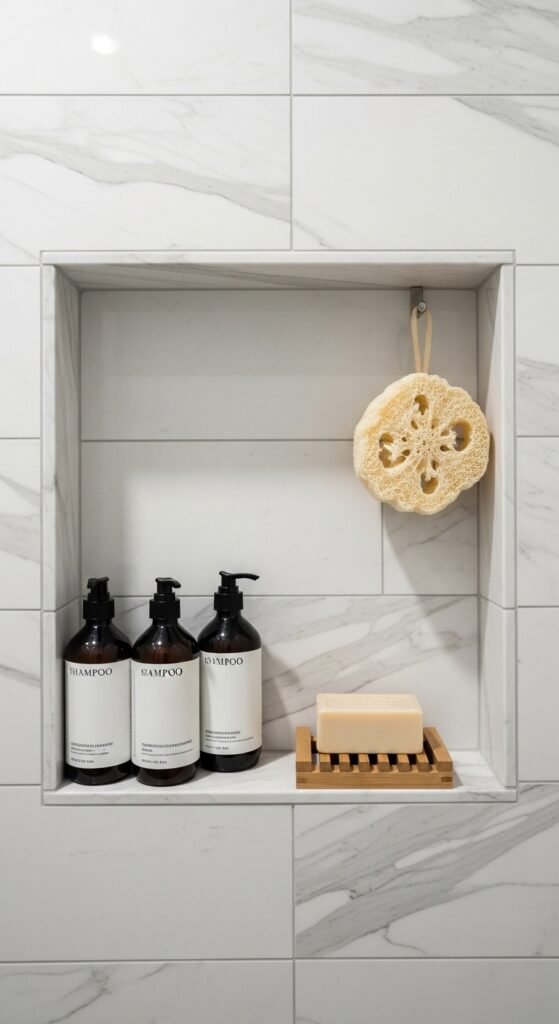
7. Floating Shoe Storage

Floating Shoe Storage

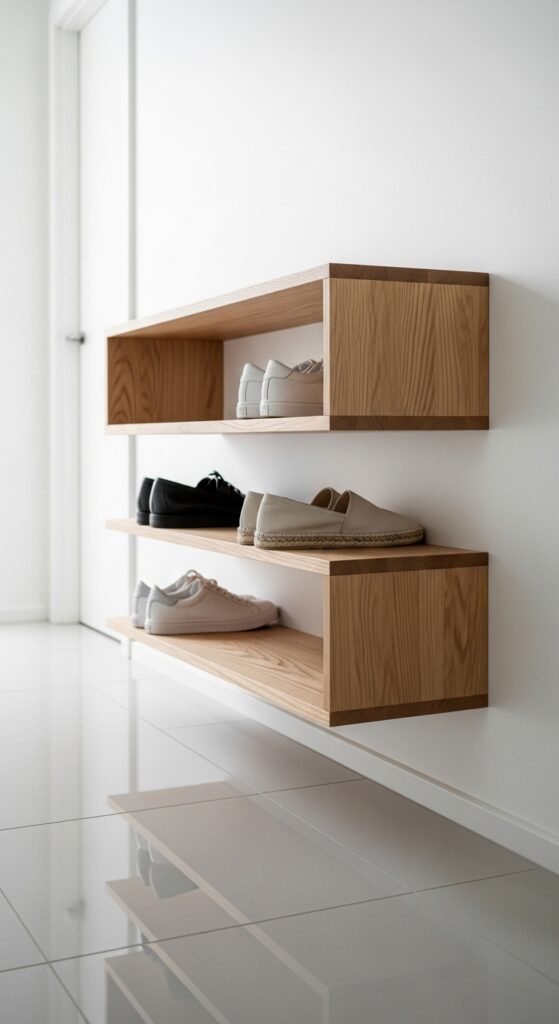
Floating shoe shelves free floor space while keeping shoes organized. Stack two or three tiers for small apartments. Open shelving allows quick access. Pair with baskets for smaller items like flip-flops or slippers. Keep shelves shallow to avoid crowding the walkway. This approach is simple, affordable, and keeps your hallway neat.


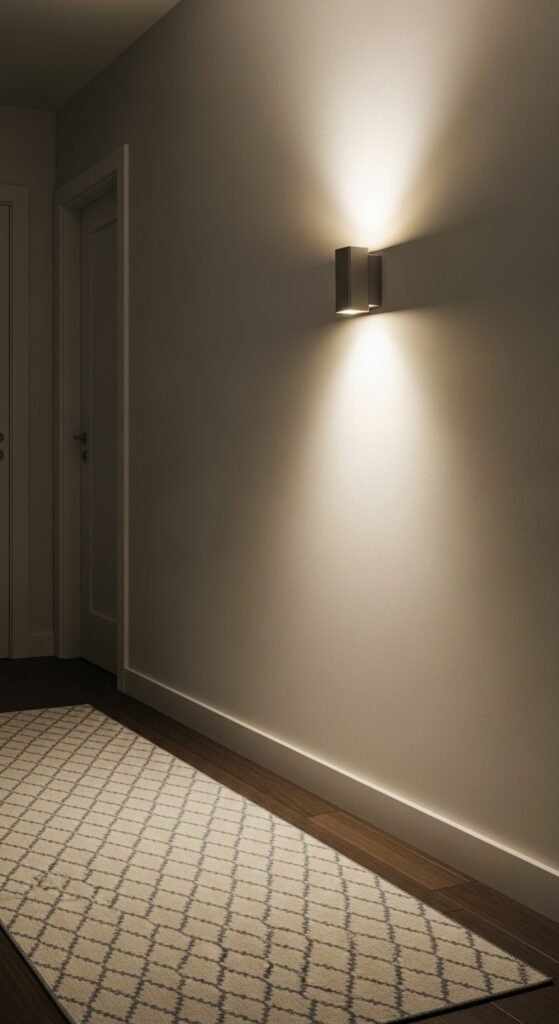
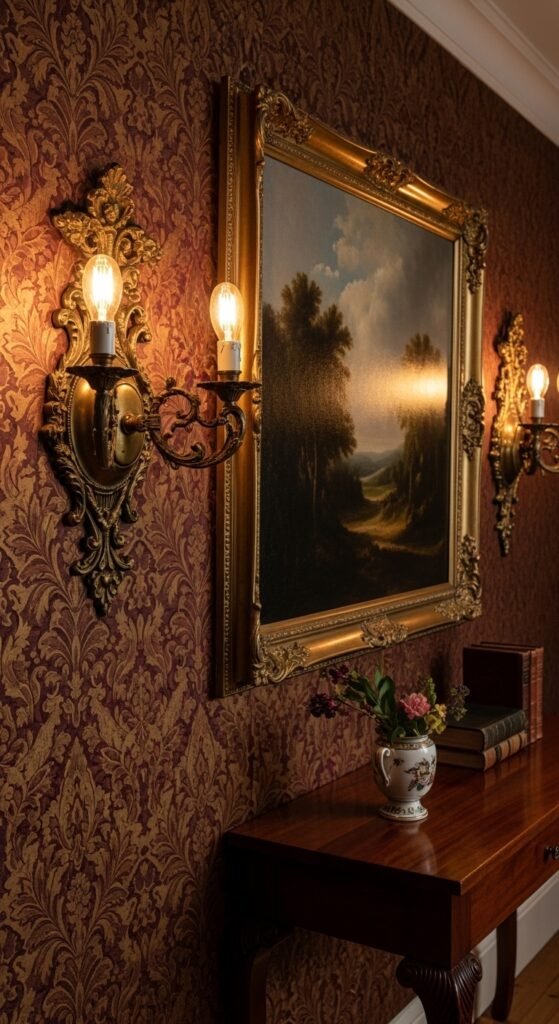
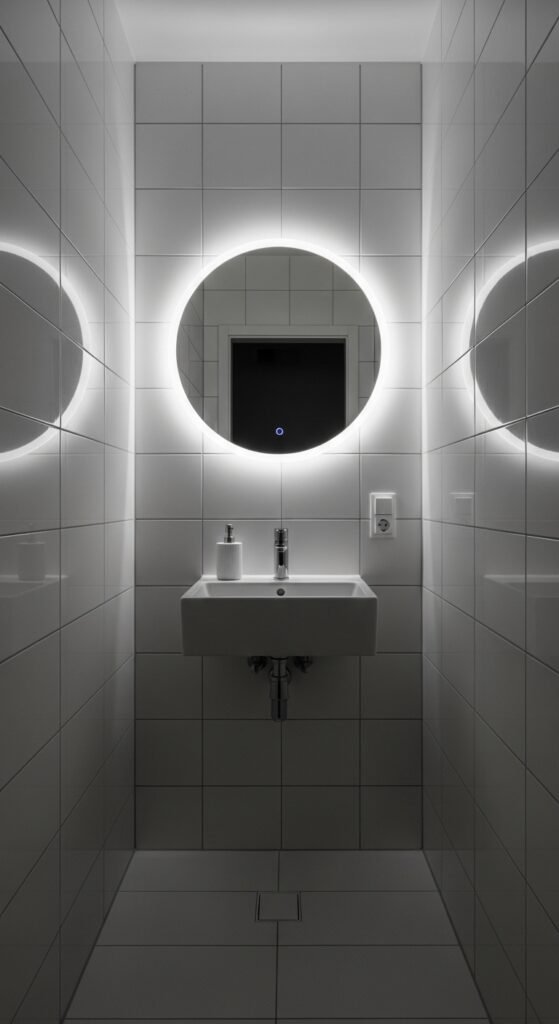
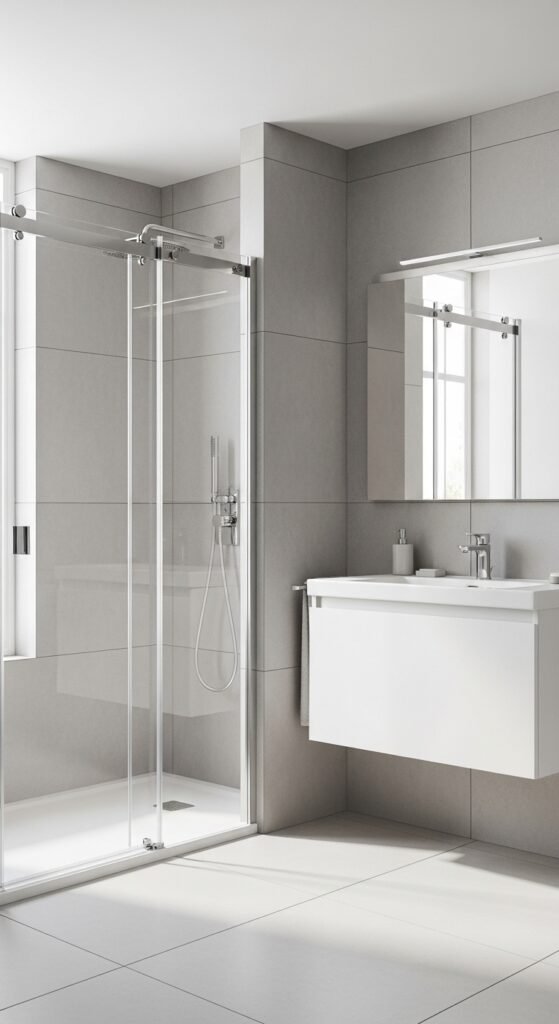
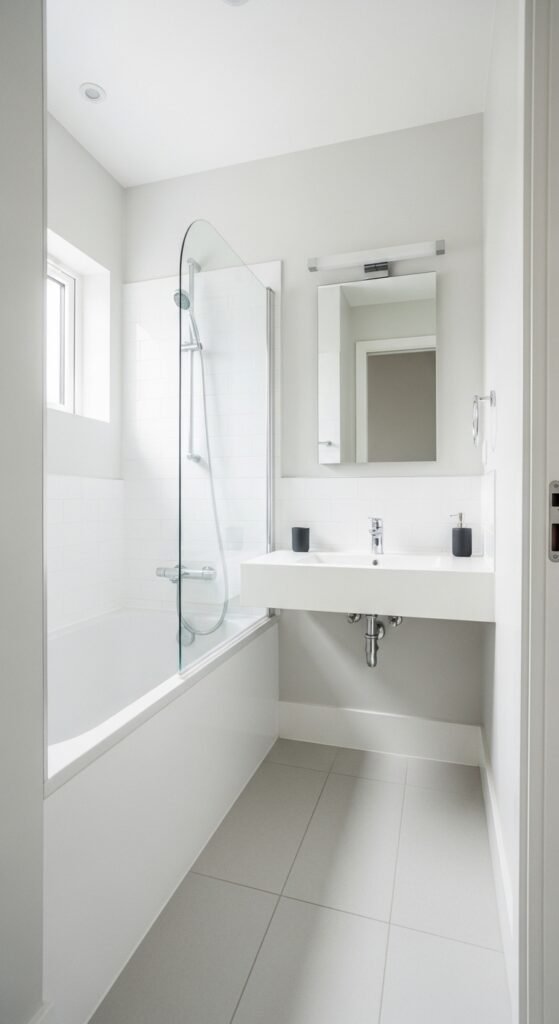
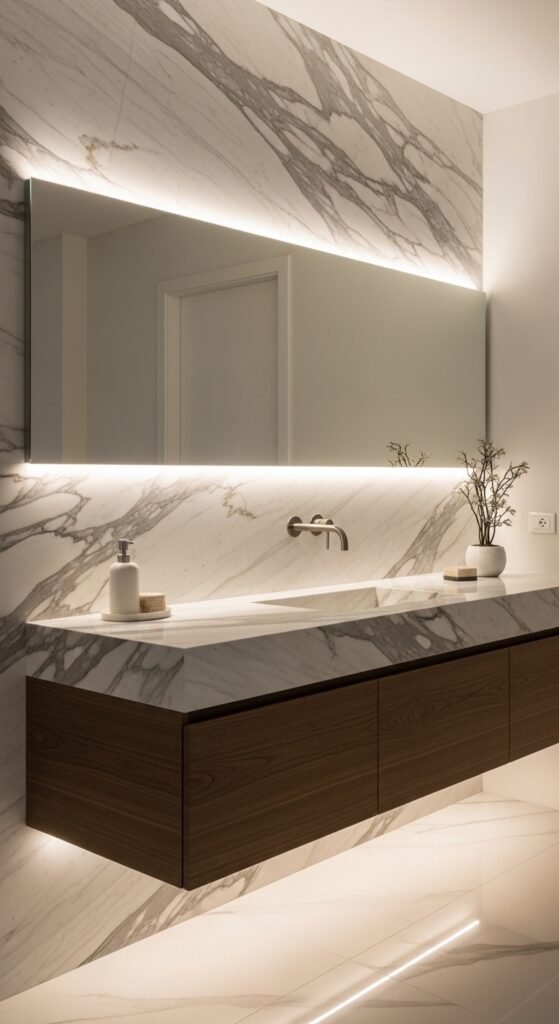
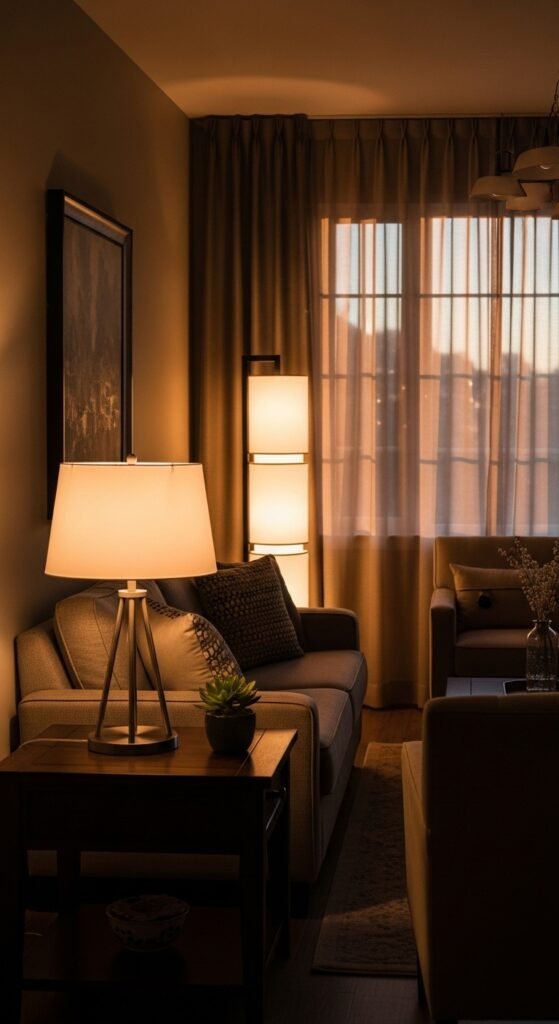
8. Wall-Mounted Lighting

Wall-Mounted Lighting

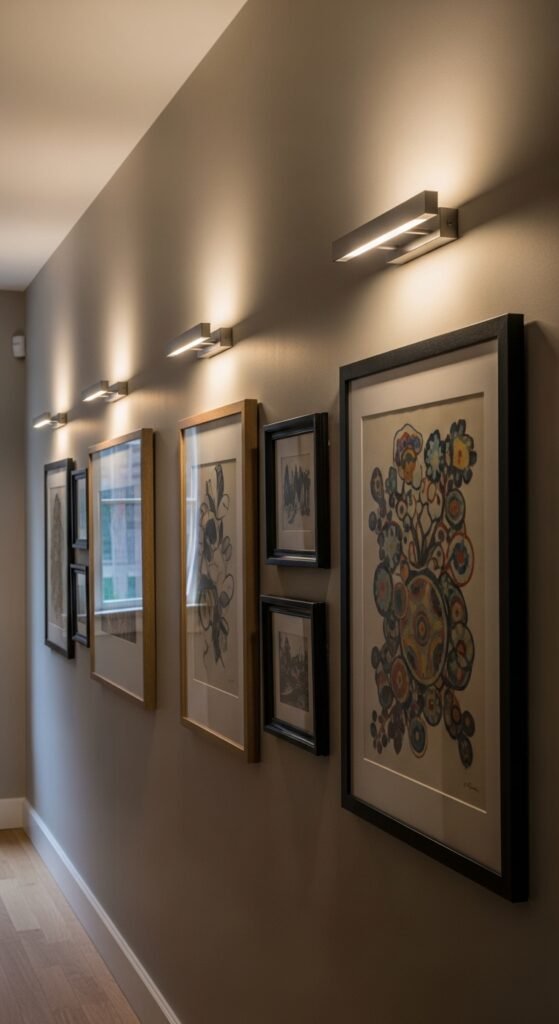
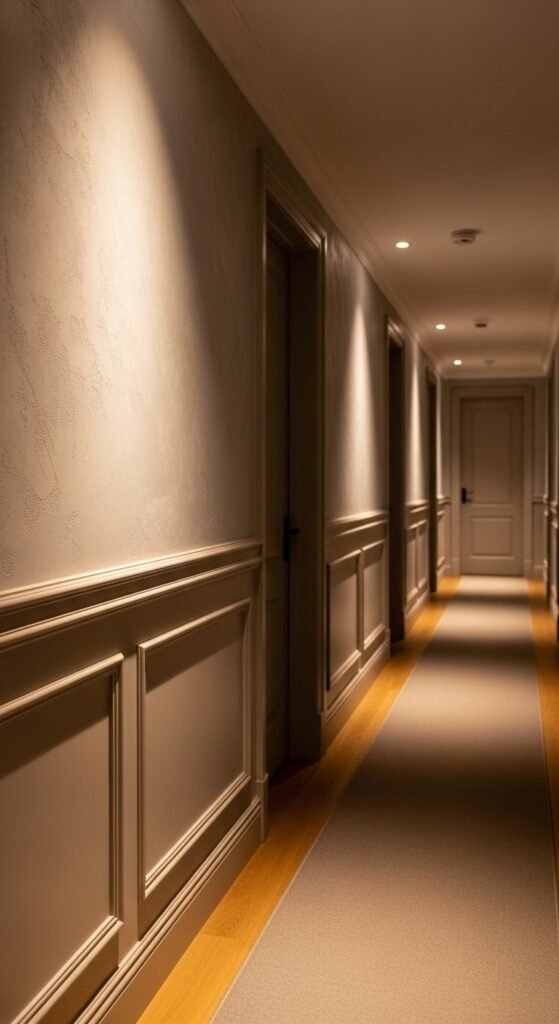
Add wall-mounted lights to brighten dim hallways. Sconces or LED strips save floor space compared to floor lamps. Choose warm light for a welcoming feel. Battery-operated or plug-in versions are rental-friendly. Proper lighting highlights artwork, rugs, and décor, making the hallway feel polished and intentional.


9. Minimalist Umbrella Stand

Minimalist Umbrella Stand

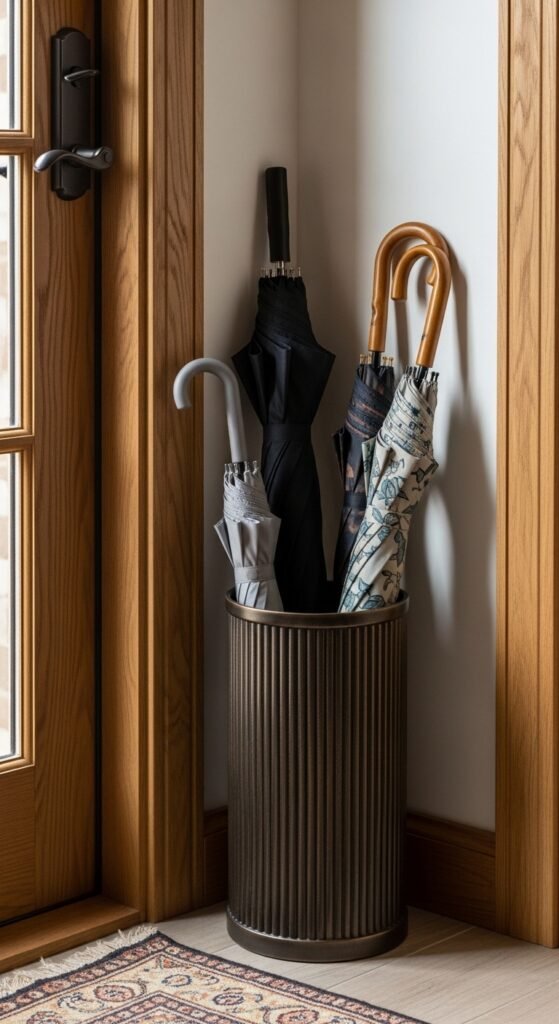
An umbrella stand keeps wet umbrellas contained and off floors. Pick a slim, simple design to avoid bulk. Consider lightweight metals or woven baskets for style. Position it near the entrance for convenience. This small addition enhances functionality while maintaining a clean, stylish look.


10. Painted Accent Wall

Painted Accent Wall

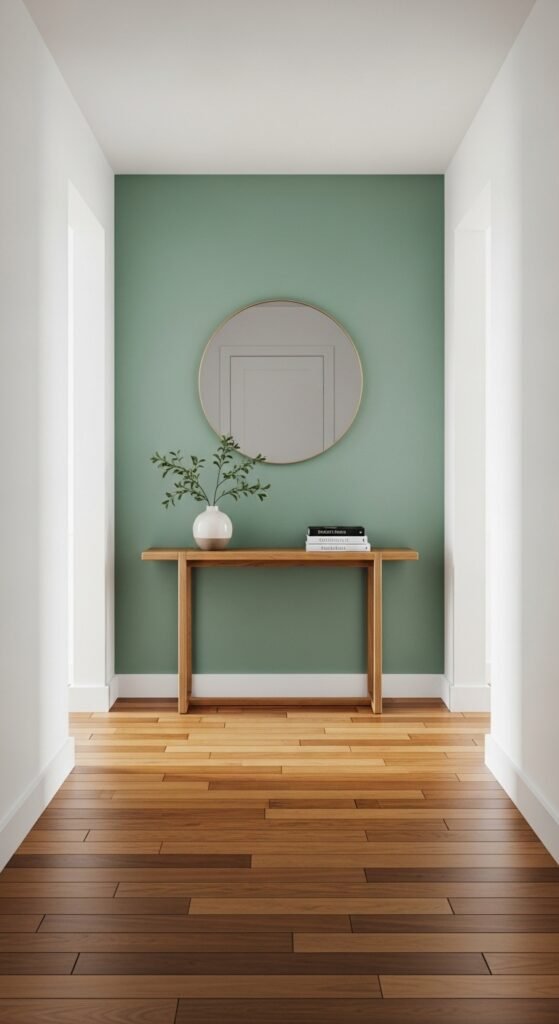
A single accent wall adds color without overwhelming a narrow space. Use removable wallpaper or peel-and-stick paint alternatives for rentals. Light tones open up space, while muted shades add warmth. Pair with neutral décor and a few framed pieces to maintain balance. Accent walls make a bold style statement while staying budget-friendly.


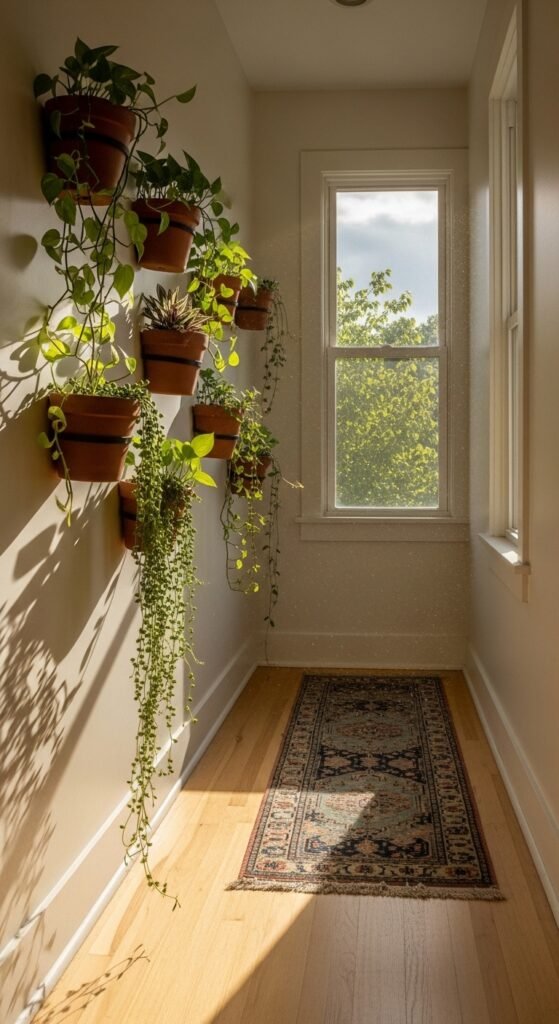
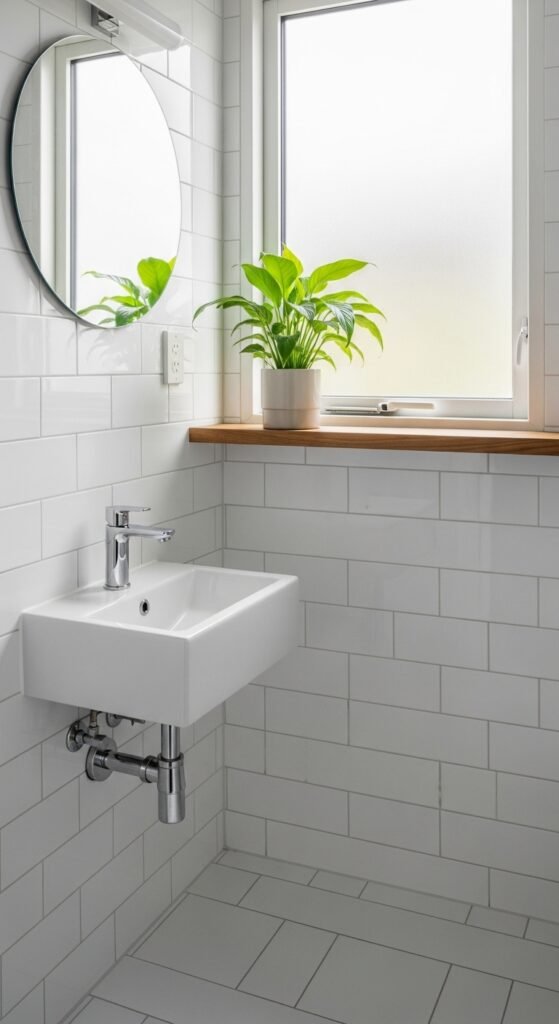
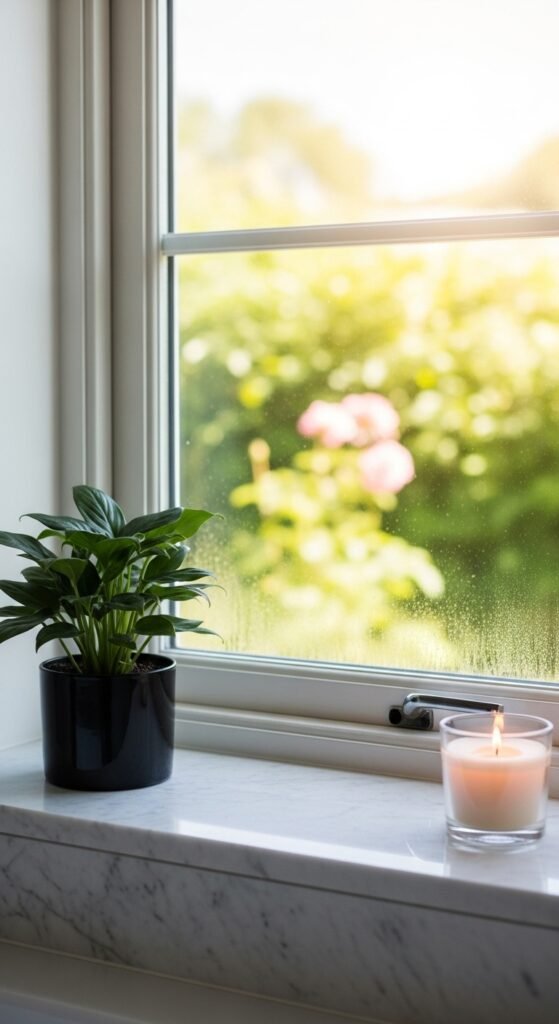
11. Hanging Planters

Hanging Planters

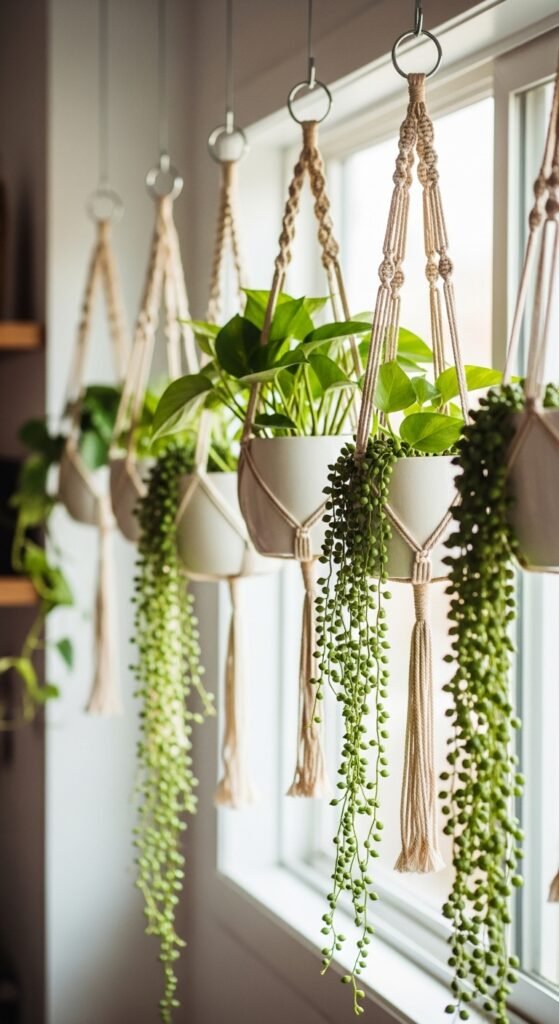
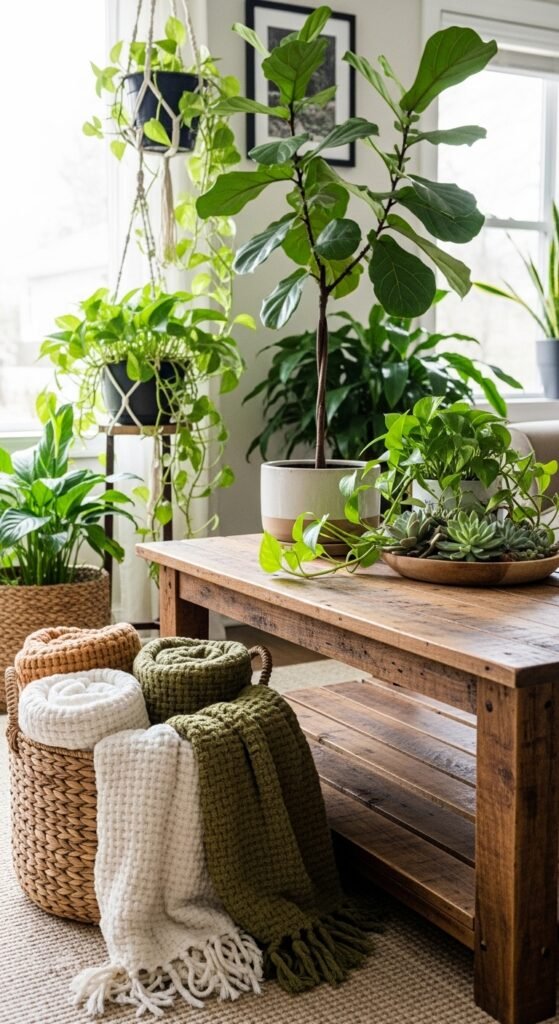
Bring life to your hallway with hanging plants. Use ceiling or wall-mounted hooks. Select small trailing plants like pothos or ivy. Hanging plants don’t take up floor space and add color and texture. Use lightweight planters to avoid wall damage. Regularly rotate or water plants to keep them vibrant and welcoming.


12. Chalkboard or Whiteboard Message Area

Chalkboard or Whiteboard Message Area

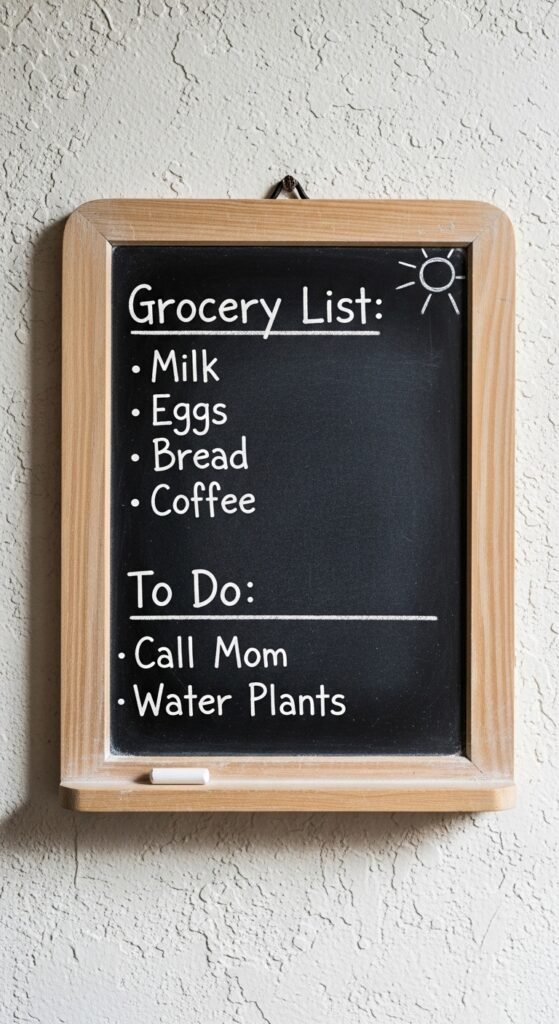
Create a mini message board for notes, reminders, or doodles. Stick-on chalkboards or magnetic boards are perfect for rentals. Keep it minimal to avoid clutter. A message area adds function and personality. Use it for quick to-do lists or friendly reminders, keeping the hallway lively and practical.


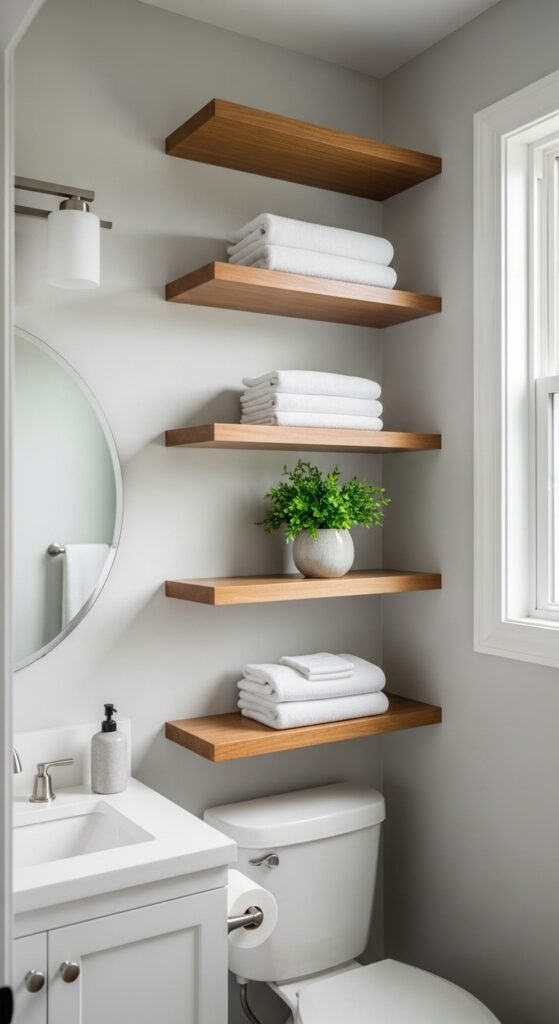
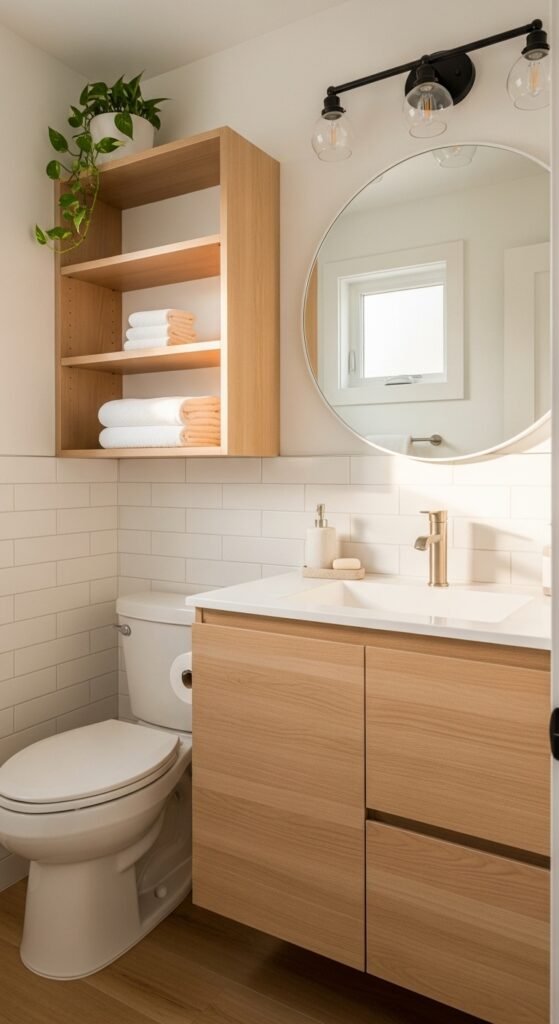
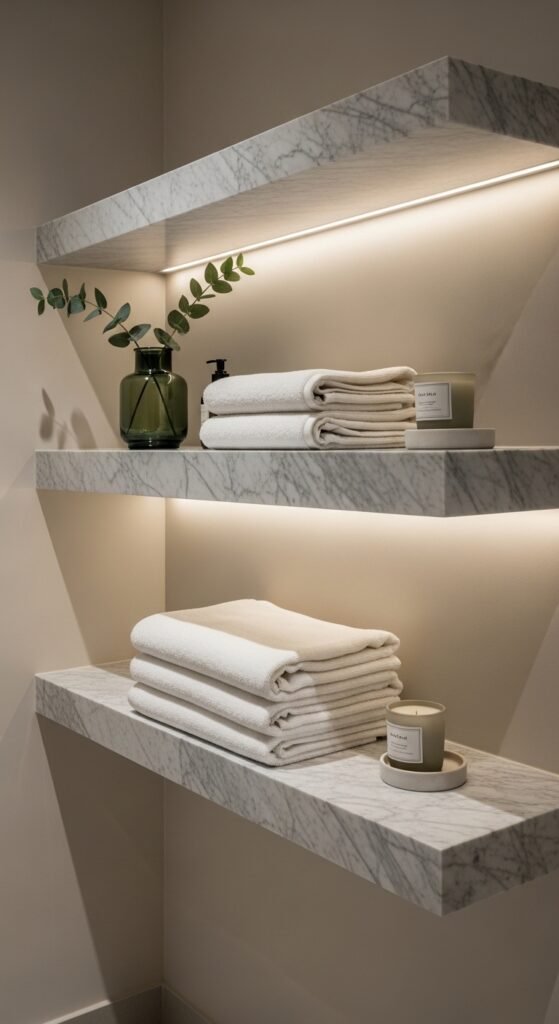
13. Overhead Shelving

Overhead Shelving

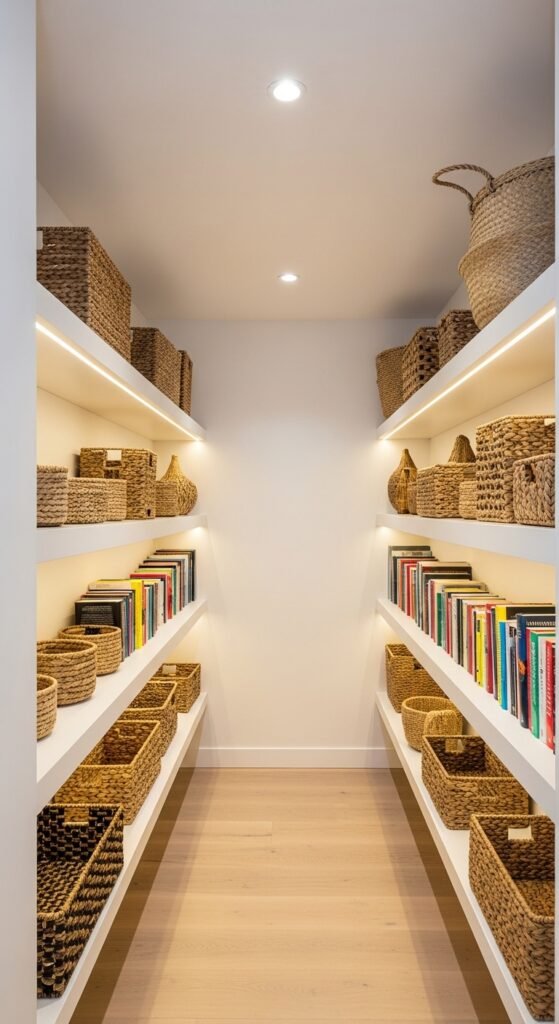
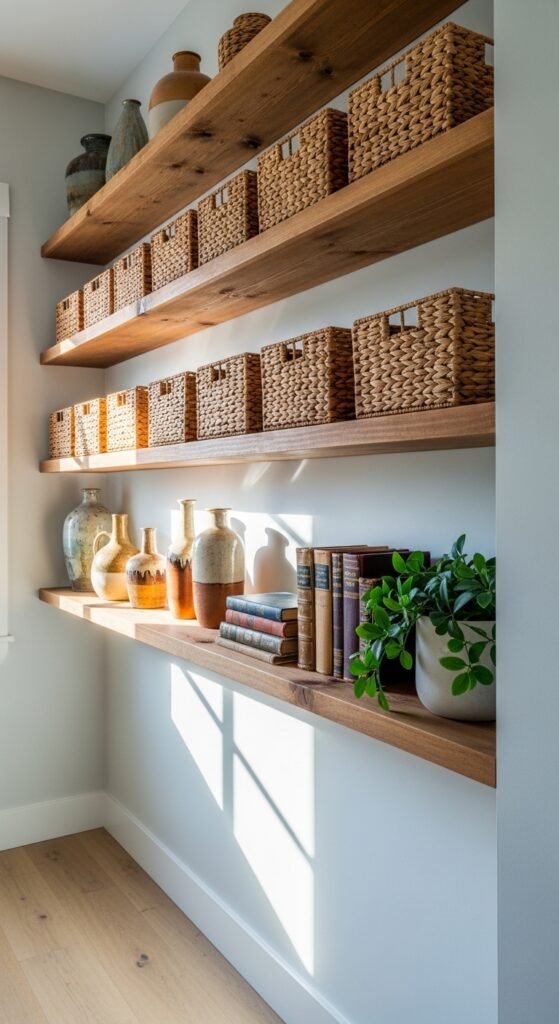
Install slim overhead shelves for extra storage. Use baskets to hide small items. This keeps essentials accessible but off the floor. Shelf placement should be high enough to avoid head bumps but low enough to reach easily. Overhead shelving makes small hallways feel organized without feeling crowded.


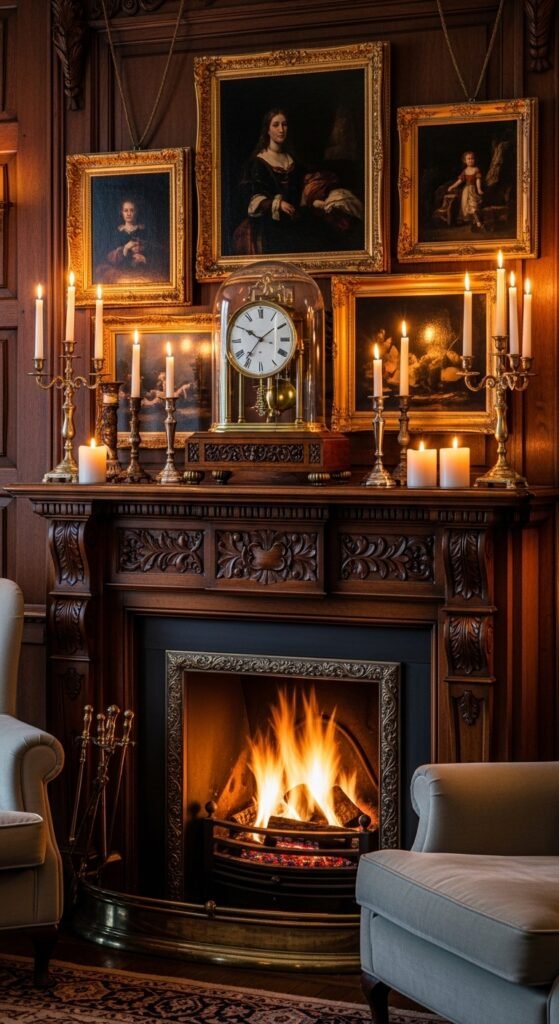
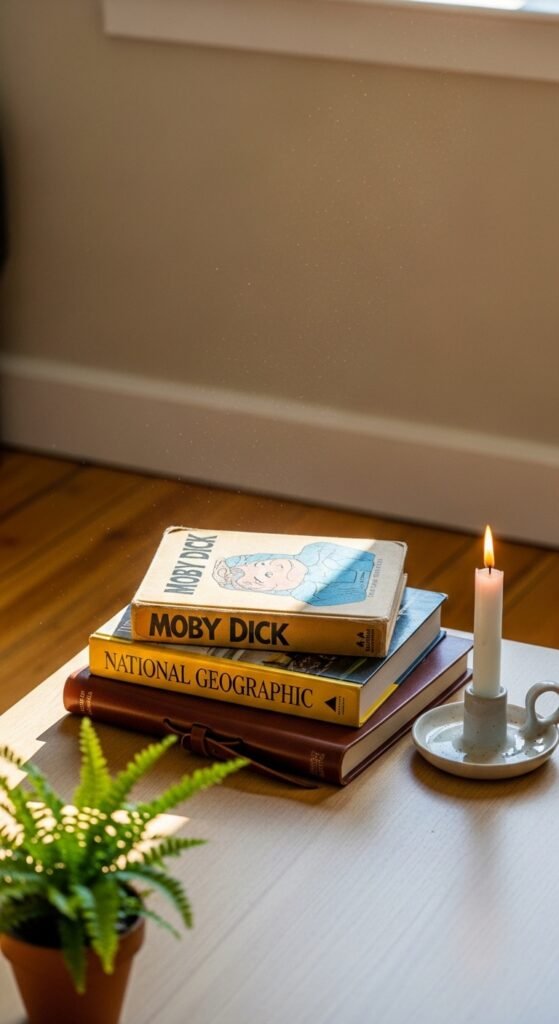
14. Rotating Seasonal Decor

Rotating Seasonal Decor

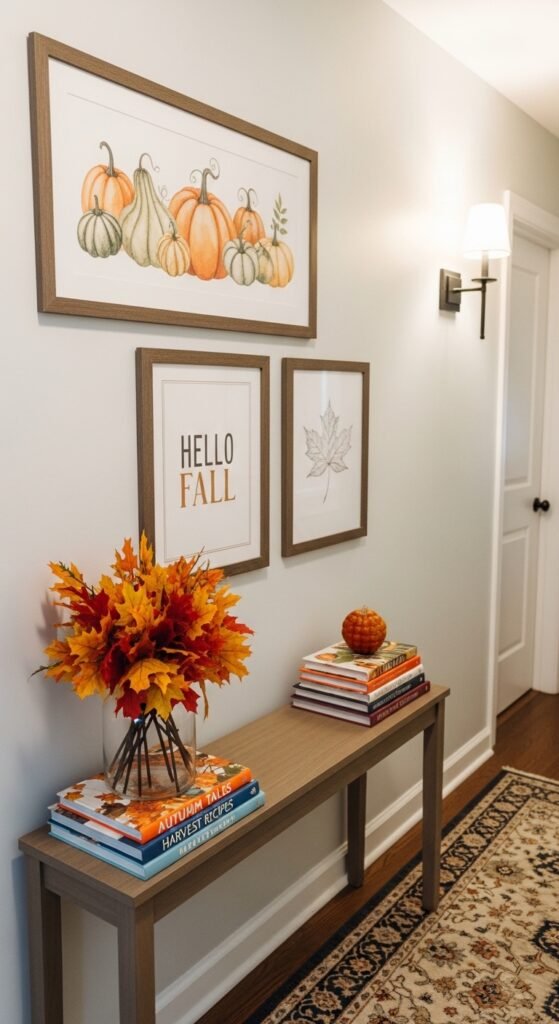
Switch out décor with the seasons. Simple items like vases, framed prints, or cushions make the space feel current. Rotate items to keep the hallway fresh without buying expensive furniture. Seasonal décor keeps your apartment visually engaging on a budget.


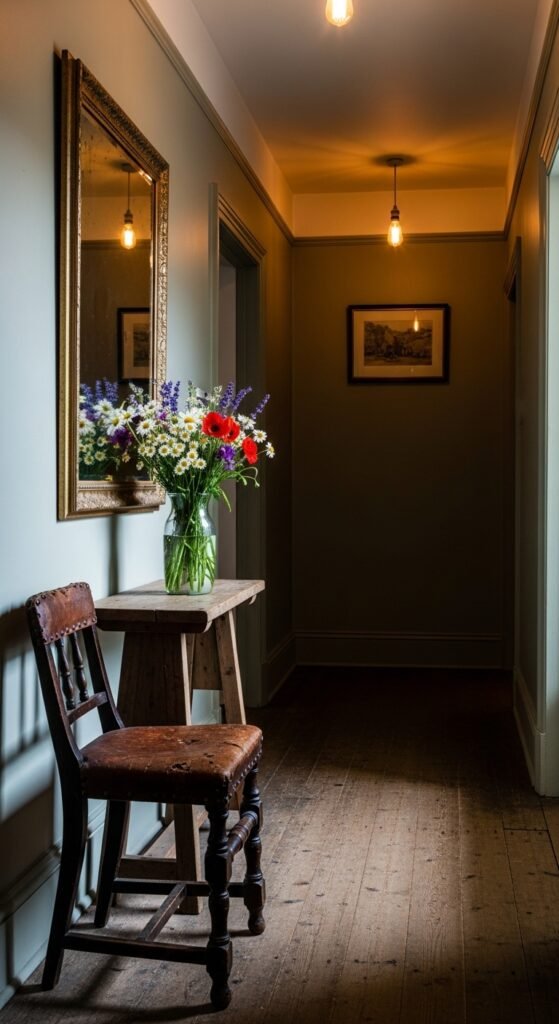
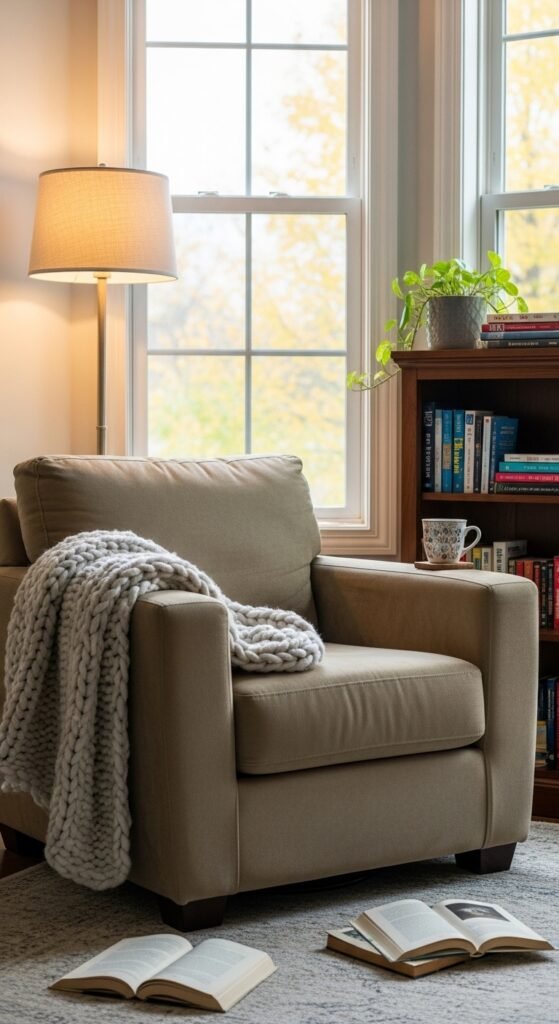
15. Slim Folding Chair

Slim Folding Chair

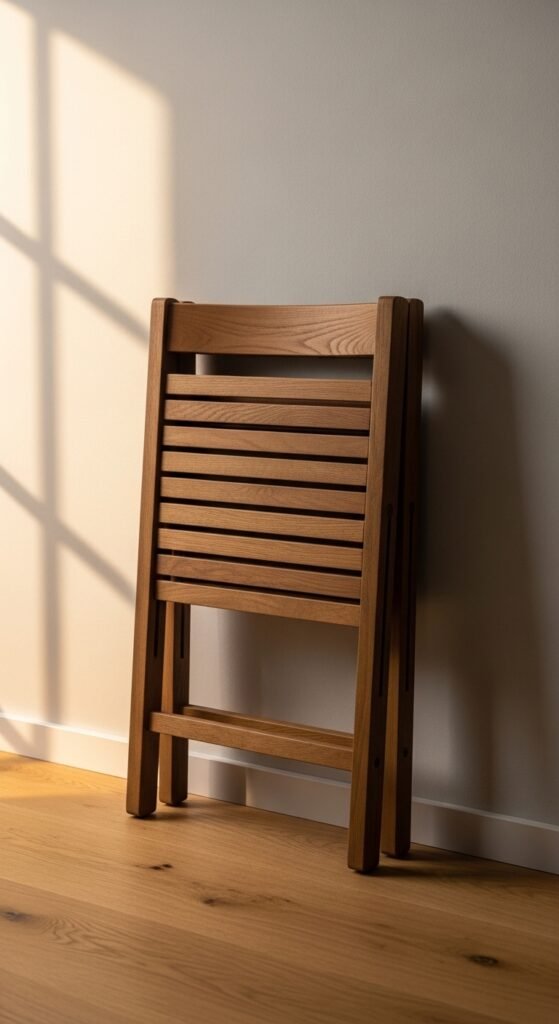
A folding chair adds temporary seating for putting on shoes. Choose lightweight, neutral-colored chairs that can be stored easily. This addition is practical for small hallways where permanent seating isn’t feasible. It’s budget-friendly and functional for visitors or quick stops.


16. Decorative Wall Hooks

Decorative Wall Hooks

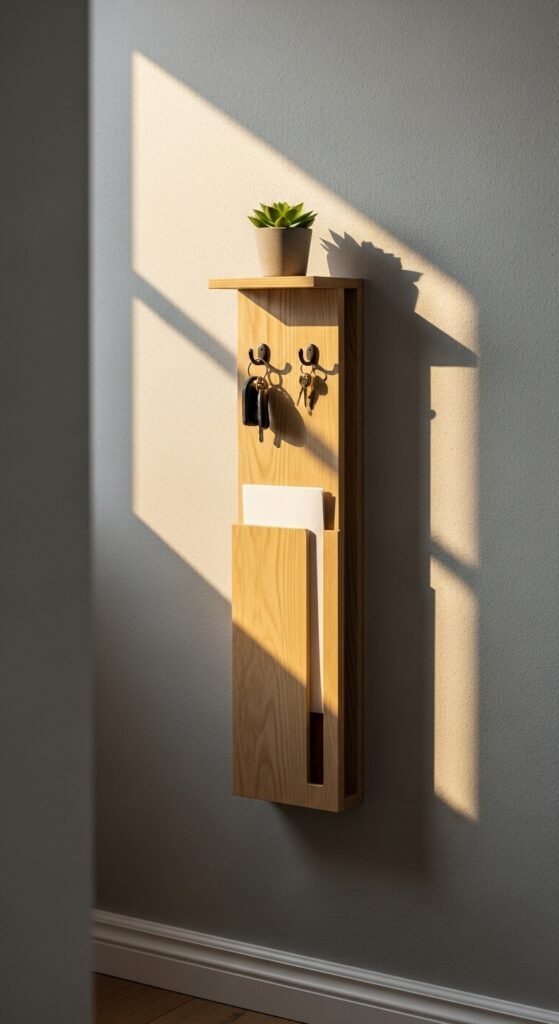
Use decorative hooks for keys, small bags, or scarves. Choose designs that match your style—ceramic, metal, or painted wood. Hooks can create a visual statement while organizing items. Place them at convenient heights to maximize usability. This small detail elevates style without permanent changes.


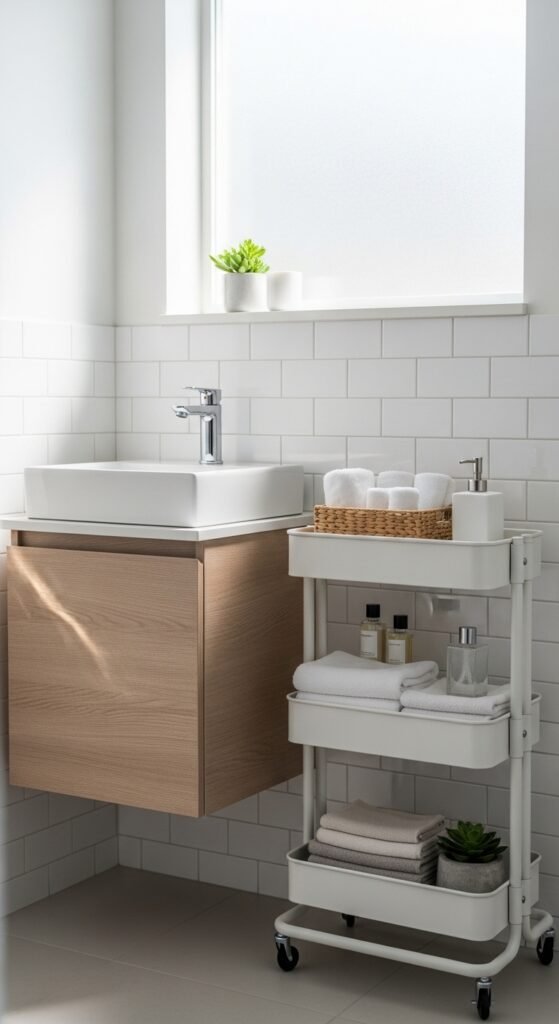
17. Slim Rolling Cart

Slim Rolling Cart

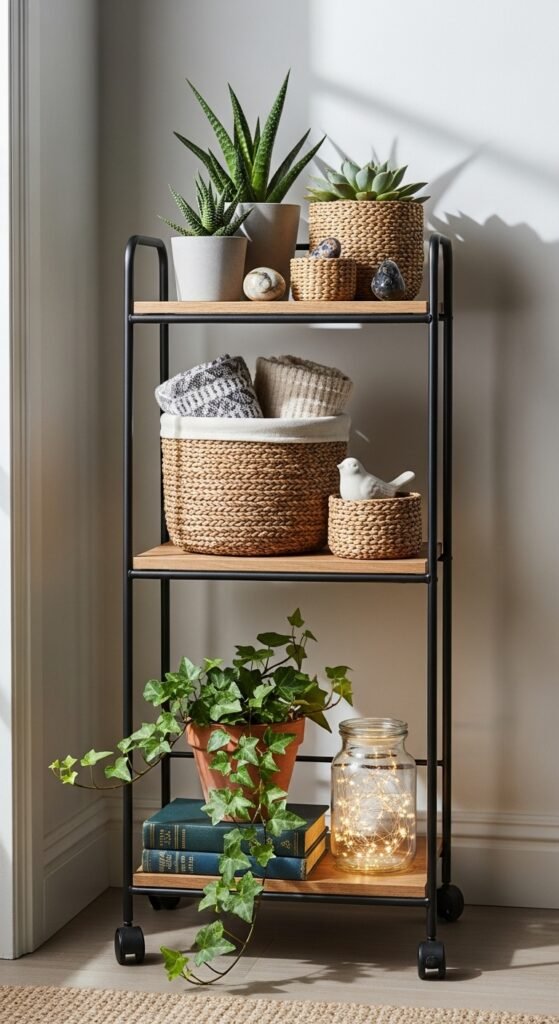
A slim rolling cart can be moved around as needed. Store plants, décor, or frequently used items. Use it for seasonal rotations or as a mobile mini-console. Carts add storage without permanent installation. Opt for lightweight materials and narrow designs to avoid blocking the hallway.


18. Patterned Wallpaper Accent Strip

Patterned Wallpaper Accent Strip

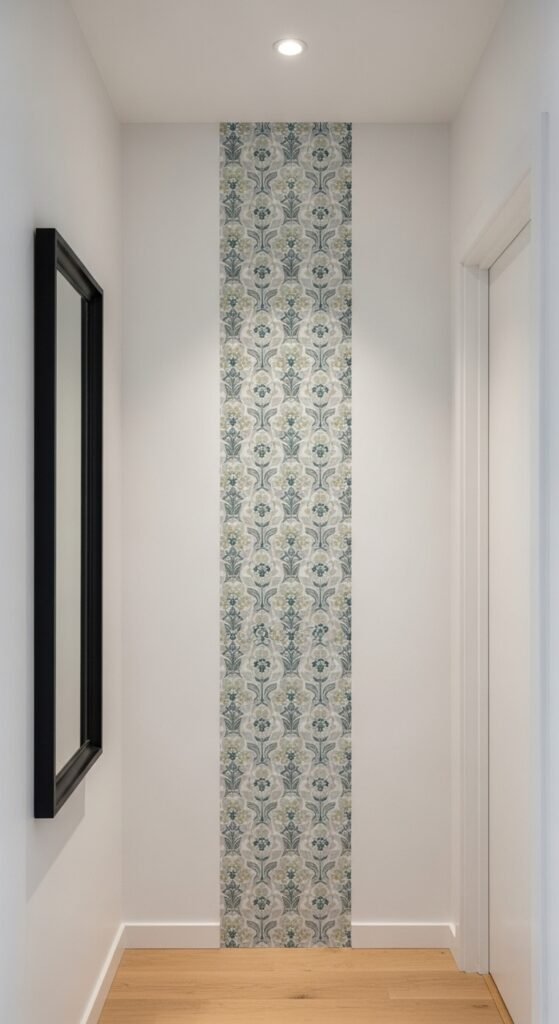
A wallpaper strip creates visual interest without overwhelming the space. Use peel-and-stick wallpaper to stay rental-friendly. Vertical stripes elongate the hallway. Pair with neutral flooring and simple décor for balance. This small touch instantly adds personality.


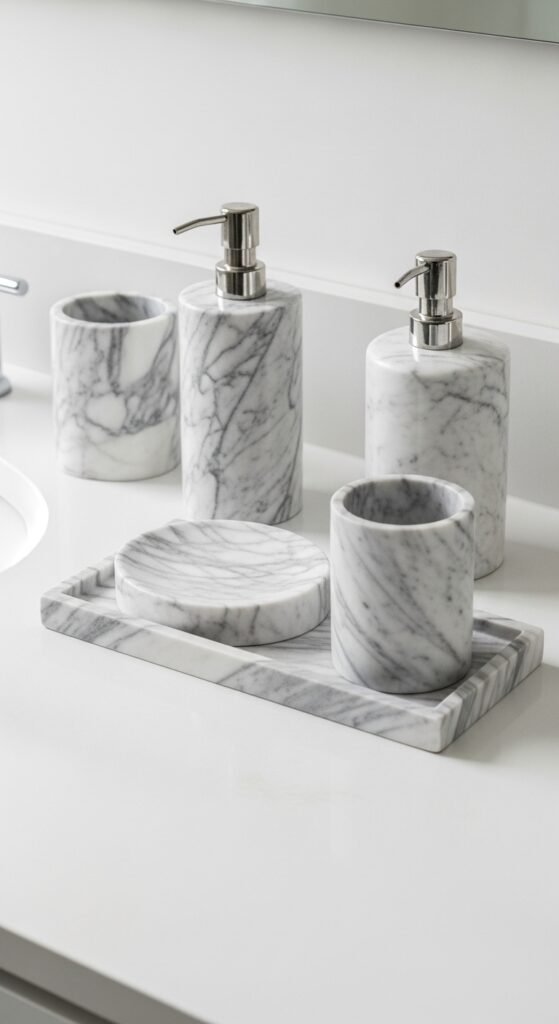
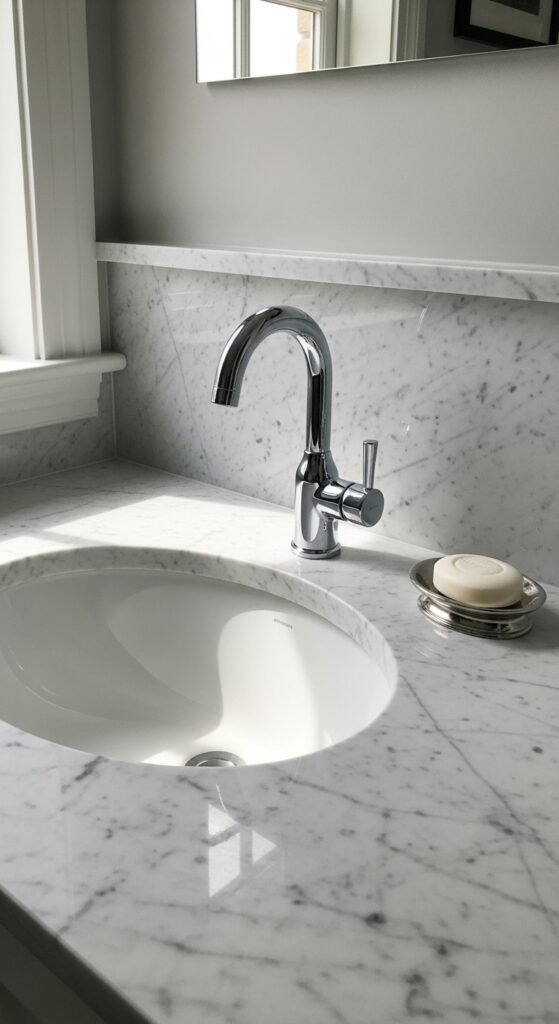
19. Multi-Purpose Entry Tray

Multi-Purpose Entry Tray

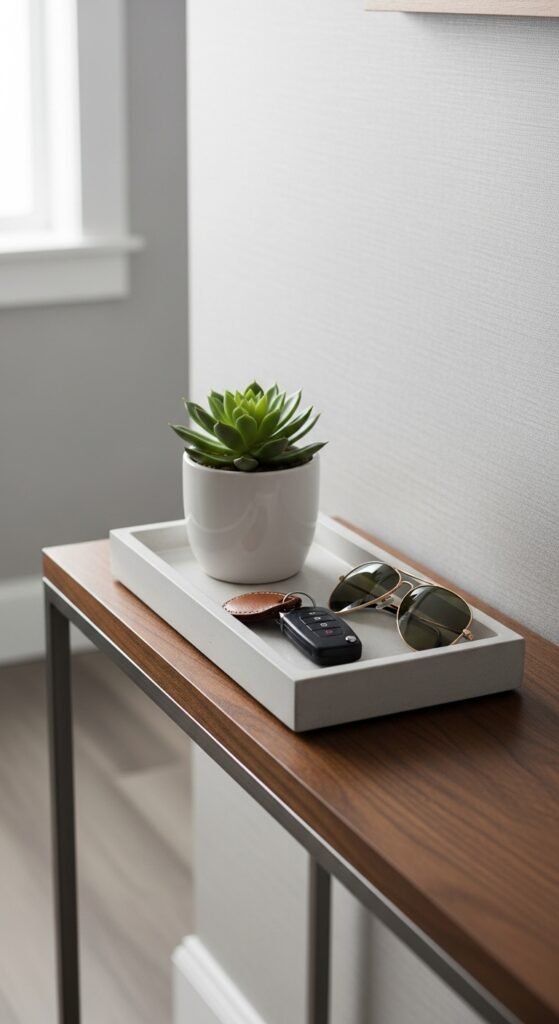
A tray keeps daily essentials organized. Place on a console table or floating shelf. Use it for keys, sunglasses, or mail. Choose materials that are easy to clean like metal or wood. A tray is simple, affordable, and keeps clutter contained in a stylish way.


20. Slim Wall-Mounted Desk

 Slim Wall-Mounted Desk

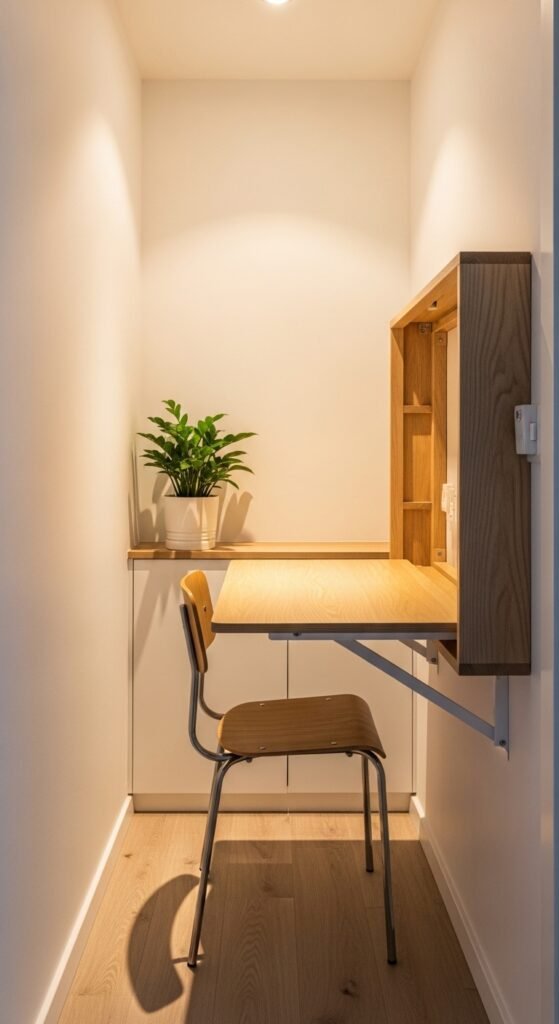
If your hallway is slightly wider, a slim wall-mounted desk can double as a workspace or catch-all station. Foldable versions keep floor space open when not in use. Pair with a small stool and minimal décor. This adds function without clutter and keeps your apartment stylish.


Conclusion

Small apartment hallways don’t need to be bland or purely functional. With smart décor choices, clever storage solutions, and budget-friendly updates, you can turn even the narrowest space into a stylish and welcoming passage. Try a few of these ideas today—mix and match to fit your style, and watch your hallway feel brighter, cleaner, and more intentional with minimal effort.


Claire Anderson

21 Elegant Small Entrance Hallway Ideas for a Welcoming Home Update

small entrance hallway ideas

A small entrance hallway doesn’t have to feel cramped or dull. With thoughtful touches, even the tiniest space can feel welcoming and stylish. From clever storage hacks to smart lighting and decorative accents, there are simple ways to make a lasting first impression. These 21 ideas show how to turn a small hallway into a space that’s functional, inviting, and visually appealing—all without breaking the bank. Whether you enjoy DIY projects or prefer quick updates, you’ll find ideas to suit your home and style.


1. Slim Console with Storage Baskets

Slim Console with Storage Baskets

A slim console table is a perfect solution for small hallways. It keeps the surface clear for keys and mail while leaving space underneath for storage baskets. Use baskets to hold shoes, umbrellas, or seasonal items. Choose light-colored or woven baskets to keep the space airy. DIY tip: Paint an old table in a soft neutral tone and add baskets you already have. This setup keeps your hallway organized without overcrowding it. Adding a small lamp or a vase with fresh flowers gives warmth and personality to the entry.


2. Wall-Mounted Hooks for Coats

Wall-mounted hooks save floor space while keeping essentials within reach. Place hooks at varying heights for adults and kids. You can mix metal and wood hooks for style. This setup is budget-friendly, requiring only a few screws and anchors. For a DIY touch, paint the wall behind hooks in a contrasting color to make the display pop. Hooks also keep your hallway tidy and clutter-free, creating an inviting vibe immediately when guests enter.


3. Mirror to Open Up Space

Mirrors create the illusion of a larger hallway. A round or rectangular mirror above a console reflects light and opens up the space visually. Tip: Look for second-hand mirrors to save money or repaint an old frame for a fresh look. Pair with a small table lamp to enhance the brightness. Mirrors aren’t just decorative—they’re practical for a quick appearance check before heading out. Even a simple DIY mirror setup can transform a small hallway instantly.


4. Floating Shelves for Décor

Floating shelves provide display space without taking up floor area. Use them for plants, small vases, or picture frames. Budget tip: Install wooden planks with brackets and sand/paint them yourself. Avoid overcrowding the shelves—keep it minimal for a clean, airy look. Shelves can also act as a small catch-all for mail or keys. This is an easy DIY upgrade that adds personality while keeping your hallway neat.


5. Patterned Runner Rug

A patterned runner rug adds visual interest and warmth. Choose light colors to keep the space feeling open, or subtle patterns for a touch of style. DIY tip: Repurpose a rug from another room or thrift one and add a non-slip backing. A runner helps define the hallway while protecting flooring. It’s an inexpensive way to make a small entry feel inviting and complete.


6. Under-Bench Storage

A bench with built-in storage offers a practical place to sit and put on shoes. Underneath, baskets or cubbies can hide footwear, bags, or pet accessories. Budget tip: Use crates or repurposed wooden boxes for cubbies. Add a soft cushion or throw for comfort and style. This makes the hallway functional and welcoming while keeping clutter out of sight.


7. Vertical Wall Organizer

A vertical organizer maximizes narrow wall space. Use it for mail, keys, or daily essentials. DIY tip: Attach small baskets or boxes to a wooden plank and mount it on the wall. This keeps the floor clear and provides an easy grab-and-go system. Vertical organizers make your entryway tidy and practical, ideal for busy households.


8. Statement Wall Art

Adding a few pieces of wall art creates personality without taking up space. Stick to small or medium frames arranged neatly. Budget tip: Print artwork at home and use inexpensive frames. Art draws the eye upward, making the hallway feel taller. Combine with simple furniture and storage to avoid visual clutter.


9. Hanging Planters

Hanging planters bring life to a small hallway. Use trailing plants or small succulents in wall-mounted pots. DIY tip: Make your own macramé hangers or repurpose small containers. Greenery softens hard lines and creates a welcoming atmosphere. Vertical planting avoids using floor space, keeping the entry open and airy.


10. Compact Shoe Rack

A compact shoe rack keeps footwear organized and off the floor. Choose a slim, open design for easy access. Budget tip: Stackable racks or repurposed shelves work well. Keep it tidy by only storing daily-use shoes. This small addition reduces clutter and makes the space more inviting instantly.


11. Multi-Purpose Corner Table

Use corners wisely with a small corner table. It holds keys, mail, or a plant without crowding the hallway. DIY tip: Repurpose an old stool or shelf for the corner. Add a small tray to keep items organized. Corners often go unused, so a functional table enhances the entryway’s practicality and charm.


12. Minimalist Lighting

Lighting transforms a small hallway. Choose slim sconces or LED strips to brighten space without bulky fixtures. Budget tip: Simple wall-mounted lights or plug-in lamps are inexpensive upgrades. Proper lighting highlights décor and creates a welcoming feel. Use warm bulbs to make the hallway cozy and inviting.


13. Neutral Paint Colors

Light, neutral colors make small hallways feel open. Shades of cream, soft gray, or pastel tones reflect natural light. DIY tip: Paint the hallway yourself for an affordable refresh. Keep furniture in complementary tones to maintain cohesion. Neutral walls provide a blank canvas for art, mirrors, and accessories.


14. Decorative Wall Trim

Wall trim adds character without taking space. Simple molding or wainscoting elevates the hallway’s look. DIY tip: Use peel-and-stick trim or paint an existing wall to mimic the effect. This inexpensive detail creates a polished feel while keeping the area light and open.


15. Overhead Shelving

Overhead shelving uses vertical space for storage or display. Baskets, hats, or seasonal décor fit neatly above eye level. DIY tip: Install a single plank with brackets yourself to save money. Keep items light and decorative to avoid a crowded feel. Overhead storage is practical and keeps the floor open.


16. Small Rug Layering

Layering rugs adds depth without taking space. Use a thin patterned runner over a larger neutral rug. Budget tip: Repurpose existing rugs for a layered look. This adds visual interest, warmth, and softness underfoot, making the entry more inviting and stylish.


17. Vintage Accent Pieces

Adding one or two vintage pieces creates charm. A stool, small cabinet, or framed print adds personality. DIY tip: Thrift shops or garage sales often offer affordable options. Mixing vintage with modern furniture adds warmth without clutter, creating a welcoming vibe.


18. Sliding Door Panels

Sliding doors save space while adding style. Use them for closet access or as an entryway accent. Budget tip: Convert old doors into sliding panels with simple hardware. Sliding doors are practical in small spaces, keeping the hallway open and functional.


19. Accent Wall with Wallpaper

An accent wall creates focus without overcrowding. Choose subtle patterns in light colors to keep the space feeling airy. Budget tip: Peel-and-stick wallpaper is inexpensive and easy to remove. A single wall adds personality while maintaining an open, welcoming feel.


20. Built-In Bench Nook

A built-in bench fits seamlessly into a narrow hallway. Add a cushion for comfort and drawers or baskets underneath for storage. DIY tip: Modify an existing alcove or repurpose a small cabinet. A bench adds seating, organization, and a cozy feel, perfect for greeting guests.


21. Personalized Entry Display

Create a personalized display to make your hallway feel warm and inviting. Use photos, small art, or mementos. Budget tip: Print photos at home and use thrifted frames. Keep arrangements balanced and simple to avoid clutter. A personal touch instantly makes a hallway feel like home.


Conclusion

A small entrance hallway can be both stylish and functional with simple, thoughtful updates. From clever storage solutions to mirrors, lighting, and décor, these 21 ideas show that even the tiniest space can make a strong impression. Many solutions are budget-friendly and DIY-ready, so you can transform your hallway without major renovations. Start with a few updates, mix in personal touches, and watch your entryway become a welcoming, organized, and beautiful space.


Claire Anderson

21 Elegant Victorian Living Room Decor Ideas for a Rich Layered Style

Victorian living room decor

Victorian living rooms feel warm, detailed, and full of personality. Layered fabrics, carved wood, patterned walls, and decorative objects give the space a rich and inviting look. The good news is you do not need antique store budgets to bring this style home. With smart thrift finds, DIY touches, and simple styling tricks, you can recreate that elegant Victorian charm in a modern house or apartment. The ideas below focus on practical decor steps that help you build a layered look one piece at a time without spending too much.


Classic Tufted Sofa as the Centerpiece

Classic Tufted Sofa as the Centerpiece

A tufted sofa instantly creates a Victorian mood. The deep buttons and curved arms give the room structure and charm.

You do not need a vintage original. Many budget stores sell tufted sofas that capture the same look.

Choose deep shades such as burgundy, forest green, or navy. These colors reflect the traditional Victorian palette.

Pair the sofa with patterned throw pillows. Look for floral prints, damask patterns, or textured fabrics.

Thrift stores are great places to find pillows or cushion covers. You can also sew simple covers using upholstery fabric.

Place the sofa near a window or fireplace so it naturally becomes the room’s anchor.

Add a throw blanket across one arm. Choose lace trim or a tasseled edge for extra detail.

If a full sofa is too expensive, try a tufted loveseat or even a second-hand piece that can be reupholstered.

Fabric paint and new buttons can transform older furniture surprisingly well.

Small steps like these create the layered Victorian feeling without a big investment.


Ornate Wooden Coffee Table

Ornate Wooden Coffee Table

Victorian rooms often feature carved wood furniture with decorative shapes and curves.

A coffee table is a simple place to introduce that detail.

Search thrift stores, flea markets, or online marketplaces for carved wood tables. Older pieces often appear for very low prices.

If the finish looks worn, sand lightly and apply dark stain. Rich walnut or mahogany tones work well.

Decorate the table in layers.

Stack two or three books with decorative covers. Add a small brass tray or candle holder.

Place a small vase with dried flowers or faux roses on top.

Avoid clutter. Victorian style looks detailed but still organized.

If a carved table is hard to find, add decorative trim yourself. Wood appliqués are inexpensive and easy to glue onto plain furniture.

Paint them the same color as the table for a carved appearance.

With just a few touches, your coffee table becomes a charming Victorian feature.


Patterned Wallpaper Accent Wall

Patterned Wallpaper Accent Wall

Wallpaper plays a big role in Victorian design. Patterns add depth and character to the room.

You do not need to cover every wall. One accent wall works well.

Look for floral prints, damask patterns, or vintage botanical designs.

Peel-and-stick wallpaper is budget friendly and easy to install.

Choose deep background colors like cream, burgundy, dark green, or navy.

Place the wallpaper behind the sofa or fireplace. This draws attention to the focal area.

Balance the pattern with solid furniture colors.

If wallpaper feels expensive, try stencils instead. Wall stencils allow you to paint a repeating pattern for very little money.

Gold or cream paint over a darker wall gives a beautiful vintage effect.

Even a small wallpaper section adds charm and texture that fits perfectly with Victorian decor.


Decorative Fireplace Styling

Decorative Fireplace Styling

A fireplace often becomes the heart of a Victorian living room.

Even if your home does not have a working fireplace, you can style a decorative mantel.

Start with a large mirror above the mantel. Ornate gold frames work especially well.

Next, add symmetry.

Place candle holders, small sculptures, or vintage clocks on each side.

Layer smaller picture frames in front of the mirror.

This creates depth without making the area messy.

Thrift stores usually carry old frames and brass pieces that fit perfectly.

If your mantel looks plain, add decorative trim or paint it a darker shade.

A faux fireplace surround made from wood boards is another affordable idea.

Once styled, this corner becomes a beautiful Victorian focal point.


Layered Area Rugs

Layered Area Rugs

Victorian rooms rarely look empty or bare.

Layered rugs help create that cozy, collected feeling.

Start with a large neutral rug.

Place a patterned oriental-style rug on top.

This adds color and texture without replacing your entire flooring.

Many budget shops sell vintage-inspired rugs at affordable prices.

Second-hand stores also carry older rugs that only need light cleaning.

If the rug looks worn, position furniture partly over it. This hides damage while keeping the pattern visible.

Choose rich shades such as deep red, navy, gold, or dark green.

The layered look works especially well under coffee tables or seating areas.

Even two inexpensive rugs can create a luxurious Victorian atmosphere.


Gallery Wall of Vintage Frames

Gallery Wall of Vintage Frames

A gallery wall adds personality and history to the room.

Look for ornate picture frames in gold or dark wood.

Mix different sizes and shapes.

The mismatched look actually works well in Victorian interiors.

Inside the frames, place vintage art prints, botanical drawings, or black-and-white portraits.

Many printable artworks online are free.

Print them on thick paper for a classic appearance.

Arrange frames on the floor before hanging them.

This helps you create a balanced layout.

Start with one larger frame in the center, then build around it.

Small details like this bring character to plain walls.

And most pieces can come from thrift stores for just a few dollars.


Lace Curtains for Soft Elegance

Lace Curtains for Soft Elegance

Lace curtains soften natural light and give the room a graceful look.

Victorian homes often used lace to filter sunlight without blocking it completely.

Choose white or cream lace panels for the best effect.

Hang them high above the window frame. This makes ceilings appear taller.

Pair lace curtains with heavier side drapes if you want more layers.

Look for second-hand lace curtains in vintage stores or online resale markets.

Sometimes older tablecloths can even be repurposed as window panels.

Use simple curtain clips for quick installation.

The soft filtered light instantly creates a calm, classic Victorian atmosphere.


Antique Side Tables

Antique Side Tables

Small furniture pieces add detail without overwhelming the room.

A Victorian-style side table with curved legs works beautifully beside a sofa or armchair.

Search for wooden tables with carved details or decorative edges.

Older pieces often appear in flea markets at low prices.

If the wood finish looks uneven, apply dark stain or furniture wax.

Decorate the table with simple layers.

A small lamp, stacked books, and a decorative tray work well together.

Avoid filling every inch of space.

The table should feel useful and stylish at the same time.

Adding just one or two antique-style tables helps create the Victorian look gradually.


Brass and Gold Lighting

Brass and Gold Lighting

Lighting changes the mood of a room quickly.

Victorian interiors often use brass or gold lamps.

Look for table lamps with decorative bases and fabric shades.

Soft warm bulbs help create a calm glow.

Thrift stores often carry vintage lamps that only need a new shade.

Choose shades in cream, floral patterns, or soft pleated fabric.

Place lamps on side tables or console tables around the room.

Multiple light sources create the warm layered feeling typical of Victorian homes.

Even two simple brass lamps can change the entire space.


Decorative Throw Pillows

Decorative Throw Pillows

Throw pillows allow you to introduce color and texture without large purchases.

Mix velvet, floral, and damask fabrics.

Use three to five pillows on a sofa.

Choose deep colors that complement your furniture.

Second-hand fabric can easily become pillow covers.

Simple sewing or fabric glue works for quick DIY projects.

Add tassels or lace trim for extra charm.

These small details help the room feel richer and more layered.


Vintage Books as Decor

Vintage Books as Decor

Old books work beautifully in Victorian decor.

Look for hardcover books with decorative spines.

Stack two or three on tables or shelves.

Neutral colored covers such as brown, cream, and burgundy look great together.

Thrift stores often sell old books for very low prices.

Tie them with ribbon or place a small object on top for styling.

Books add personality while keeping the space cozy.


Floral Upholstered Armchair

Floral Upholstered Armchair

A floral armchair adds classic charm.

Choose soft floral patterns rather than bright modern prints.

Place the chair near a window or reading corner.

If you find an old chair cheaply, reupholster the cushion using floral fabric.

Staple guns make this project surprisingly simple.

Add a small pillow or throw blanket to finish the look.


Decorative Ceiling Medallion

Decorative Ceiling Medallion

Ceiling details often appear in Victorian homes.

A ceiling medallion around a light fixture adds elegance quickly.

Lightweight foam versions are inexpensive and easy to install.

Paint them white or soft cream.

This small feature makes the ceiling feel more decorative.


Dark Wood Display Cabinet

Dark Wood Display Cabinet

A glass cabinet works well for showing decorative pieces.

Look for dark wood finishes and simple carvings.

Display porcelain, small sculptures, or framed photos.

Keep shelves organized rather than crowded.

Older cabinets often appear in second-hand shops for reasonable prices.


Layered Wall Mirrors

Layered Wall Mirrors

Mirrors reflect light and make the room feel larger.

Mix different ornate mirror frames.

Gold finishes work beautifully with Victorian furniture.

Arrange them above a sofa or console table.

Thrift stores often carry old mirrors that only need cleaning.


Decorative Mantel Clock

Decorative Mantel Clock

A mantel clock adds character and history.

Look for decorative wood or brass designs.

Place it in the center of a fireplace mantel.

Balance it with candles or small frames.

Older clocks appear often in antique markets.

Even non-working clocks still look beautiful.


Velvet Curtains for Drama

Velvet Curtains for Drama

Velvet curtains create a dramatic Victorian look.

Deep colors such as burgundy or dark green work well.

Hang curtains high above the window.

This makes the room feel taller and more elegant.

Pair velvet with lace for layered texture.


Ornate Wall Sconces

Ornate Wall Sconces

Wall sconces add soft lighting and decorative detail.

Choose brass or antique gold finishes.

Install them beside mirrors or artwork.

Battery-powered versions work well if wiring is difficult.

The warm light adds charm in the evening.


Decorative Trays on Tables

Decorative Trays on Tables

A tray helps organize decor on tables.

Choose brass, silver, or carved wood trays.

Place candles, books, or a small vase inside.

This keeps items grouped neatly.

Thrift stores often carry beautiful trays at low prices.


Floral Arrangements for Classic Charm

Floral Arrangements for Classic Charm

Flowers add life to the room.

Use roses, peonies, or hydrangea.

Real or faux arrangements both work well.

Place them on coffee tables, mantels, or side tables.

Vintage vases make the display even more charming.


Decorative Room Divider

Decorative Room Divider

A folding screen adds both function and style.

Victorian screens often feature carved wood or fabric panels.

Place one behind a sofa or reading corner.

It fills empty space while adding decorative detail.

Second-hand screens can be repainted or re-covered with new fabric.


Conclusion

Victorian living rooms shine through layers, textures, and decorative details. You do not need expensive antiques to capture that timeless character. Start with one or two key pieces such as a tufted sofa or patterned wallpaper. Add smaller touches like lace curtains, vintage frames, and brass lighting over time. Thrift stores, DIY projects, and simple styling tricks can build a rich Victorian look step by step while keeping your budget comfortable.

Claire Anderson

21 Bold Black Marble Bathroom Ideas for a Dramatic Luxury Feel


black marble bathroom ideas

Black marble bathrooms bring a sense of drama and luxury to any home. Dark, polished stone instantly creates a bold statement, yet it can feel warm and inviting when paired with the right lighting and accents. From budget-friendly updates to DIY-friendly designs, black marble can transform your bathroom into a stylish retreat. This guide offers 21 practical ideas to help you create a dramatic, luxurious feel without overspending.


1. All-Black Marble Walls

All-Black Marble Walls

Covering your bathroom walls entirely in black marble creates instant drama. If full slabs are too pricey, try marble-effect tiles for a similar look on a budget. Paint the ceiling a soft white to prevent the room from feeling too dark. Add simple metallic fixtures for contrast. Even a small accent wall can make a bold impact without overwhelming your space.


2. Floating Vanity with Black Marble Top

Floating Vanity with Black Marble Top

A floating vanity keeps your bathroom looking airy and modern. Choose a black marble countertop paired with a simple white or wooden base. DIY-friendly options include applying black marble contact paper over existing surfaces. Use LED strip lights underneath to highlight the floating effect and make cleaning easier while keeping the space bright.


3. Black Marble Shower Surround

Black Marble Shower Surround

Turn your shower into a statement feature. Black marble tiles can cover all walls, creating a spa-like atmosphere. For a cost-friendly alternative, combine smaller black tiles with white grout. Keep the shower door frameless for a modern feel. Small touches like a matching soap tray or shower shelf add luxury without extra cost.


4. Contrasting White Fixtures

Contrasting White Fixtures

White fixtures pop against black marble, creating visual contrast. Freestanding tubs look luxurious and are easy to swap in for older tubs. Consider repainting your vanity or using a pre-made sink if remodeling isn’t in the budget. A white rug or towels can also lighten the space naturally.


5. Gold or Brass Accents

Gold or Brass Accents

Metallic touches add warmth and glamour. Gold or brass taps, drawer pulls, and towel racks pair beautifully with dark marble. Affordable DIY: spray-paint old fixtures in metallic shades. Even small accents like a soap dispenser or mirror frame can enhance the luxe feel without major renovation.


6. Black Marble Backsplash

Black Marble Backsplash

Add a dramatic focal point behind your sink with a black marble backsplash. This works well for small bathrooms, where full-wall marble isn’t feasible. Peel-and-stick marble tiles are a budget-friendly solution. Pair with floating shelves for extra storage without cluttering the visual impact.


7. Black Marble Floor with Pattern

Black Marble Floor with Pattern

Patterned flooring adds subtle interest. Try a herringbone or chevron pattern with black marble tiles. Budget option: use vinyl or ceramic tiles mimicking marble. Keep walls simple to let the floor shine. A well-placed rug softens the space and adds warmth.


8. Black Marble Accent Wall

Black Marble Accent Wall

If covering the whole room feels heavy, create a single accent wall. Place it behind a tub or vanity for maximum effect. DIY: marble wallpaper or panels can mimic the look affordably. Highlight the wall with soft lighting to enhance texture and depth.


9. Matte Black Fixtures

Matte Black Fixtures

Matte black fixtures create a modern, cohesive look with black marble. Affordable upgrades: swap handles, faucets, and showerheads instead of remodeling. The matte finish prevents glare and keeps the design feeling contemporary.


10. Marble-Look Countertop Upgrade

Marble-Look Countertop Upgrade

Transform an old vanity with a marble-look countertop. Laminates or peel-and-stick marble sheets are budget-friendly alternatives to natural stone. Add simple accessories like black soap dispensers or towel hooks to tie the look together.


11. Black Marble and Wood Combo

Black Marble and Wood Combo

Combine black marble with natural wood for warmth. Wood softens the intense look of black and adds a welcoming feel. DIY tip: use reclaimed wood for cabinetry or shelves to save money. This combination works in both modern and rustic styles.


12. Black Marble Vanity Top with Vessel Sink

Black Marble Vanity Top with Vessel Sink

Vessel sinks add elegance and depth. A white vessel sink on black marble creates contrast and luxury. Budget option: buy a ready-made sink and mount on an existing countertop with minimal modifications. Pair with simple wall-mounted taps to maintain clean lines.


13. Black Marble Shower Niche

Black Marble Shower Niche

A marble-lined shower niche looks custom and high-end. Even small niches give the impression of a built-in luxury feature. If new marble installation is expensive, try waterproof marble-look panels or tiles inside an existing niche.


14. Backlit Marble Feature

Backlit Marble Feature

Adding LED backlighting behind black marble elevates the drama. Strip lights under cabinets or behind mirrors highlight veining. Affordable options: battery-operated LED strips for temporary installations. Backlighting creates depth without structural changes.


15. Black Marble Bathroom Accessories

Black Marble Bathroom Accessories

Small accessories can pull the look together. Soap dishes, trays, and containers in black marble style instantly upgrade a simple vanity. Budget-friendly: marble stickers or inexpensive resin accessories. They make a big visual impact without major renovation.


16. Minimalist Black Marble Vanity

Minimalist Black Marble Vanity

Less can be more. Keep your vanity minimal to let the marble shine. Avoid clutter and opt for hidden storage solutions. A simple countertop with a few essential items looks modern and polished.


17. Black Marble Window Sill

Black Marble Window Sill

Upgrade small details. A black marble window sill adds subtle luxury. DIY: marble contact paper or tiles applied to existing sills. It’s a small change with a noticeable impact, especially when sunlight reflects off the polished surface.


18. Marble Wall Panels

Marble Wall Panels

Use modular panels for a cost-effective alternative to full marble slabs. They can cover walls, create accents, or highlight key features. Panels are easier to install than traditional slabs and reduce overall cost while keeping a high-end feel.


19. Black Marble Around Mirrors

Black Marble Around Mirrors

Frame your mirrors with black marble for a subtle yet bold upgrade. It draws attention to the mirror and complements countertops or walls. DIY idea: marble adhesive sheets or thin panels. This adds elegance without major renovations.


20. Black Marble with Colored Accents

Black Marble with Colored Accents

Add pops of color to break the dark tones. Teal, gold, or soft neutrals create contrast and liveliness. Budget tip: colored towels, mats, and small décor items. The black marble provides a dramatic backdrop, letting accent colors shine.


21. Black Marble Half-Wall

Black Marble Half-Wall

A half-wall balances drama with light. Black marble on the lower half creates luxury without darkening the entire room. Paint the top half white or a light neutral. DIY-friendly and perfect for renters or those testing black marble in small spaces.


Conclusion

Black marble bathrooms can feel bold and luxurious without being expensive. From full walls to small accents, there are many ways to incorporate black marble affordably. Focus on contrast, lighting, and accessories to achieve a dramatic look. Even small DIY updates like peel-and-stick tiles, vessel sinks, or marble-inspired décor can make your bathroom feel high-end. Start with one feature and build up for a stunning, budget-conscious transformation.


Claire Anderson

22 Genius Small Marble Bathroom Ideas for a Bigger-Looking Space


small marble bathroom ideas

Small bathrooms can feel cramped, but the right design choices make them appear spacious and inviting. Marble adds luxury without overwhelming the room. Light tones, reflective surfaces, and smart layouts create the illusion of more space. With simple tweaks, budget-friendly updates, and DIY tricks, even a tiny bathroom can feel airy and elegant. This guide walks through practical ways to make a small marble bathroom feel bigger while keeping it stylish and functional.


1. Go for Light-Colored Marble

Go for Light-Colored Marble

Using light-colored marble instantly opens up a small space. White or soft gray walls reflect light, making the room feel larger. For budget-friendly options, consider marble-look porcelain tiles that mimic natural stone at a fraction of the cost. Install them floor-to-ceiling in key areas like the shower to create continuity. DIY tip: Lay larger tiles with minimal grout lines to reduce visual clutter and stretch the space visually.


2. Install a Floating Vanity

Install a Floating Vanity

A floating vanity frees up floor space and makes your bathroom look more open. You can even add baskets underneath for storage. Opt for a vanity in marble or with a marble countertop for a cohesive feel. Budget tip: Repurpose an old cabinet by removing the legs and mounting it to the wall. Shortcuts like these reduce cost while keeping your bathroom stylish and airy.


3. Use Large Mirrors

Use Large Mirrors

Large mirrors double the sense of space by reflecting light and creating depth. Choose a frameless or slim-framed mirror above the sink. For a DIY-friendly approach, place multiple smaller mirrors together for a custom look. Mirrors also reduce the need for extra lighting since they amplify natural or artificial light. Keep them clean to maintain a crisp, open appearance.


4. Opt for Frameless Glass Showers

Opt for Frameless Glass Showers

Frameless glass showers keep lines clean and prevent visual blockage. They allow your marble walls to shine and make the bathroom feel uninterrupted. Affordable alternatives include acrylic or tempered glass panels that mimic high-end frameless designs. DIY tip: Use clear shower curtains or half-glass panels if you want a temporary budget solution without losing openness.


5. Maximize Vertical Storage

Maximize Vertical Storage

When floor space is limited, think vertical. Floating shelves, recessed niches, or tall cabinets keep essentials accessible without crowding the room. Use baskets or decorative boxes to tidy items. Even narrow spaces above toilets can hold shelves for towels or toiletries. DIY: Install simple floating boards with sturdy brackets, then finish with a marble-like adhesive overlay for a cohesive look.


6. Choose Subway Marble Tiles

Choose Subway Marble Tiles

Subway tiles in marble or marble-look porcelain can make walls appear taller and more expansive. Lay them horizontally or in a herringbone pattern for texture without crowding the eye. Budget-friendly tip: Buy tiles with subtle veining to mimic natural marble at lower cost. Pair with matching grout to create seamless, flowing surfaces.


7. Install a Marble Backsplash

Install a Marble Backsplash

A marble backsplash adds elegance while keeping the space clean and bright. Use it behind your sink or vanity for a touch of luxury without covering all walls. DIY: Stick-on marble tiles or peel-and-stick sheets give the same visual impact at lower cost. They’re easy to apply and remove, perfect for renters or quick updates.


8. Use Glass or Acrylic Accessories

Use Glass or Acrylic Accessories

Clear glass or acrylic accessories prevent clutter and maintain openness. They let marble surfaces shine without visually weighing down the room. Budget tip: Repurpose old jars or trays and keep items minimal. Even small touches like transparent toothbrush holders make a noticeable difference in perception of space.


9. Keep Fixtures Minimal

Keep Fixtures Minimal

Large, ornate fixtures can overwhelm a small bathroom. Stick to slim, modern fixtures in chrome or brushed nickel. Simple handles and faucets create a seamless flow. DIY upgrade: Swap old handles for minimalistic ones—small change, big impact. Fewer visual interruptions make your marble features the focal point.


10. Add Wall-Mounted Lighting

Add Wall-Mounted Lighting

Wall-mounted lights save counter space and brighten up corners. Use sconces or vertical fixtures to highlight mirrors and marble surfaces. For budget-friendly options, pick energy-efficient LED sconces. DIY: Attach small battery-operated wall lamps if wiring is tricky. Proper lighting enhances depth, making your bathroom feel larger.


11. Use Narrow Marble Flooring Planks

Use Narrow Marble Flooring Planks

Long, narrow marble planks guide the eye across the room, giving the illusion of length. Light veining adds interest without overcrowding. Affordable tip: Marble-look vinyl or porcelain planks can achieve the same effect at lower cost. DIY: Arrange planks in parallel or diagonal layouts to create movement and spaciousness.


12. Incorporate Recessed Shelves

Incorporate Recessed Shelves

Recessed shelves keep products off countertops, clearing clutter. A marble-lined niche matches walls seamlessly. If you don’t want a full remodel, try adhesive marble shelves or stick-on organizers. They create storage without reducing visual space, perfect for small bathrooms where every inch counts.


13. Use a Floating Toilet

Use a Floating Toilet

A wall-mounted toilet exposes floor space, making your bathroom look bigger. It pairs beautifully with marble walls or floors. Budget tip: If a full install is pricey, choose a compact floor-mounted toilet with a sleek silhouette. Even small adjustments in toilet size and design can enhance openness.


14. Opt for Clear Shower Doors Instead of Curtains

Opt for Clear Shower Doors Instead of Curtains

Traditional curtains can visually cut off space. Clear doors allow full visibility of marble walls, creating continuity. DIY: For a low-cost approach, use a vinyl clear curtain or plexiglass panels temporarily. The key is minimizing visual boundaries to keep the room airy.


15. Paint the Ceiling Light

Paint the Ceiling Light

Painting the ceiling a glossy white or light color adds height. Marble walls reflect the light upward, opening the space. DIY: Even a semi-gloss white paint brightens corners. This small, budget-friendly update works wonders in compact bathrooms where vertical space is limited.


16. Go for Minimal Accessories

Go for Minimal Accessories

Clutter shrinks a bathroom visually. Keep only essentials on counters and shelves. A small plant or candle adds warmth without overcrowding. DIY: Use small baskets to group items together, reducing visual noise. Minimalism highlights marble surfaces, making the room feel open and clean.


17. Use Transparent Shower Mats

Use Transparent Shower Mats

Even small mats can break the visual flow. Transparent shower mats let the marble pattern remain visible, preserving the sense of space. Budget tip: Simple vinyl mats work fine, or use peel-and-stick rubber mats. The effect is subtle but keeps the bathroom looking cohesive.


18. Introduce Subtle Metallic Accents

Introduce Subtle Metallic Accents

A touch of metallic accents adds dimension without crowding the eye. Chrome, brass, or gold in small doses reflects light and elevates marble elegance. Budget-friendly tip: Swap handles, towel bars, or soap dispensers instead of full fixtures. The result is a polished, spacious look without major renovations.


19. Use Marble-Look Wallpaper for Accent Walls

Use Marble-Look Wallpaper for Accent Walls

If full marble installation is pricey, try marble-look wallpaper for a single wall. It creates a focal point without heavy investment. DIY: Choose peel-and-stick options for easy installation. Keep remaining walls light and simple to preserve the sense of openness.


20. Choose Floating Shelves Over Cabinets

Choose Floating Shelves Over Cabinets

Open, floating shelves take less visual space than bulky cabinets. They make the bathroom feel light while keeping storage functional. Budget tip: Use painted MDF or repurposed wood, then add marble contact paper. Small shelves can hold essentials and a decorative item or two, keeping the room tidy and airy.


21. Add a Clear Divider for Tub Areas

Add a Clear Divider for Tub Areas

If you have a tub, a clear glass divider prevents the area from feeling boxed in. It preserves sightlines and highlights marble walls. DIY: Use acrylic sheets or temporary panels if permanent glass is costly. Maintaining visual flow is key in small bathrooms.


22. Keep Grout Lines Minimal

Keep Grout Lines Minimal

Thin grout lines reduce visual breaks and make marble tiles appear larger. Choose light-colored grout to blend with tiles. Budget-friendly tip: Many DIY kits allow easy grout removal and replacement. Even small tweaks in grout width or color dramatically improve spaciousness perception.


Conclusion

Small bathrooms don’t have to feel cramped. By using light marble, reflective surfaces, floating elements, and minimal clutter, you can create an open, luxurious feel without overspending. Practical tweaks like vertical storage, clear glass panels, and large mirrors make a big impact. Many ideas are DIY-friendly and affordable, allowing your small space to feel elegant, airy, and functional. Start with one or two updates and watch your bathroom feel instantly bigger and brighter.


Claire Anderson

21 Creative Tiny Modern Bathroom Ideas for a Functional and Beautiful Space

tiny modern bathroom ideas

Tiny bathrooms can still feel open, stylish, and practical. A small footprint does not mean sacrificing comfort or design. With smart layouts, clever storage, and a few thoughtful details, even the smallest bathroom can work beautifully.

Modern design focuses on clean lines, smart storage, and light colors that make tight spaces feel larger. Many of these ideas also work well on a modest budget and can be done as simple DIY weekend projects.

Below are 21 creative tiny modern bathroom ideas that help you organize better, save space, and create a room that looks calm and inviting.


1. Floating Vanity for Open Floor Space

Floating Vanity for Open Floor Space

A floating vanity is one of the easiest ways to make a tiny bathroom feel larger. Because it attaches to the wall, the floor remains visible. That open space instantly creates a lighter look.

You do not need an expensive custom cabinet. Many affordable wall-mounted vanities are available online or in home stores.

If you enjoy DIY work, you can also mount a small wood cabinet to the wall and add a sink on top.

A few practical tips:

  • Leave 8–12 inches of open floor below the vanity.
  • Add a small basket underneath for towels.
  • Use a slim drawer organizer inside the vanity.

Light wood finishes work well in small bathrooms. They keep the room warm without feeling heavy.

Pair the vanity with a round mirror to soften the straight lines of the room.

Cleaning also becomes easier. A quick mop under the vanity keeps everything tidy.

For renters, choose a compact wall-mounted shelf with a small basin on top. This creates the same open effect without heavy remodeling.

Small change. Big visual difference.


2. Large Mirror to Expand the Room

Large Mirror to Expand the Room

A large mirror can double the visual space of a tiny bathroom.

When light reflects across the room, the walls feel farther apart. This simple trick works in nearly every small bathroom.

Instead of using a small framed mirror, install one that runs the full width of the vanity.

Frameless mirrors look clean and modern. They also cost less than many decorative mirrors.

Budget ideas:

  • Buy a large mirror panel from a hardware store.
  • Mount it using mirror adhesive and clips.
  • Frame the edges with thin wood strips for a custom look.

If your bathroom has a window, place the mirror opposite it. Natural light will bounce around the room.

Another trick is adding backlit LED strips behind the mirror. These lights give a soft glow that makes the space feel larger and calmer.

Keep the countertop simple so the reflection stays clean.

Too many items reflected in the mirror can make the room feel cluttered.

A clear counter, large mirror, and bright light can completely change how a tiny bathroom feels.


3. Glass Shower Panels Instead of Curtains

Glass Shower Panels Instead of Curtains

Shower curtains can visually cut a room in half.

A clear glass shower panel keeps the space open from wall to wall.

Because the eye can see through the glass, the bathroom feels larger instantly.

Frameless panels look clean and modern, but even a simple budget glass panel works well.

Installation can be surprisingly simple.

Many home improvement stores sell ready-to-install shower panels that attach to the wall with brackets.

DIY tip:

  • Choose a single fixed glass panel instead of a full door.
  • Leave the shower entrance open.

This creates a walk-in shower layout, which works perfectly in small bathrooms.

Another benefit is easier cleaning. Glass panels collect less mildew compared to curtains.

Use a small squeegee after showers to keep the glass clear.

Light-colored tiles behind the glass make the room feel brighter.

Add a small wall niche inside the shower for soap and shampoo.

No bulky shelves required.

Clean lines and open space always help tiny bathrooms feel comfortable.


4. Vertical Storage Shelves

Vertical Storage Shelves

When floor space is limited, vertical storage becomes your best friend.

Tall narrow shelves use wall space that usually sits empty.

The area above the toilet is perfect for this idea.

You can install three simple floating shelves using inexpensive wood boards and brackets.

Paint the shelves the same color as the wall for a cleaner look.

Or keep the natural wood tone for warmth.

What to store on vertical shelves:

  • rolled towels
  • small storage baskets
  • extra toilet paper
  • a small plant

Try to avoid overloading the shelves.

A few items spaced out looks better than many items stacked together.

Use matching baskets to hide clutter.

This makes the shelves look neat and organized.

If drilling into tile feels difficult, adhesive wall shelves also work for lightweight items.

Tall shelving also draws the eye upward.

That visual movement makes the room feel taller.

Simple wall shelves cost very little but make a big difference in storage.


5. Light Neutral Color Palette

Light Neutral Color Palette

Color has a big effect on how large a space feels.

Tiny bathrooms benefit from light neutral tones.

Soft shades reflect more light and make walls feel farther apart.

Great color choices include:

  • warm white
  • light gray
  • pale beige
  • soft sand

You do not need to paint everything the same shade.

A simple formula works well:

  • light walls
  • slightly darker floor
  • white fixtures

This keeps the space calm and balanced.

Painting is also one of the cheapest bathroom updates you can do.

One gallon of paint can transform the entire room in a weekend.

If you like subtle contrast, add black or dark bronze hardware.

Even small details like towel hooks or cabinet handles can give the room personality.

Avoid very dark colors on all four walls. They can make a tiny room feel tighter.

Instead, add darker tones through accessories.

Light colors plus simple decor create a bathroom that feels open and relaxing.


6. Corner Sink for Tight Layouts

Corner Sink for Tight Layouts

A corner sink can save surprising amounts of space.

Traditional vanities extend too far into tiny bathrooms. This makes movement awkward.

Corner sinks solve that problem.

They fit neatly where two walls meet and free up valuable walking space.

Small bathrooms with inward-opening doors benefit most from this layout.

Budget tip:

Many compact wall-mounted corner sinks cost much less than full vanities.

Pair the sink with:

  • a round mirror
  • a slim wall shelf
  • a towel hook nearby

Storage can still work well.

Add a small shelf above the toilet or a cabinet on the adjacent wall.

For renters, pedestal corner sinks are easy to install and remove later.

Choose a light-colored sink to keep the area bright.

This layout also leaves room for a slightly larger shower area.

Even a few extra inches of walking space can make daily routines more comfortable.

Tiny rooms often work best when each fixture stays compact and carefully placed.


7. Wall Niches for Hidden Storage

Wall Niches for Hidden Storage

Shower shelves can look bulky in small bathrooms.

A wall niche solves that problem.

It sits inside the wall, so it does not take up extra space.

Many people think niches require major remodeling.

In reality, they can be added during simple tile updates.

Even a single rectangular niche can hold daily shower items.

Design tips:

  • Line the niche with contrasting tile.
  • Add a small LED strip light inside.
  • Keep the shape simple and clean.

Two smaller niches stacked vertically can look very modern.

If cutting the wall is not possible, try recessed corner shelves designed for tile showers.

These install between tiles and sit almost flush with the wall.

Less clutter inside the shower keeps the bathroom looking calm.

A neat shower area makes the entire room feel more organized.

Small details like wall niches bring both style and storage without crowding the space.


8. Sliding Door for Space Saving

Sliding Door for Space Saving

Bathroom doors can take up valuable space.

A sliding door removes that problem.

Because it moves sideways, the door never blocks the sink or toilet.

This works especially well in narrow hallways.

Two popular styles include:

  • modern barn doors
  • pocket doors hidden inside the wall

Barn doors are the easiest DIY option.

You only need a door slab and sliding track hardware.

Installation usually takes a few hours.

Choose a door color that matches the bathroom palette.

Light wood, white, or soft gray work well in small homes.

If privacy gaps worry you, add a soft door seal along the edge.

Sliding doors also give the bathroom a stylish feature without adding clutter.

A simple change like this improves both movement and design.

Tiny bathrooms benefit from every inch saved.


9. Compact Wall-Mounted Toilet

Compact Wall-Mounted Toilet

A wall-mounted toilet creates more visible floor space.

The tank hides inside the wall, leaving only the bowl visible.

This makes the room feel cleaner and less crowded.

It also simplifies cleaning since there is no base touching the floor.

Installation costs more than standard toilets, but the space savings can be worth it.

For budget remodels, consider compact short-projection toilets instead.

They extend less from the wall.

Pair the toilet with a small shelf above it.

This spot works well for:

  • spare toilet paper
  • folded towels
  • a small decorative plant

Choose simple flush plates in brushed metal or matte black.

Even practical fixtures can add style when chosen thoughtfully.

In a tiny bathroom, reducing visual bulk matters.

Wall-mounted fixtures help the space feel lighter and easier to move around.


10. Under-Sink Basket Storage

Under-Sink Basket Storage

Storage does not always require cabinets.

Baskets under the sink can look stylish while hiding clutter.

This works well with floating sinks or pedestal sinks.

Choose baskets made from:

  • woven seagrass
  • cotton rope
  • wire metal

Use one basket for towels and another for toiletries.

Labeling the baskets can help keep things organized.

Budget tip:

Many home stores sell affordable basket sets that fit neatly under sinks.

If the baskets slide around, place a thin rubber mat beneath them.

Neutral basket colors keep the bathroom calm and tidy.

Avoid stacking too many items inside.

A few organized baskets look better than one overflowing container.

This simple storage method works well in rental apartments where cabinets cannot be added.

Clean storage equals a cleaner-looking bathroom.


11. Statement Floor Tiles

Statement Floor Tiles

Tiny bathrooms are a great place to try statement floor tiles. The area is small. Tile cost stays manageable. Yet the visual effect is strong.

Choose patterns that draw attention downward. This keeps the walls calm and the room balanced.

Popular choices include:

  • geometric tiles
  • small hexagon tiles
  • classic black and white patterns

DIY tip: use peel-and-stick floor tiles if you want a fast weekend update. Many modern designs look surprisingly realistic.

Keep the walls simple. Plain white or soft beige lets the floor pattern shine.

Use minimal decor so the tile becomes the star of the room.

A patterned floor also hides dust and water spots better than plain tile.

Pair the floor with simple fixtures. A floating vanity and round mirror work well with bold tile patterns.

Small spaces allow fun design choices without overwhelming the home.

A patterned floor can give a tiny bathroom personality while still keeping the layout clean.


12. Backlit Mirror Lighting

Backlit Mirror Lighting

Lighting changes the entire feel of a bathroom.

A backlit mirror gives soft, even light across the face. It also creates a calm atmosphere.

Instead of bright ceiling light alone, the mirror glows gently against the wall.

This spreads light around the room without harsh shadows.

Budget option: attach LED strip lights behind a regular mirror.

Steps are simple:

  1. Clean the back edge of the mirror.
  2. Attach waterproof LED strip lights.
  3. Plug the lights into a nearby outlet.

Warm white light feels relaxing. Neutral white works better for grooming tasks.

Backlit mirrors also reduce clutter. You may not need bulky light fixtures above the sink.

The glow makes the mirror appear to float on the wall.

In tiny bathrooms, floating elements create visual space.

Combine the mirror with a simple vanity and clean countertop.

Good lighting helps even the smallest bathroom feel calm and welcoming.


13. Narrow Rolling Storage Cart

Narrow Rolling Storage Cart

Small gaps between fixtures can become useful storage spots.

A narrow rolling cart fits perfectly between the toilet and vanity or beside a washing machine.

These carts often measure less than 8 inches wide.

Yet they can store many everyday items.

Use the shelves for:

  • folded washcloths
  • skincare bottles
  • extra soap
  • hair tools

Because the cart rolls, you can pull it out when needed and slide it back later.

Metal carts are easy to clean. Plastic versions cost even less.

DIY idea: paint the cart to match the bathroom color palette.

White, soft gray, or matte black usually work well.

Add small baskets to each shelf to keep items neat.

Rolling carts are especially helpful in rental homes where permanent cabinets cannot be installed.

Tiny bathrooms work best when every inch is useful.

A slim cart turns empty gaps into helpful storage space.


14. Wall Hooks Instead of Towel Bars

Wall Hooks Instead of Towel Bars

Traditional towel bars take up wide wall space.

In small bathrooms, wall hooks are often more practical.

Hooks allow multiple towels to hang vertically instead of side by side.

This saves space instantly.

Install three or four hooks behind the door or beside the shower.

Hooks also dry towels quickly since air circulates around them.

Budget advantage: hooks cost far less than long metal towel bars.

DIY installation is simple:

  • mark equal spacing
  • drill small holes
  • mount hooks with screws

Adhesive hooks also work for lightweight towels.

Choose finishes that match the faucet or shower hardware.

Matte black and brushed metal both look modern.

Keep the wall area tidy by limiting the number of towels hanging at once.

Small details like hooks help maintain order in tight spaces.

Simple solutions often work best in tiny bathrooms.


15. Recessed Medicine Cabinet

Recessed Medicine Cabinet

Counter space disappears quickly in tiny bathrooms.

A recessed medicine cabinet solves that problem.

Because it sits inside the wall, the cabinet stores items without sticking out into the room.

Many modern cabinets include mirrors on the front, combining storage and reflection in one piece.

Inside the cabinet you can organize:

  • toothpaste
  • skincare products
  • medicine
  • small grooming tools

Adjustable shelves help fit different bottle heights.

Installation works best during small remodeling projects when the wall is already open.

If wall cutting is not possible, choose a slim surface-mount cabinet instead.

Keep the interior organized using small plastic trays.

A clean cabinet makes daily routines easier and keeps the sink area clutter-free.

In tiny bathrooms, hidden storage always helps maintain a calm look.


16. Light Wood Accents

Light Wood Accents

Natural materials make small bathrooms feel welcoming.

Light wood accents add warmth without darkening the space.

Use wood in small touches like:

  • floating shelves
  • vanity fronts
  • mirror frames

Pale oak or bamboo works especially well.

Avoid very dark wood tones. They can make tiny rooms feel heavier.

Wood pairs nicely with white tile and matte black fixtures.

DIY option: buy a basic cabinet and apply peel-and-stick wood veneer for a custom look.

Seal wood surfaces with waterproof finish to protect them from humidity.

Adding a small wooden stool or tray can also introduce the material.

Balance the wood with neutral colors so the room stays bright.

A few natural elements make the bathroom feel more relaxed and comfortable.


17. Pocket Shower Door

Pocket Shower Door

Traditional swing shower doors require extra space.

A pocket shower door slides into the wall cavity.

This design keeps the entry clear and saves room in tight layouts.

When the door opens, it disappears neatly inside the wall.

The result is a smooth, uncluttered appearance.

Pocket systems work best during full bathroom renovations since the wall must be modified.

If that option is not available, choose sliding glass shower doors instead.

They offer similar space savings without wall construction.

Keep the glass clear rather than frosted. Transparency helps the room feel larger.

Combine the shower with light tile and minimal shelves.

Tiny bathrooms benefit from doors that move sideways instead of outward.

This keeps movement inside the room comfortable.


18. Minimal Decor Approach

Minimal Decor Approach

Small bathrooms look better with fewer decorative items.

Too many accessories quickly create visual clutter.

A minimal approach keeps the room calm and open.

Choose just a few details such as:

  • one small plant
  • a textured hand towel
  • a simple soap dispenser

Clear counters make the bathroom appear larger.

Store extra items in cabinets or baskets.

Wall art can work if kept small and simple.

Neutral frames blend nicely with modern designs.

Another idea is placing a single ceramic tray on the vanity for everyday items.

This keeps objects grouped together and tidy.

Minimal decor does not mean boring.

It simply means choosing items carefully and giving them space.

In tiny bathrooms, breathing room matters.

Less clutter equals a more peaceful space.


19. Soft Layered Lighting

Soft Layered Lighting

Relying on one ceiling light often creates harsh shadows.

Layered lighting improves both function and comfort.

Use three light sources when possible:

  1. ceiling light for overall brightness
  2. mirror lighting for grooming
  3. soft accent lighting for atmosphere

Wall sconces beside the mirror provide balanced face lighting.

LED strips under shelves can add gentle glow.

Warm white light usually feels most relaxing in bathrooms.

Energy-efficient LED bulbs also last much longer than older bulbs.

If rewiring is not possible, plug-in wall sconces can still add extra light.

Tiny bathrooms feel larger when light spreads evenly across walls and mirrors.

Good lighting also highlights the room’s design details.

A well-lit bathroom always feels cleaner and more welcoming.


20. Compact Bathtub Option

Compact Bathtub Option

Some homeowners still want a bathtub in a small bathroom.

A compact bathtub makes this possible.

These tubs are shorter but deeper than standard models.

The design allows comfortable soaking while using less floor space.

Many compact tubs measure around 48 inches long, which fits well in small layouts.

Combine the tub with a glass shower panel instead of a curtain.

This keeps the room feeling open.

Use simple white tile around the tub to reflect light.

A wall niche above the tub can store bath items without adding shelves.

For budget updates, a bathtub refinishing kit can refresh an older tub instead of replacing it.

Even small bathrooms can include relaxing features when the layout is planned carefully.


21. Small Indoor Plant Accent

Small Indoor Plant Accent

A small indoor plant can bring life to a tiny bathroom.

Plants soften hard surfaces like tile and porcelain.

They also add a calm, natural touch.

Choose plants that tolerate humidity and lower light levels.

Good options include:

  • pothos
  • snake plant
  • small ferns

Place the plant on a floating shelf or near a window.

Even a tiny pot can brighten the room.

If natural light is limited, realistic artificial plants can work too.

Use simple ceramic or stone pots that match the bathroom colors.

Avoid large planters that take up floor space.

One or two small plants are enough.

Tiny bathrooms benefit from small natural elements that add personality without clutter.


Conclusion

A tiny bathroom can still feel stylish, organized, and comfortable with a few thoughtful choices. Smart storage, light colors, floating fixtures, and clean layouts all help maximize every inch. Many of these ideas are affordable and simple enough for DIY weekend updates. Start with one change—perhaps a large mirror, floating vanity, or better lighting—and build from there. Small improvements can completely reshape how your bathroom looks and feels.

Claire Anderson

24 Stunning Marble Bathroom Ideas for a Luxurious Home Upgrade


Marble Bathroom Ideas

Upgrade your bathroom without going overboard. Marble brings timeless elegance, instantly making any space feel luxurious. From subtle accents to bold statements, you can achieve a high-end look without breaking the bank. These 24 ideas focus on practical design tips, affordable DIY hacks, and simple tweaks that transform your bathroom into a serene retreat. Whether you’re refreshing a small powder room or remodeling a master bath, there’s inspiration for every style and budget.


1. White Marble Vanity Tops

White Marble Vanity Tops

Install a white marble vanity top to add elegance without overcrowding your space. Even a small slab can change the room’s feel. For a budget-friendly option, consider marble-look quartz or porcelain tiles. Pair with simple faucets and a minimal mirror. You can also DIY by refinishing an old vanity with marble contact paper for an instant lift. Add potted plants or small candles to complete the look.


2. Marble Subway Tile Backsplash

Marble Subway Tile Backsplash

Use marble subway tiles behind sinks or counters for subtle luxury. They reflect light, making small bathrooms appear larger. Affordable alternatives include ceramic tiles with marble patterns. Layout tiles in a classic brick pattern or staggered style for extra charm. Apply grout carefully, then seal it to avoid stains. Even a single wall can make a statement without heavy remodeling.


3. Marble Shower Walls

Marble Shower Walls

Floor-to-ceiling marble shower walls create a spa-like feel. For smaller budgets, use marble-look wall panels or peel-and-stick options. Keep grout minimal and neutral to maintain a clean, seamless look. Pair with a frameless glass door to show off the marble’s veins. Add built-in shelves for functionality. Simple touches like matching soap dishes enhance the cohesive look.


4. Marble Accent Floor Tiles

Marble Accent Floor Tiles

Accent your floor with patterned marble tiles. Geometric or herringbone layouts create a modern vibe. If full marble is costly, mix marble tiles with porcelain or ceramic alternatives. DIY-friendly adhesive tiles can instantly upgrade flooring. Light-colored grout helps maintain a sleek finish. Small rugs or bath mats add comfort without hiding the pattern.


5. Marble Bathtub Surround

Marble Bathtub Surround

Wrap your bathtub in marble panels for a luxurious touch. Even a partial surround can make the tub a focal point. Consider using marble-look laminate or tiles for a budget version. Add a wooden stool or small shelves for bath essentials. Layer candles or plants for warmth. The contrast of smooth marble and soft textiles enhances the spa-like experience.


6. Marble Countertop Accessories

Marble Countertop Accessories

Not ready to commit to marble surfaces? Start with marble accessories like trays, soap dishes, or containers. These small touches elevate the look immediately. Affordable marble-look items are widely available online. Mix with wooden or metal elements for contrast. Group items by function to keep counters tidy. Simple updates like these can refresh the space without major renovations.


7. Marble Vanity Backsplash

Marble Vanity Backsplash

Add a marble backsplash behind a vanity for a subtle upgrade. This works with existing countertops, making it budget-friendly. Thin marble slabs or peel-and-stick options can mimic the look. Keep lighting soft to highlight the veins. Adding a mirror that complements the marble creates a cohesive style. Even a small backsplash area makes a noticeable difference.


8. Marble Window Sills

Marble Window Sills

Upgrade your window sills with marble slabs. They add subtle elegance without a full remodel. Pre-cut slabs are affordable and easy to install. Use the sill for plants or candles to create a peaceful vibe. Light-colored marble reflects natural light, brightening the room. It’s a small detail with a high-impact feel.


9. Marble-Look Shower Niche

Marble-Look Shower Niche

Turn your shower niche into a feature wall with marble tiles. This draws the eye and organizes essentials. DIY-friendly peel-and-stick marble sheets are perfect for small spaces. Keep niches minimal to avoid clutter. Contrast with simpler surrounding tiles for a modern look. Even a single niche can make your shower feel like a boutique spa.


10. Marble Floating Shelves

Marble Floating Shelves

Install floating marble shelves for storage and style. Affordable options include marble veneer boards or laminate. They hold toiletries, towels, or decor, adding functionality. Mount securely and balance weight. Pair with small baskets or jars for a clean display. The visual contrast between shelves and wall color enhances depth and texture.


11. Marble-Look Toilet Surround

Marble-Look Toilet Surround

Wrap the wall behind your toilet with marble panels. It creates an instant focal point in small spaces. Peel-and-stick options make this a DIY-friendly upgrade. Add a floating shelf above for extra storage or decor. Keep the space minimal to avoid feeling cramped. Even subtle marble touches can elevate a simple bathroom.


12. Marble Bathroom Mirror Frame

Marble Bathroom Mirror Frame

Frame your mirror with marble for instant sophistication. Use marble-look adhesive tiles or veneer for a budget-friendly approach. A framed mirror creates depth and reflects light beautifully. Pair with simple wall sconces or overhead lights. This simple DIY can transform a basic mirror into a luxurious statement piece.


13. Marble Sink Surround

Marble Sink Surround

Enhance your sink area with a marble surround. Even a small section adds class and protects walls from splashes. Consider marble laminate or tiles for cost savings. Pair with a sleek faucet and simple soap dispenser. Minimal accessories keep the area uncluttered and stylish. It’s a simple upgrade that looks professionally done.


14. Marble Soap Dish & Accessories

Marble Soap Dish & Accessories

Small marble details make a noticeable difference. Soap dishes, trays, and containers add style without remodeling. Affordable options are easy to find online or in stores. Group accessories for symmetry. Mix marble with wood or metal for contrast. These subtle touches create a polished, cohesive look.


15. Marble Shower Floor Tiles

Marble Shower Floor Tiles

Update your shower floor with small marble tiles for a spa-like feel. Mosaic or penny tiles are budget-friendly and slip-resistant. Keep grout neutral and sealed. Pair with simple shower walls to highlight the flooring. Small tiles make cleaning easier and add visual interest. Even a compact shower can feel luxurious.


16. Marble Accent Wall

Marble Accent Wall

Make a statement with a marble accent wall. Full coverage isn’t necessary—cover one wall for impact. Use marble-look panels for affordability. Highlight with soft lighting to accentuate veins. Add minimalistic decor to avoid visual clutter. The accent wall anchors the space and gives a polished feel instantly.


17. Marble Towel Bar or Hooks

Marble Towel Bar or Hooks

Install marble towel bars or hooks for subtle luxury. Affordable marble-look hardware is available online. It’s a simple swap that elevates everyday elements. Position towels for easy reach and symmetry. Combine with minimal wall decor. Small touches like these create cohesion and elegance in a practical way.


18. Marble Window Frame

Marble Window Frame

Frame windows with marble for a refined finish. Pre-cut slabs or veneer work on a budget. It brightens the space and highlights architectural features. Add small plants or candles on the sill. Even in small bathrooms, this detail creates a luxurious atmosphere. Marble frames pair beautifully with neutral walls.


19. Marble-Look Floor Mats

Marble-Look Floor Mats

Update your bath mats with marble-patterned mats. They mimic marble elegance without permanent changes. Choose non-slip options for safety. Match with towels or accessories to tie the room together. It’s a low-cost way to add style and comfort instantly. Perfect for renters or DIY enthusiasts.


20. Marble-Look Shower Ceiling Panels

Marble-Look Shower Ceiling Panels

Extend luxury overhead with marble-look ceiling panels in showers. Lightweight peel-and-stick panels work for tight budgets. Reflective surfaces enhance light and create depth. Combine with simple shower walls for focus. Small overhead details give a complete, cohesive feel to the room. Minimal installation effort brings noticeable sophistication.


21. Marble Bath Tray

Marble Bath Tray

Place a marble bath tray across your tub for a luxurious touch. Affordable marble-look trays are widely available. Perfect for holding bath essentials, they add both style and function. Pair with candles or plants for a spa vibe. Even small additions like this create a high-end feel in a few seconds.


22. Marble Door Handles

Marble Door Handles

Swap ordinary handles with marble or marble-look options. Affordable DIY kits or online hardware offer stylish upgrades. It’s subtle but adds cohesive elegance. Combine with other marble accents for continuity. Small details like these make everyday interactions feel luxurious without remodeling.


23. Marble Soap Shelf in Shower

Marble Soap Shelf in Shower

Install a small marble soap shelf in your shower. DIY-friendly options include pre-cut slabs or tiles. Keeps essentials organized and adds a touch of class. Contrast with plain shower walls for emphasis. Even a compact shelf gives a sense of sophistication and practical storage.


24. Marble-Look Bathroom Hooks

Marble-Look Bathroom Hooks

Update hooks with marble-look versions. Easy to install and inexpensive, they make a small but noticeable impact. Mix with wooden or metal elements for visual contrast. Functional and stylish, these hooks complete your bathroom’s cohesive look without heavy investment. Even minor upgrades add elegance.


Conclusion

Marble doesn’t have to be intimidating or expensive. From full walls to tiny accessories, small changes can create big impact. Using marble or marble-look materials strategically, you can transform a basic bathroom into a serene, elegant space. Whether it’s DIY-friendly peel-and-stick options, affordable tiles, or simple decor swaps, these 24 ideas help you create a luxurious vibe without overspending. Pick a few touches, experiment, and enjoy a spa-like bathroom at home.


Claire Anderson

How to Style Cozy Decor for Everyday Comfort

We all dream of coming home to a cozy, inviting space where we can unwind and relax. A cozy home doesn’t require a complete overhaul; it’s all about creating an atmosphere that makes you feel at ease. With the right decor, you can transform your space into a comfort haven for everyday living. Whether it’s curling up with a book or hosting a movie night, cozy decor adds warmth and comfort to any room. Let’s dive into how you can style your home to make it the ultimate comfort zone.

how to style cozy decor daily

1. Layer Your Furniture with Soft Textures

One of the quickest ways to add coziness to any space is by layering your furniture with soft textures. Think about your couch and chairs: add plush pillows, soft throws, and even a snug blanket for a comfortable look that invites relaxation.

Tip:

  • Opt for soft fabrics like velvet, chenille, or cotton for an inviting feel.
  • Don’t be afraid to mix different textures (like leather with a velvet throw or cotton cushions on a linen sofa) to create a cozy yet stylish contrast.
Layer Your Furniture with Soft Textures

2. Play with Warm Lighting

Lighting can make or break the ambiance of a room, and warm lighting is essential when creating a cozy atmosphere. Swap out bright, harsh lighting for softer, warmer tones that will make you feel relaxed and at ease.

Tips:

  • Use lamps with dimmer switches so you can adjust the light to suit the mood.
  • String lights or fairy lights are perfect for creating a soft glow in the evening.
  • Opt for warm-toned bulbs instead of cool white ones for a more inviting environment.
Play with Warm Lighting

3. Incorporate Natural Elements

Bringing nature into your home instantly adds warmth and coziness. Natural elements like wood, plants, and stone can give your space an earthy feel, making it more calming and comfortable.

Ideas:

  • Choose a wooden coffee table or shelving unit to bring in a rustic touch.
  • Add some greenery with easy-care plants like snake plants, pothos, or succulents. Not only do they look great, but they also improve air quality.
  • Use natural woven baskets for storing blankets or pillows to add texture and utility.
Incorporate Natural Elements

4. Create Cozy Nooks

Having a cozy nook in your home makes it even more inviting. Whether it’s a reading corner by the window or a cozy chair in the bedroom, carving out a small space for relaxation is key to making your home feel warm and comforting.

How to Set Up:

  • Choose a corner with plenty of natural light or soft lamps for reading.
  • Add a comfortable chair, a soft blanket, and a small side table for your favorite books or a cup of tea.
  • Don’t forget to add some personal touches, like framed photos or artwork, to make the space feel truly yours.
Create Cozy Nooks

5. Add Personal Touches

Your home should reflect your personality and style. Adding personal elements to your decor is a great way to make your space feel uniquely cozy and comforting. Whether it’s through photos, books, or artwork, personal touches make your home feel more lived-in and welcoming.

Suggestions:

  • Frame family photos or artwork that brings you joy and add them to shelves or walls.
  • Keep your favorite books within reach on a bookshelf or coffee table.
  • Use decorative items that reflect your interests, whether it’s vintage finds, travel souvenirs, or handmade pieces.
Add Personal Touches

Conclusion: Create Your Cozy Retreat

Styling your home for comfort doesn’t have to be expensive or difficult. With a few key elements like soft textures, warm lighting, natural touches, and personal items, you can turn your space into a cozy retreat that you’ll love spending time in every day. So, go ahead—start layering your furniture, adding some plants, and creating those little nooks for quiet moments. You deserve a home that feels as cozy as it looks!

Save this article and start creating your cozy space today!

Claire Anderson

How to Create a Warm Cozy Home With Decor

There’s something magical about walking into a home that instantly makes you exhale. Soft lighting, inviting textures, and thoughtful details can transform even the simplest space into a comforting retreat. A cozy home isn’t about expensive furniture or perfectly styled rooms — it’s about creating warmth, personality, and a feeling of belonging.

Whether you live in a small apartment or a spacious house, a few intentional decor choices can completely change how your home feels every day.

how to create warm cozy home decor

Let’s explore how to create that warm, cozy atmosphere step by step.


Start With Warm Lighting

Lighting is the fastest way to change the mood of any room. Bright overhead lights often feel harsh, while layered lighting creates comfort and depth.

Instead of relying on one main light source, try mixing different types:

  • Table lamps with warm-toned bulbs
  • Floor lamps in reading corners
  • String lights or fairy lights for soft ambiance
  • Candles (real or LED) for a calming glow

Tip: Choose warm white bulbs instead of cool white. Warm light mimics sunset tones and instantly makes spaces feel more relaxing.

Place lights at different heights around the room. This creates gentle shadows and visual warmth — the secret ingredient behind cozy interiors.

Start With Warm Lighting

Layer Textures for Instant Comfort

If lighting sets the mood, textures create the feeling of coziness. Think about how a room feels, not just how it looks.

Add layers using soft and natural materials:

  • Chunky knit blankets
  • Linen or cotton cushions
  • Wool or shag rugs
  • Velvet or boucle accent pillows
  • Wooden or woven decor pieces

Layering works best when you mix textures rather than matching everything perfectly. A smooth sofa paired with a fluffy throw instantly looks inviting.

Easy rule: Every seating area should have something soft within reach.

Even small changes — like adding a throw blanket over a chair — can make a space feel lived-in and welcoming.


Use Warm, Calming Colors

Color plays a huge role in how cozy your home feels. Warm, muted tones create comfort without overwhelming the space.

Popular cozy color palettes include:

  • Cream, beige, and soft whites
  • Warm greys and taupe
  • Earthy browns and terracotta
  • Sage green or dusty olive accents

You don’t need to repaint walls to achieve this. Try adding warmth through decor instead:

  • Cushion covers
  • Curtains
  • Rugs
  • Artwork or pottery

Avoid overly bright or stark colors in large amounts. Cozy spaces feel calm, not busy.

Use Warm, Calming Colors

Bring Nature Indoors

Nature instantly softens a home and adds life to your decor. Even a small touch of greenery can make a room feel peaceful and grounded.

Simple ways to add natural elements:

  • Indoor plants or small potted herbs
  • Wooden trays or furniture accents
  • Dried flowers or branches
  • Stone or clay decorative pieces

If you’re worried about maintenance, choose low-care plants or realistic faux greenery. The goal is warmth — not stress.

Natural textures balance modern furniture and help rooms feel organic rather than staged.


Create Cozy Corners (Not Just Rooms)

A cozy home isn’t about perfection everywhere. It’s about creating small moments of comfort throughout your space.

Think in terms of zones:

  • A reading corner with a chair and lamp
  • A window seat with cushions
  • A tea or coffee station in the kitchen
  • A bedside setup with books and soft lighting

These intentional corners invite you to slow down and actually enjoy your home.

Try styling surfaces using the “rule of three”:

  • Something tall (lamp or vase)
  • Something soft (book or fabric item)
  • Something personal (photo, candle, or keepsake)
Create Cozy Corners (Not Just Rooms)

Add Personal Touches That Tell Your Story

The coziest homes feel personal — not like a showroom.

Display items that make you happy:

  • Travel souvenirs
  • Family photos
  • Handmade decor
  • Favorite books
  • Meaningful artwork

When your home reflects your memories and personality, it naturally feels warmer.

Don’t worry about trends too much. Cozy design is timeless because it focuses on comfort and authenticity.


Keep It Simple and Clutter-Free

Cozy doesn’t mean crowded. Too many items can make a space feel stressful instead of relaxing.

Try this approach:

  • Keep only decor you truly love
  • Use baskets for hidden storage
  • Leave breathing room between items
  • Rotate seasonal decor instead of displaying everything at once

A calm environment helps your cozy elements stand out more.


Final Thoughts: Cozy Is a Feeling, Not a Style

Creating a warm, cozy home isn’t about copying a perfect aesthetic — it’s about designing a space that helps you relax and recharge. Soft lighting, layered textures, natural elements, and personal touches work together to create comfort you can feel the moment you walk in.

Start small. Add a blanket. Change a lamp bulb. Style one corner. Little changes quickly turn into a home that feels like a sanctuary.

Save this guide for later and start creating your cozy space today!

Claire Anderson

How to Decorate Your Home for Ultimate Comfort

There’s nothing like coming home after a long day and stepping into a space that feels warm, inviting, and most importantly, comfortable. Whether you’re living in a cozy apartment or a spacious house, creating an environment that makes you feel relaxed and at ease is key. It’s not just about style – it’s about making your home a haven. Let’s dive into how you can transform your space into the ultimate comfort zone, one room at a time.

how to decorate home for comfort cozy

Start with Cozy Textures

When it comes to comfort, textures are everything. Soft fabrics, plush pillows, and cozy throws can instantly make a room feel more inviting.

Key Tips for Cozy Textures:

  • Layered Bedding: Start with high-quality sheets, but don’t stop there. Add fluffy comforters, duvets, and throws that you can snuggle up with.
  • Plush Pillows: Mix different shapes and sizes of throw pillows. Consider velvet, linen, or wool for variety.
  • Area Rugs: Place soft rugs beneath your feet to add warmth and texture, especially on hardwood floors.
Start with Cozy Textures

Choose the Right Lighting

Lighting plays a huge role in setting the tone of your home. You want it to be bright when you need energy and warm when you’re ready to unwind. The right lighting can also add a touch of luxury and relaxation to your space.

Tips for Soft and Inviting Lighting:

  • Warm, Soft Lights: Choose light bulbs with a warm, yellow tone. Avoid harsh, bright lights that can feel too cold.
  • Multiple Light Sources: Use table lamps, floor lamps, and wall sconces to create layered lighting. This helps set a calm, inviting atmosphere.
  • Dimmer Switches: Install dimmer switches in key rooms like the living room and bedroom. This allows you to adjust the light depending on your mood.
Choose the Right Lighting

Create a Relaxing Color Palette

Colors can have a profound effect on your mood. Cool tones like blues and greens are relaxing, while warm tones like yellows and reds are energizing. To maximize comfort, opt for soothing shades that make you feel at ease.

Best Color Choices for Comfort:

  • Soft Neutrals: Shades like beige, taupe, and soft gray work well for a calm and serene atmosphere.
  • Earthy Tones: Greens, browns, and terracotta create a natural, grounding vibe that’s perfect for relaxation.
  • Accent Colors: If you want to add a pop of color, choose muted, pastel shades or deep jewel tones like navy blue or forest green for a comforting but vibrant touch.
Create a Relaxing Color Palette

Add Personal Touches

A home feels truly comforting when it reflects your personality and interests. Personal touches help make your space unique and add an extra layer of warmth.

Personalizing Your Space:

  • Artwork and Photos: Frame some of your favorite pictures or art pieces. Consider family photos, travel souvenirs, or prints from local artists.
  • Books and Candles: A stack of your favorite books or a scented candle can instantly create a sense of home.
  • Indoor Plants: Add a few plants for a touch of nature. Plants not only look great but also purify the air and add a peaceful vibe.
Add Personal Touches

Comfort Doesn’t Mean Clutter

While comfort is about having things you love, it’s important to keep the space organized. Clutter can lead to stress, and a tidy home often feels more peaceful and spacious.

Tips for Avoiding Clutter:

  • Storage Solutions: Invest in stylish storage furniture like ottomans or storage baskets. Hidden storage can keep your space clean while maintaining comfort.
  • Declutter Regularly: Keep only the items that serve a purpose or bring you joy. Donate items you no longer use.
  • Multi-Functional Furniture: Opt for furniture that serves multiple purposes, like a coffee table with built-in storage or a couch that doubles as a guest bed.
Add Personal Touches

Conclusion: Make Your Home a Sanctuary

Decorating your home for ultimate comfort isn’t just about filling it with furniture or trendy décor; it’s about creating a space that nurtures your well-being. By focusing on textures, lighting, colors, personal touches, and avoiding clutter, you’ll transform your home into a cozy sanctuary where you can unwind and recharge.

Take your time with these steps, and soon enough, your home will be the perfect place to relax and feel completely at ease. Happy decorating!

Save these tips for your next home makeover!

Claire Anderson
« Previous Page
Next Page »

Primary Sidebar

More to See

27 Simple Tiny Hallway Ideas for Better Function and Flow

27 Simple Tiny Hallway Ideas for Better Function and Flow

March 26, 2026 By Claire Anderson

20 Aesthetic Small Apartment Hallway Ideas for a Stylish Rental Refresh

20 Aesthetic Small Apartment Hallway Ideas for a Stylish Rental Refresh

March 12, 2026 By Claire Anderson

23 Trendy Modern Small Hallway Ideas for a Clean and Sleek Upgrade

23 Trendy Modern Small Hallway Ideas for a Clean and Sleek Upgrade

March 26, 2026 By Claire Anderson

21 Elegant Small Entrance Hallway Ideas for a Welcoming Home Update

21 Elegant Small Entrance Hallway Ideas for a Welcoming Home Update

March 12, 2026 By Claire Anderson

24 Genius Small Hallway Ideas for a Bigger and Brighter Entry

24 Genius Small Hallway Ideas for a Bigger and Brighter Entry

April 1, 2026 By Claire Anderson

21 Elegant Victorian Living Room Decor Ideas for a Rich Layered Style

21 Elegant Victorian Living Room Decor Ideas for a Rich Layered Style

March 12, 2026 By Claire Anderson

22 Gorgeous Victorian Living Room Ideas for a Timeless and Cozy Look

22 Gorgeous Victorian Living Room Ideas for a Timeless and Cozy Look

April 7, 2026 By Claire Anderson

Copyright © 2025 · Haven Only